

This article will outline how to perform a MySQL database recovery to the original location using the R1Soft Server Backup Manager.
Step 1: Click on "Protected Machines" in the main menu to see the list of all the protected machines.
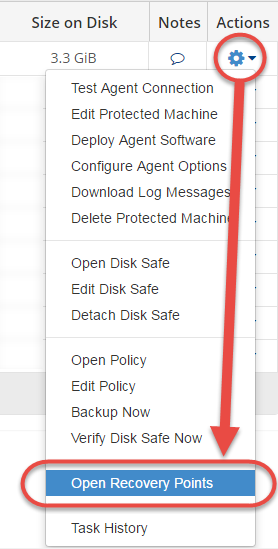
Step 2: Select the machine that contains the database that you want to restore. Then click on that machine's corresponding "Actions" icon on the right-hand side of the screen and select the "Open Recovery Points" options as shown below. This will display a list of all the recovery points for that machine.
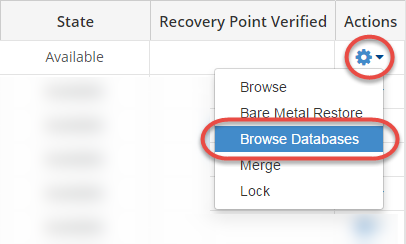
Step 3: On the "Recovery Points" interface, select the desired recovery point. Then click on that Recovery point's corresponding "Actions" icon on the right-hand side of the screen and select the "Browse Databases" option as shown below. If the recovery point contains a MySQL database, this option will be available. You will see the "Browse Databases" interface.
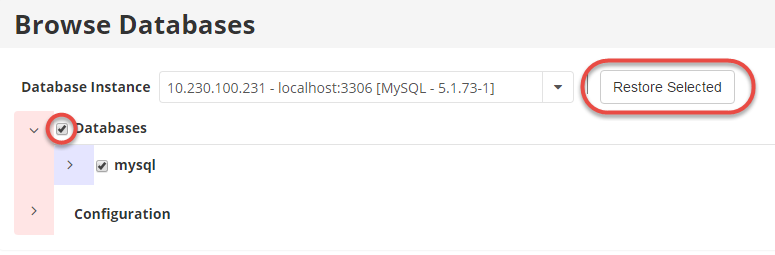
Step 4: On the "Browse Databases" window, select a database instance in the "Database Instance" dropdown field. You can then browse the database instance by clicking the corresponding ">" icons. Select the check box for the database you want to restore and click the "Restore Selected" button as shown below. You will see the "Restore Database" window.
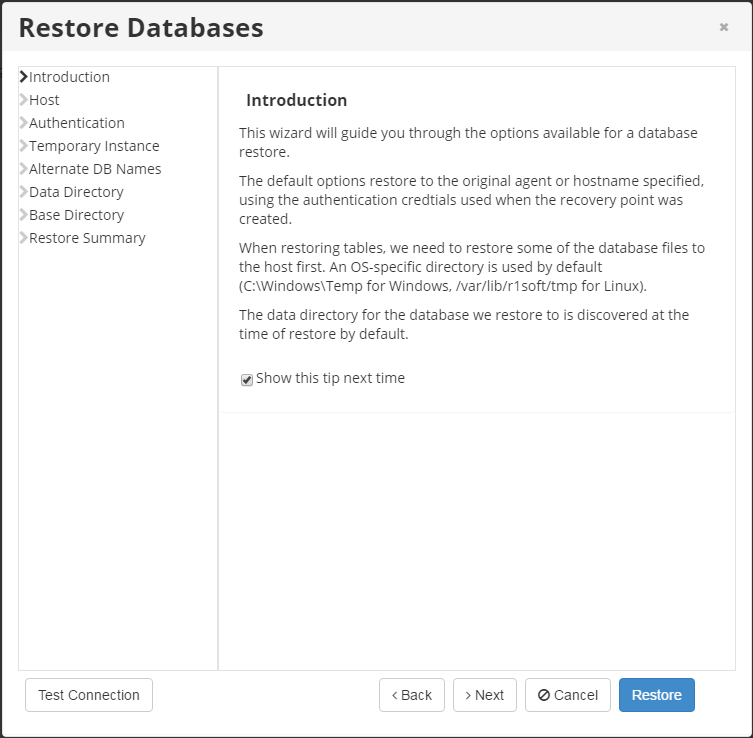
Step 5: On the "Introduction" screen, review the introductory information and click "Next" to proceed to the "Host" screen.
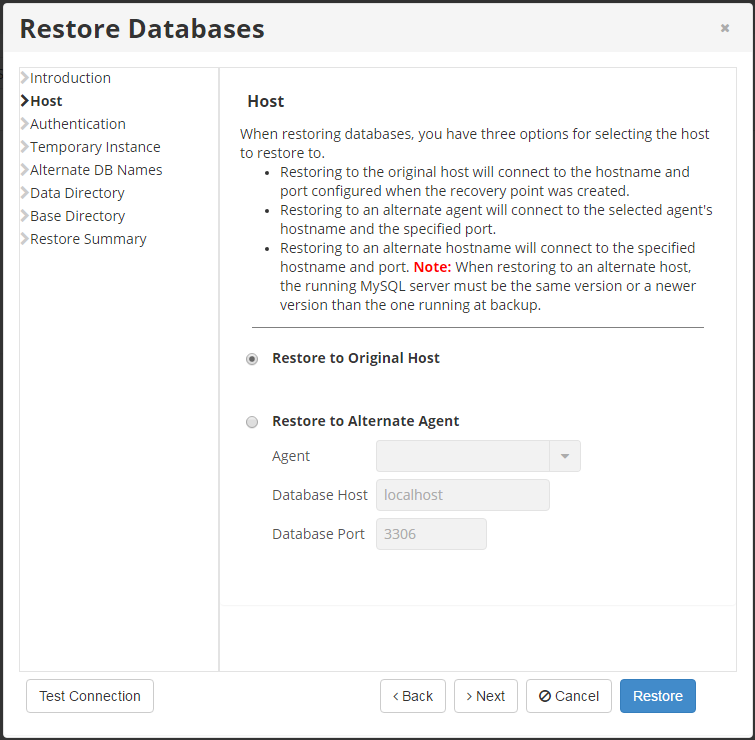
Step 6: On the "Host" screen, there are two options for selecting the host to restore the database to. This article only covers restoration to the original location. So we will select the first option "Restore to Original Host" as shown below. This option allows us to restore the database to the server where the source database was located. If the database exists, it can be overwritten. Click on "Next" to proceed to the "Authentication" screen.
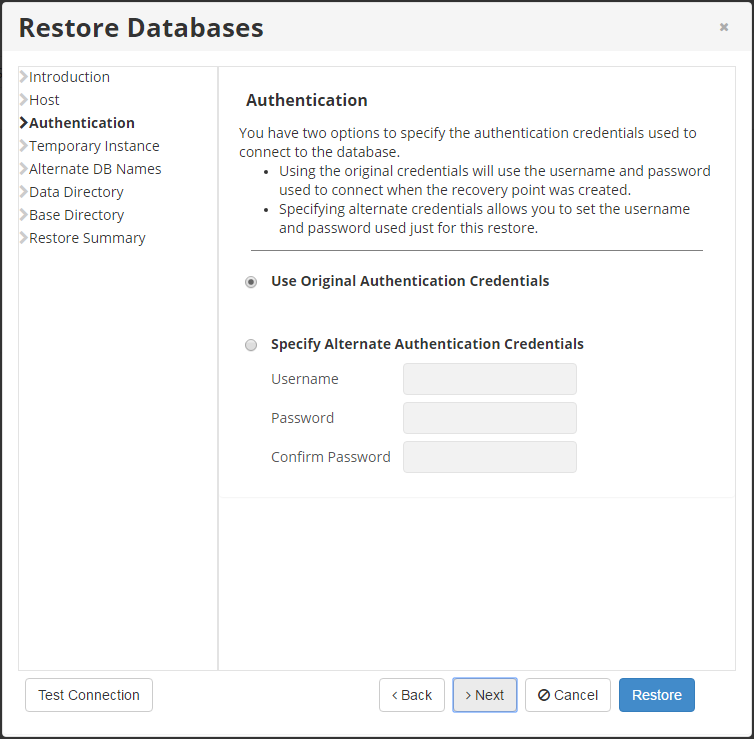
Step 7: On the "Authentication" screen, you have two options to specify how to connect to the selected database as seen below.
- Use Original Authentication Credentials - Connects using the default username and password used to back up the database instance.
- Specify Alternate Authentication Credentials - This allows you to set a username and password different from the default ones. The user must have full administrator-level access to the database instance that you are going to restore.
Select the desired authentication option and click on "Next" to proceed to the "Temporary Instance" screen.
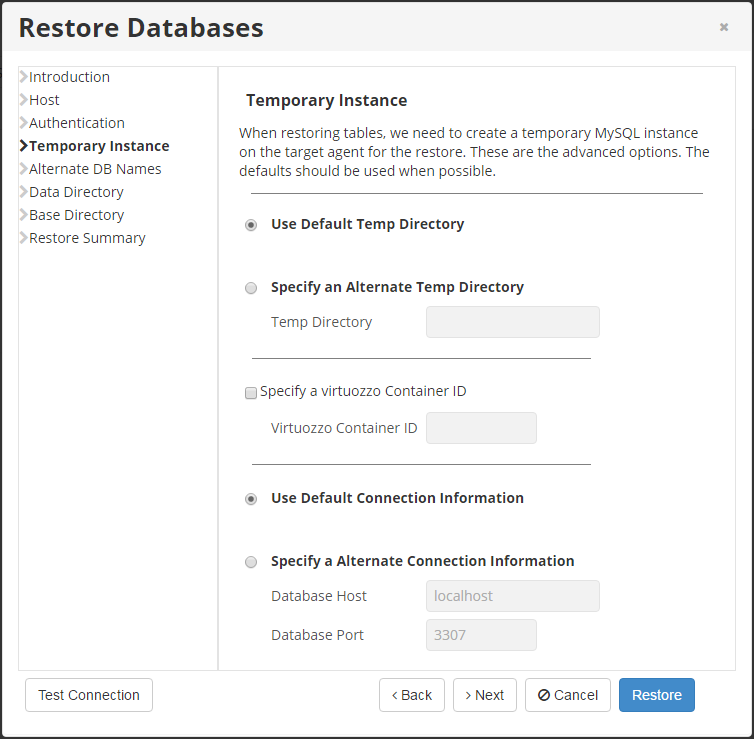
Step 8: The restoration process needs to create a temporary directory when restoring individual tables within the database. The "Temporary Instance" screen allows you to choose between two options on how to create this temporary directory as follows:
- Use Default Temp Directory - Creates a directory in an OS-specific default location (C:\Temp for Windows, /tmp for Linux).
- Specify an Alternate Temp Directory - This allows you to control exactly where the temp directory is created on the Server.
This screen also allows you to specify the Virtuozzo Container ID (optional) and input the Connection Information. Fill out the form as per your requirements and click on "Next" to proceed to the "Alternate DB Names" screen.
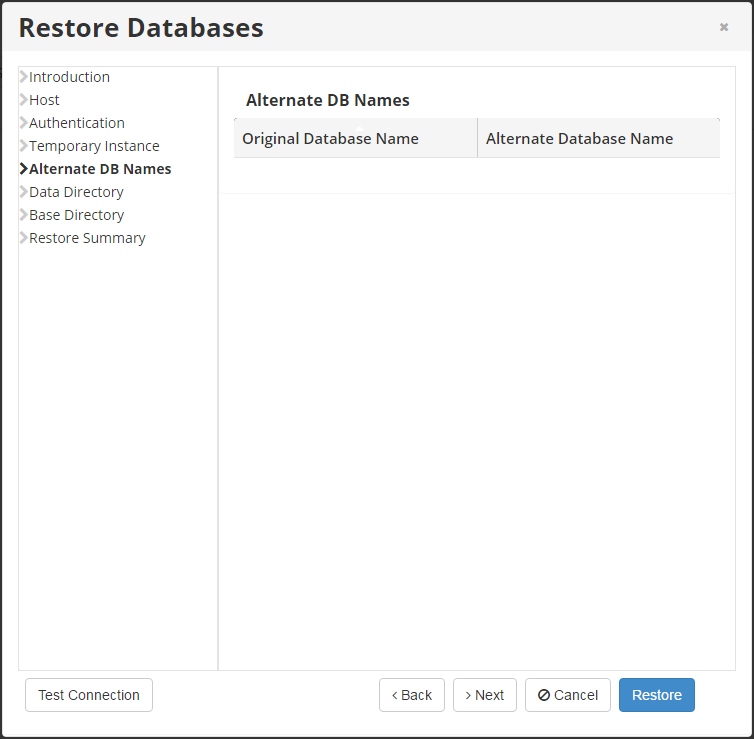
Step 9: This step is optional. You can define an alternate database name for any of the selected databases for restoration as a new step in the "Restore Databases" window. If a database with the newly defined name already exists, that database restoration will fail and alert the policy. You can also proceed with the original database name. Choose an option and click on "Next" to proceed to the "Data Directory" screen. The screen appears as shown below.
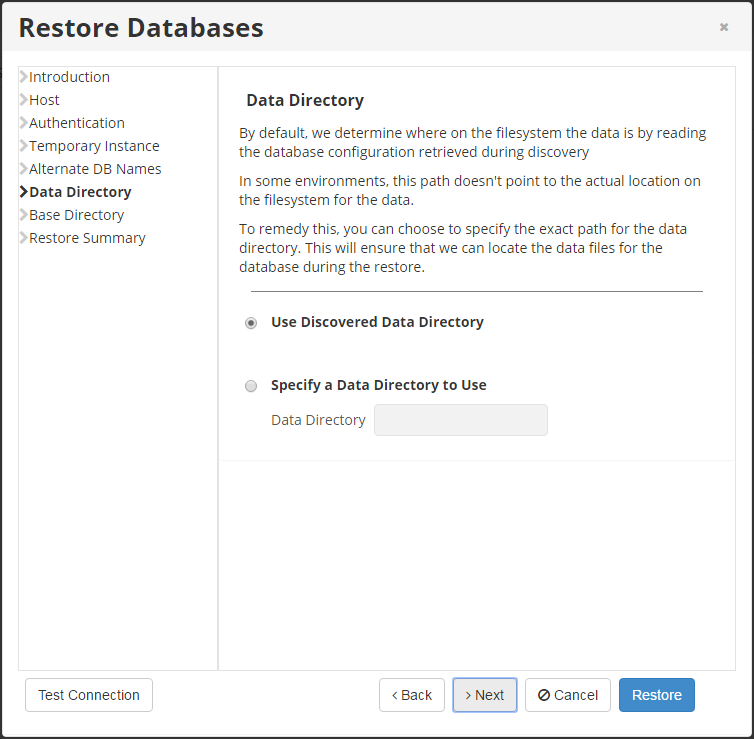
Step 10: The "Data Directory" screen appears as shown below. By default, the database configuration retrieved during discovery is used. In some environments, this path does not point to the actual location on the filesystem for the data. To remedy this, you can choose to specify the exact path for the data directory. This will ensure that the system can locate the data files for the database during the restoration. Select the desired option and click on "Next" to proceed to the "Base Directory" screen.
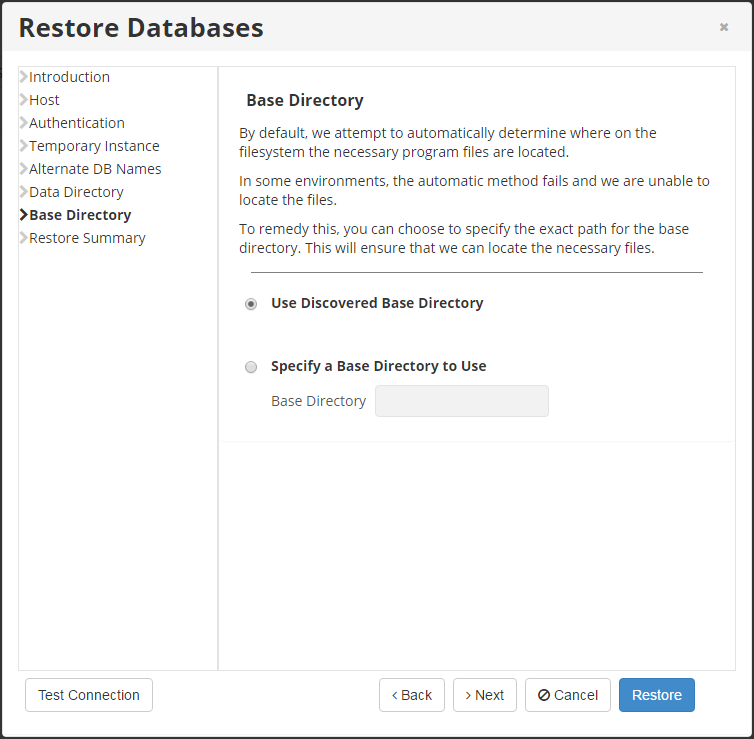
Step 11: On the "Base Directory" screen, you will specify the exact path for the base directory. By default, the system automatically determines where on the filesystem the necessary program files are located. In some environments, the automatic method fails. That is why you have the option to specify as below. Select the desired option and click on "Next" to proceed to the "Restore Summary" screen.
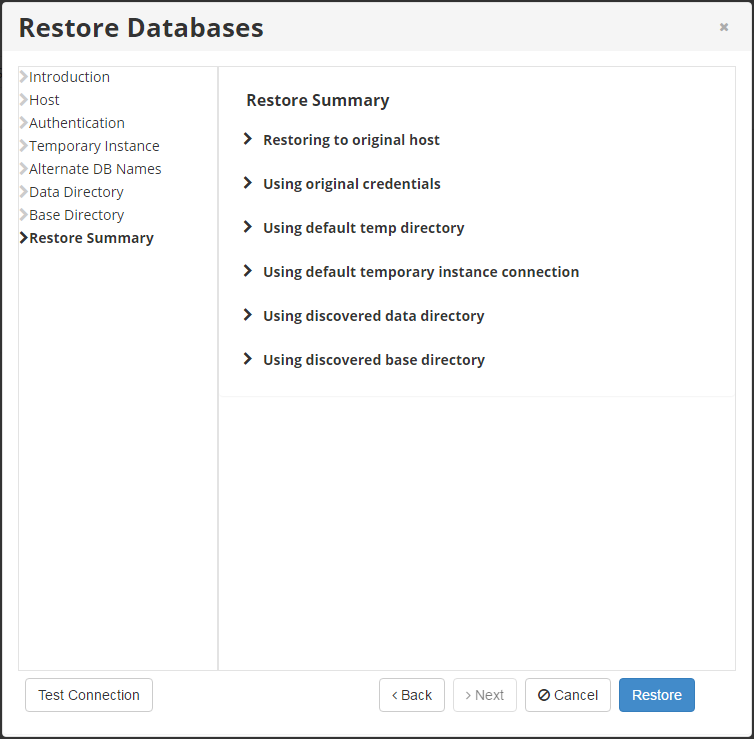
Step 12: On the "Summary" screen, the configurations you have selected are listed and can be reviewed as below before you start the restoration process. Once you have verified that all the restoration options are in order, click on the "Restore" button to start the restoration process. The "Details for Database Restore" window indicates that the restore process is launched. You can watch the restoration progress in real-time.
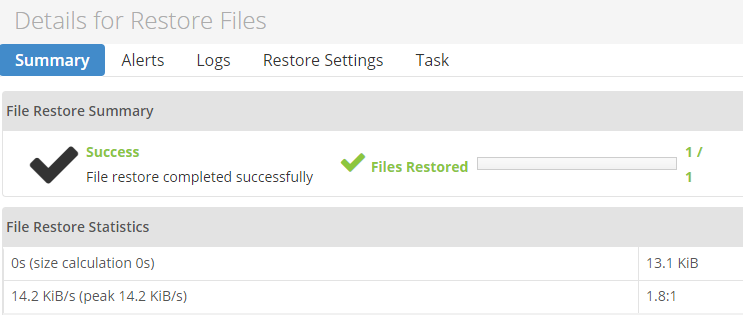
When the database restoration is completed, a success message is displayed as seen below. You can click through the tabs on this window to review additional database restoration details.
 Congratulations! You have successfully restored a MySQL database to its original location using the R1Soft Server Backup Manager.

