Bare-metal restore is the process of reformatting a computer/server from scratch after a catastrophic failure. In conventional methods, the process typically involves reinstalling the operating system and software applications and then, if possible, restoring data and settings. With the R1Soft Backup Manager, you can perform a bare-metal restore with the help of either a Live CD or a PXE Network Boot.
There are typically three steps when using a live CD:
- Boot the server from a CD.
- Configure the network settings for bare-metal restore.
- Performing the bare-metal restore.
Boot the Server from a CD
The Bare-Metal Restore Live CD, based on Debian Live Linux, has been modified to reduce ISO size by removing unnecessary packages, ensuring the Backup Agent starts automatically at boot, and include an option to start SSH after network configuration.
Step 1: Insert the CD into the drive to boot your server. Press the key combination during the initial boot seconds to activate the BIOS Boot Menu. If your BIOS lacks this feature, enter the BIOS setup and set the CD or DVD as the first boot device. In the screenshot below, pressing Esc activates the Boot Menu.

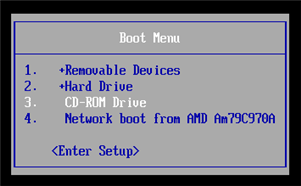
Step 2: If your BIOS has a Boot Menu feature, select CD-ROM from the boot options. An example Boot Menu is shown below.
Step 3: After loading, the Debian boot menu appears on the screen as shown below. It contains four items, though only the first one is typically used.

Press <Enter> to boot Debian from the LiveCD. You'll see numerous debug messages from the Linux kernel. Eventually, the red ASCII-art R1Soft logo, a brief help screen, and the root shell will appear as shown below.

To begin the bare-metal restore process, first configure the network on the server.
Configure the network settings for bare-metal restore
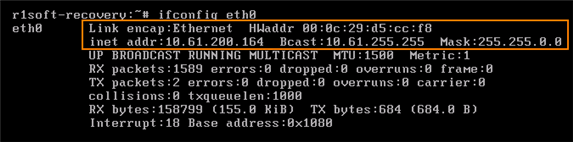
ifconfig eth0 and press <Enter> as shown below to check if an IP address has been assigned to your network card.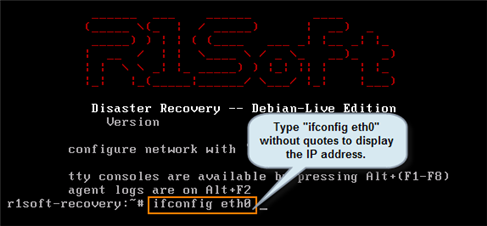
netconfig at the command line and press <Enter> as shown below.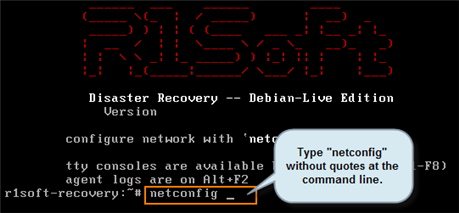
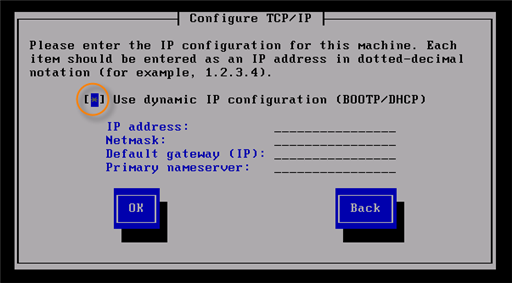
Option A: Select the "Use dynamic IP configuration (BOOTP/DHCP)" option as shown below. The IP address, Netmask, Default gateway (IP), and Primary nameserver will be obtained from the DHCP server. Choose this option if you are unsatisfied with the initial DHCP configuration attempt. This might be necessary if the DHCP server was recently installed and requires adjustments.
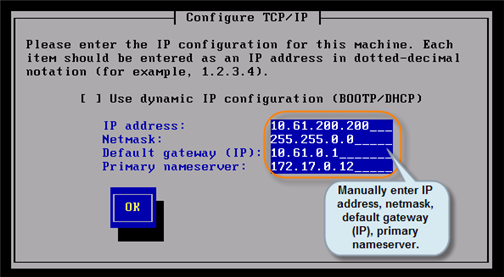
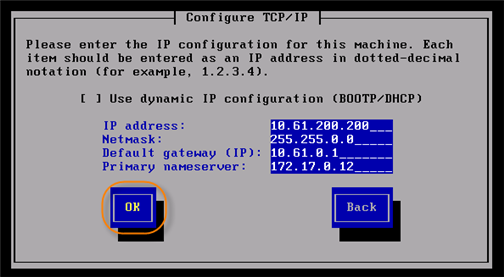
Option B: Enter the following information manually as shown in the image below:
- IP address
- Netmask
- Default gateway (IP)
- Primary nameserver
Type the IP address and press the Down arrow key on your keyboard to automatically populate the values.
Step 5: After choosing your option in Step 4 above, click "OK" on the screen shown below to proceed with the Bare-Metal Restore process.
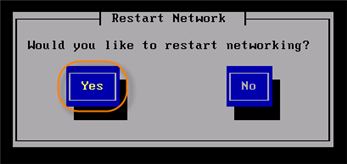
Step 6: Once the "Restart Network" screen appears as shown below, choose "Yes" to restart the network configuration settings. It is essential to select "Yes" to ensure proper network functionality.
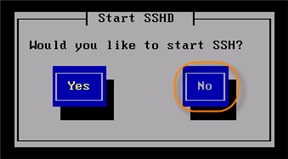
Step 7: When the "Start SSHD" screen appears as shown below, choose "No." SSH is unnecessary when performing the Bare-Metal Restore from the local console.
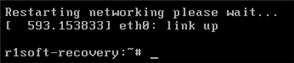
Step 8: The next screen will display a message with the IP address of the newly configured network interface as shown below.
If you are performing Bare-Metal Restore using Server Live CD or Server PXE Boot, you will need to configure the bare-metal restore manager. Otherwise, proceed to perform the bare-metal restore detailed below.
Performing the Bare-Metal Restore
Step 1: Click on "Protected Machines" in the main menu to see the list of all the protected machines.
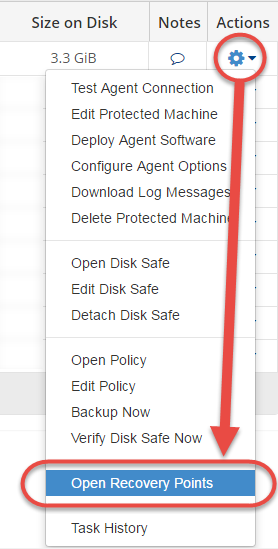
Step 2: Select the machine that contains the backup that you want to restore. Then click on that machine's corresponding "Actions" icon on the right-hand side of the screen and select the "Open Recovery Points" options as shown below. This will display a list of all the recovery points for that machine.
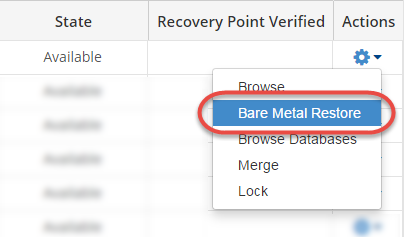
Step 3: On the "Recovery Points" interface, select the desired recovery point. Then click on that Recovery point's corresponding "Actions" icon on the right-hand side of the screen and select the "Bare Metal Restore" option as shown below. You will see the "Bare Metal Restore" wizard.
Step 4: On the bare metal restore "Introduction" page shown below, review the introductory information and click on "Next" to proceed to the "Choose Filesystems" screen.

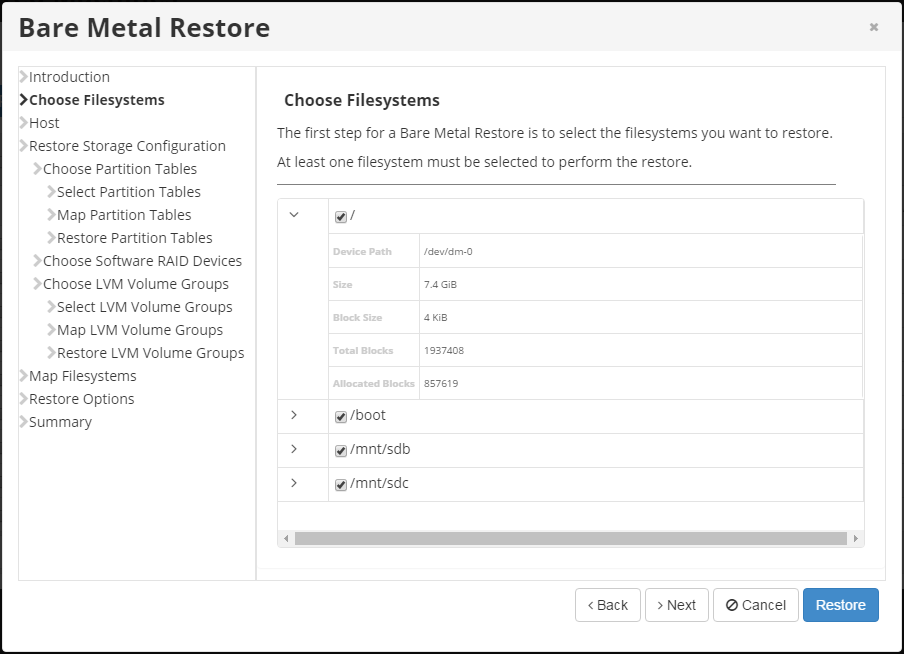
Step 5: On the "Choose Filesystems" screen shown below, each filesystem and swap device (if Linux) available in the Recovery Point is listed. You can select the filesystem you want to restore. All available filesystems are listed. At least one must be selected by selecting the corresponding check box. You can view the filesystem properties by clicking on the ">" icon in front of the filesystem name. The information provided for each filesystem includes the device path, the size, the block size, the total number of blocks, and the allocated blocks. Select the desired filesystems and click on "Next" to proceed to the "Host" screen.
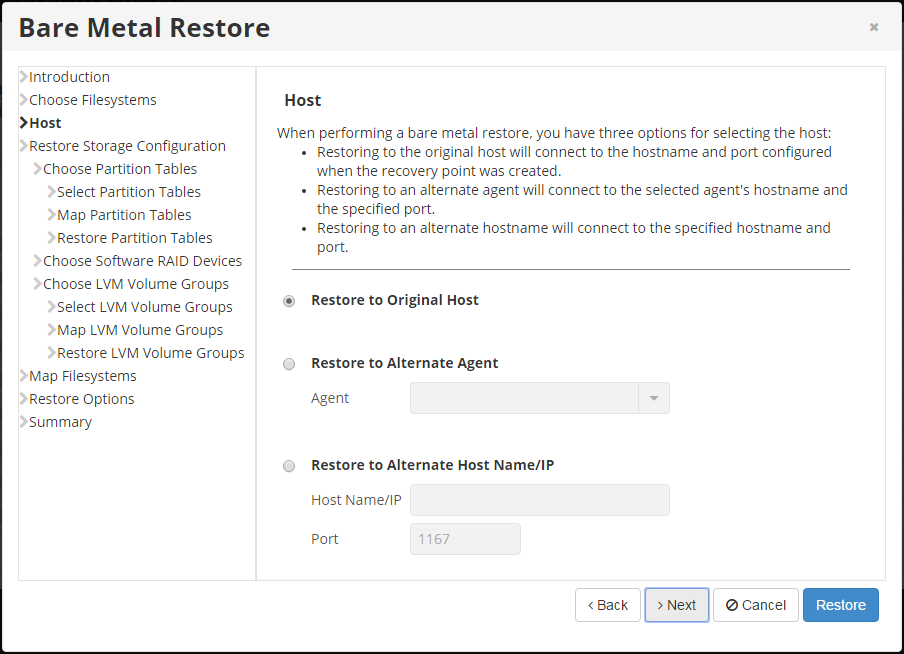
Step 6: On the "Host" screen shown below, select one of the following options:
- Restore to Original Host - The restoration will occur to the same Server Name/IP address and port as the original protected machine. The Backup Manager connects to the protected machine name and uses the port configured when the Recovery Point was created. Select this option to restore to the protected machine where the system was installed previously. This is the only option that makes sense when you perform a Bare-Metal Restore using Server Live CD or Server PXE Boot.
- Restore to Alternate Agent - The Backup Manager connects to the selected Server hostname and the specified port. The protected machine must have already been added to the system. Select this option to restore to an alternate protected machine in the system. Then select the agent from the drop-down list. The machine to restore must be running the Backup Disaster Recovery Boot Media and should be known to the Backup Manager. When a machine is booted into Disaster Recovery Media, no authentication will be required.
- Restore to Alternate Host Name/IP - The Backup Manager connects to the specified Host Name and port. This option allows you to restore to a Host with a Host Name/IP address different than the original Host. For example, if the PXE host has a different IP address, specify the IP address. Select this option to restore to an alternate protected machine that is not in the system. Then enter the Host Name or IP address of the alternate machine. This option should be selected when you perform a Bare-Metal Restore using Agent Live CD or Agent PXE Boot.
Select the desired option and click on "Next" to proceed to the "Restore Storage Configuration" screen.
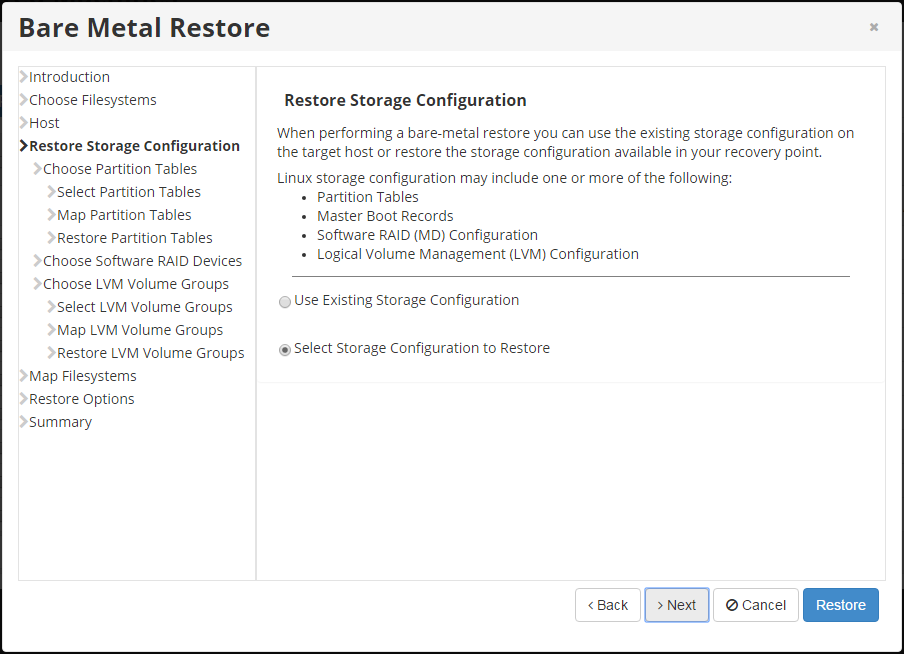
Step 7: On the "Restore Storage Configuration" screen shown below, select one of the following options:
- Use Existing Storage Configuration - The Bare-Metal restoration will use the existing storage configuration. This option should almost never be used when performing a Bare-Metal Restore.
- Select Storage Configuration to Restore - Selecting this option lets you pick a Storage Configuration to restore to the target Server. In most cases, you should select this option.
Select the second option (Select Storage Configuration to Restore) then clock on "Next" to proceed to the "Choose Partition Tables" screen.
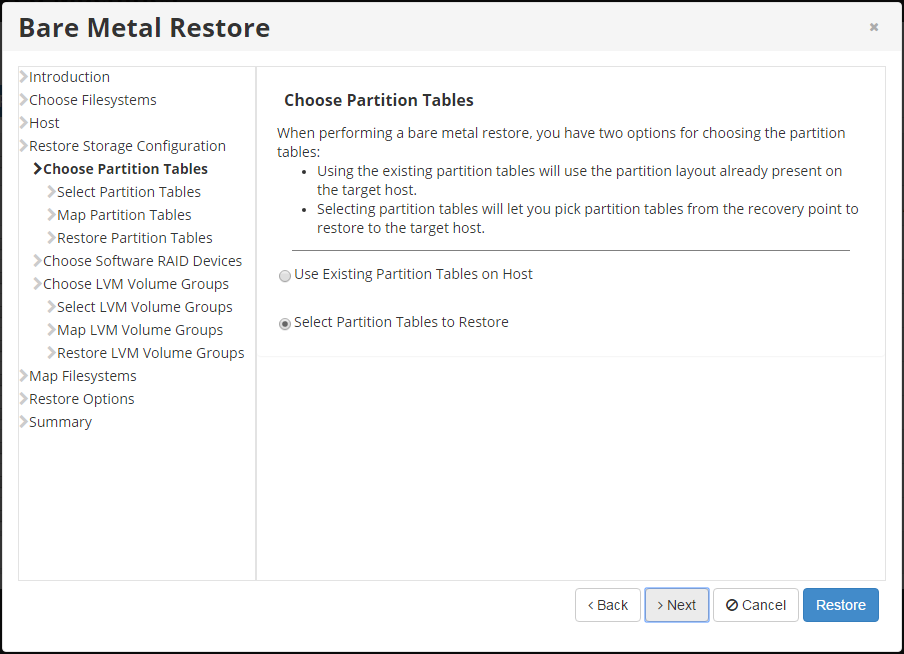
Step 8: On the "Choose Partition Tables" screen shown below, select one of the following options:
- Use Existing Partition Tables on Host - The Bare-Metal Restoration will use the partition layout already present on the target Server. This option should almost never be used when performing a Bare-Metal Restore. However, if you do select this option, click Next and proceed to the "Choose Software RAID Devices" screen.
- Select Partition Tables to Restore - Selecting this option lets you pick partition tables from the Recovery Point to restore to the target Server. In most cases, you should select this option. Selecting this option will make you go through three more screens i.e. "Select Partition Tables", "Map Partition Tables", and "Restore Partition Tables".
Select the desired option then click on "Next" to proceed to either the "Choose Software RAID Devices" screen or the "Select Partition Tables" screen depending on which option you selected.
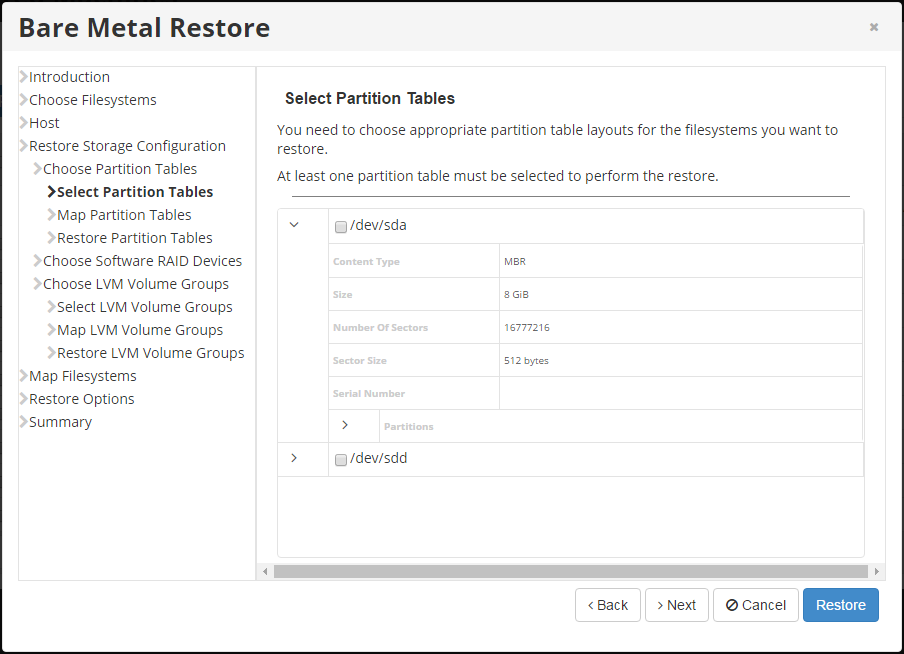
Step 9: On the "Select Partition Tables" screen shown below, select the partition table layouts for the filesystems you want to restore. You can click on the ">" icon in front of the partition table's name to see the partition table properties. Select at least one option and then click on "Next" to proceed to the "Map Partition Tables" screen.
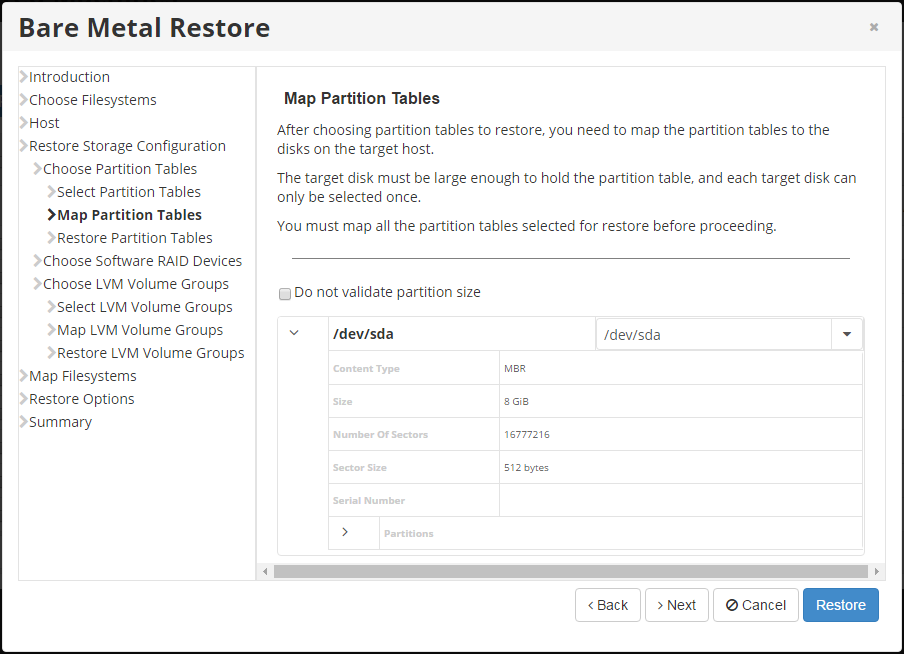
Step 10: On the "Map Partition Tables" screen shown below, the selected partition table (Recovery Points) needs to be mapped to physical Disks in the target server. From the drop-down menu, select the physical Disks to which you are going to restore. Each partition table must be mapped to a physical disk on the target server before proceeding. Select the necessary disks to map the partition tables to and then click on "Next" to proceed to the "Restore Partition Tables" screen.
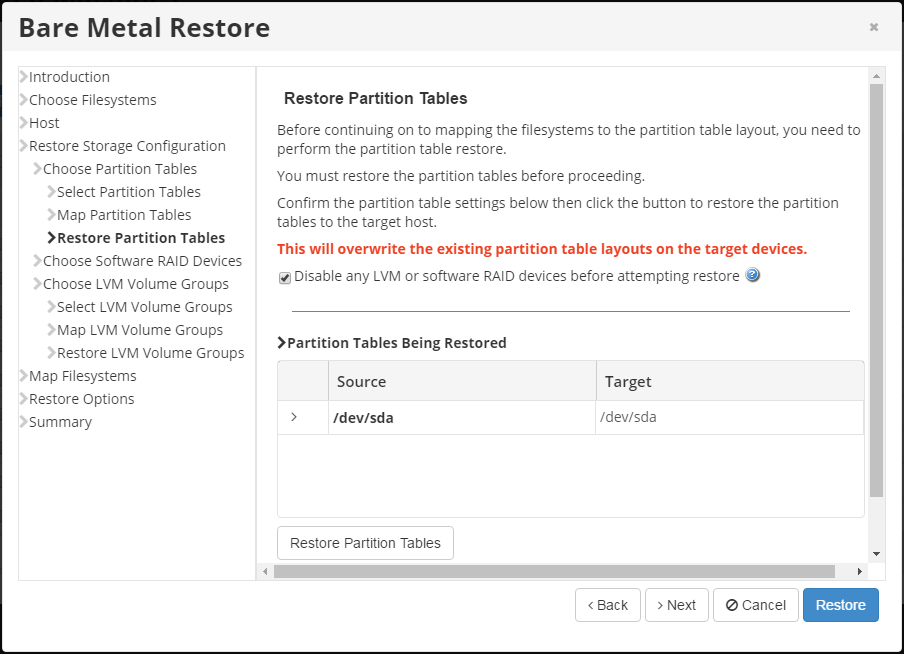
Step 11: On the "Restore Partition Tables" screen shown below, you will see that the partition table restoration process has been initiated. A busy indicator will be displayed while the restoration is in progress. This restoration will overwrite the existing partition table layout on the target devices. When this process is over, click OK in the notification pop-up then click on "Next" to proceed to the "Choose Software RAID Devices" screen.
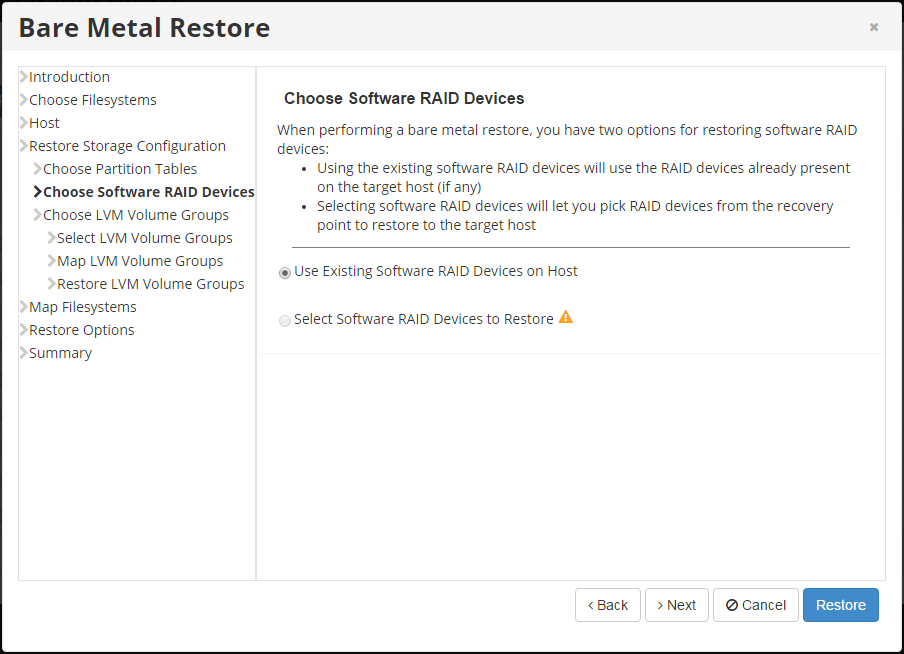
Step 12: On the "Choose Software RAID Devices" screen shown below, choose one of the following options:
- Use Existing Software RAID Devices on Host
- Select Software RAID Devices to Restore
In this article, we will use the second option which allows us to select a RAID device from the recovery point to restore to the target host. Select the second option and click on "Next" to proceed to the "Select Software RAID Devices" screen.
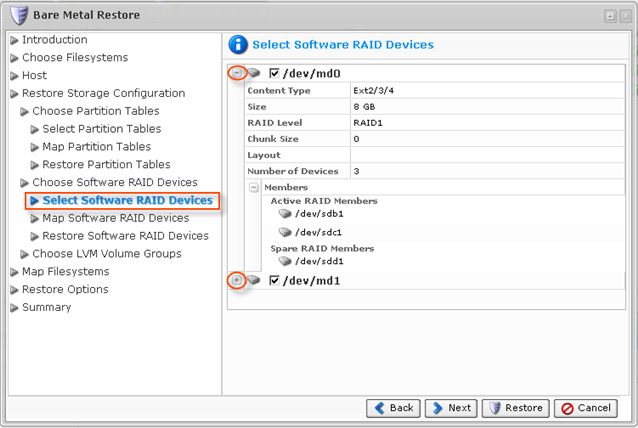
Step 13: On the "Select Software RAID Devices" screen shown below, select the corresponding check box for the devices you want to restore then click on "Next" to proceed to the "Map Software RAID Devices" screen.
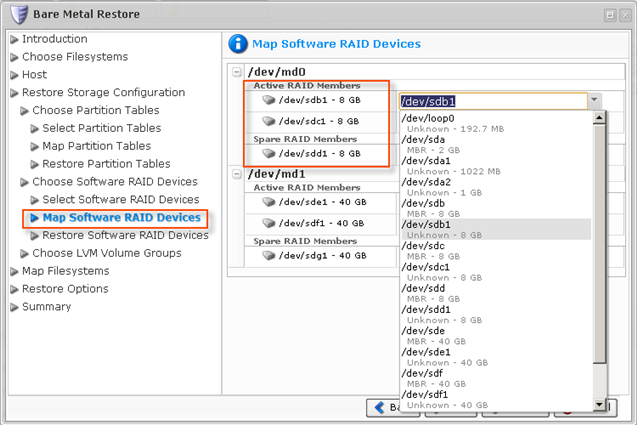
Step 14: On the "Map Software RAID Devices" screen shown below, select the devices you want to map. Note that the mapping of RAID devices is hierarchical. Instead of mapping the actual RAID device (/dev/md0), you should map its active and spare members. Click on "Next" to proceed to the "Restore Software RAID Devices" screen.
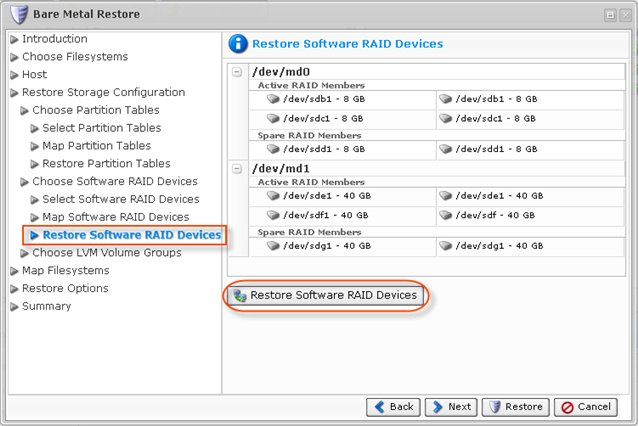
Step 15: On the "Restore Software RAID Devices" screen shown below, review the selected RAID Device information and click the "Restore Software RAID Devices" button to start the restoration process then click on "Next" to proceed to the "Map Filesystems" screen. Note that we have skipped the "Choose LVM Volume Groups" step.
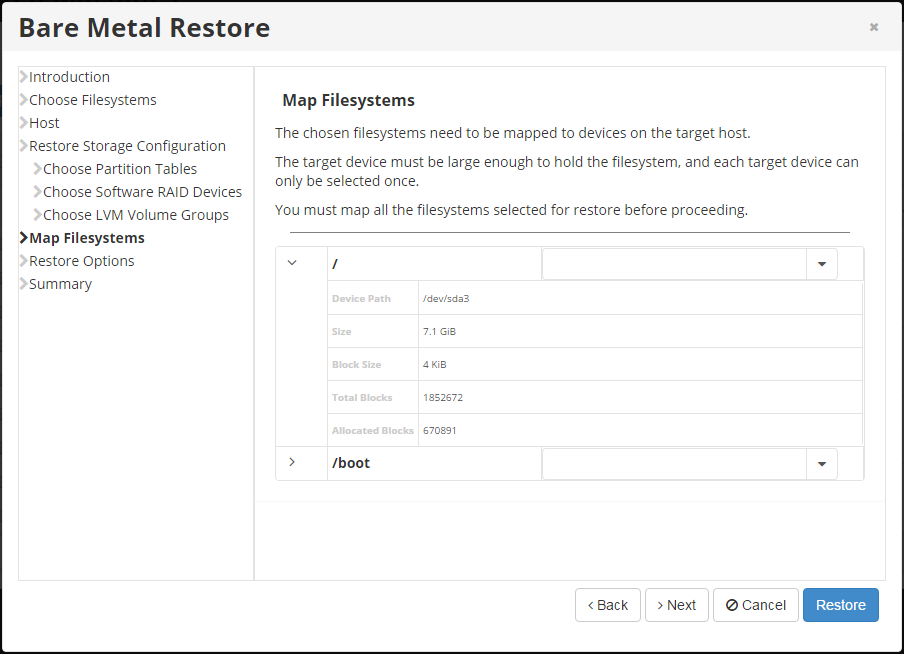
Step 16: On the "Map Filesystems" screen shown below, map the chosen filesystems to the devices on the target machine. From the drop-down menu, select the destination devices for each source filesystem. The target device must be large enough to hold the filesystem. Each target device can only be selected once. Click on "Next" to proceed to the "Restore Options" screen.
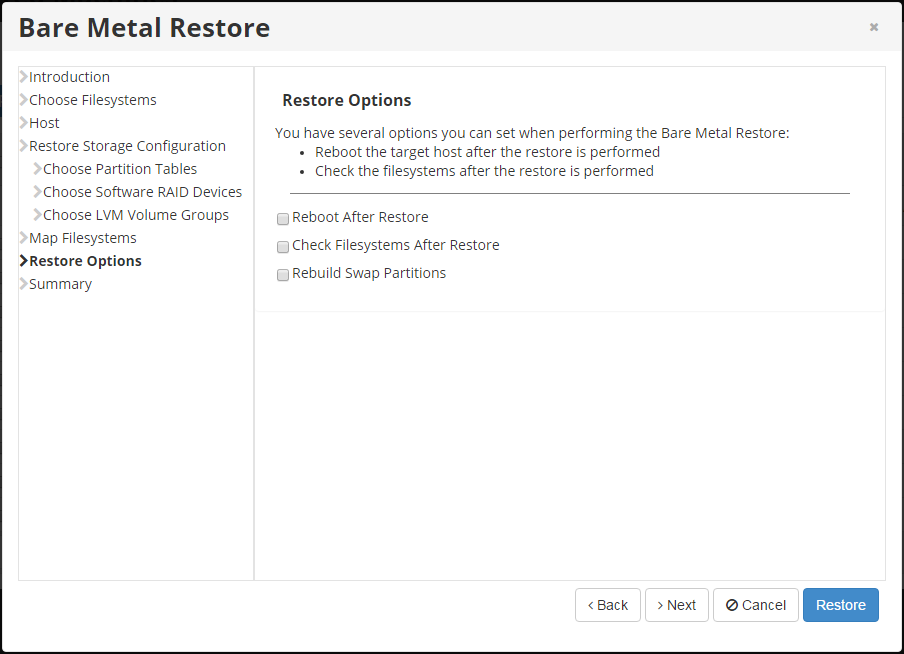
Step 17: On the "Restore Options" screen shown below, define the following options:
- Reboot After Restore - Select this check box to reboot the target host after the restore is performed. This is a very useful option since you have to reboot the target host after the restore anyway.
- Check Filesystems After Restore - Select this check box to check the filesystems after the restore is performed.
- Rebuild Swap Partitions - Select this check box to rebuild the swap partitions.
Tick the desired check boxes and click on "Next" to proceed to the "Summary" screen.
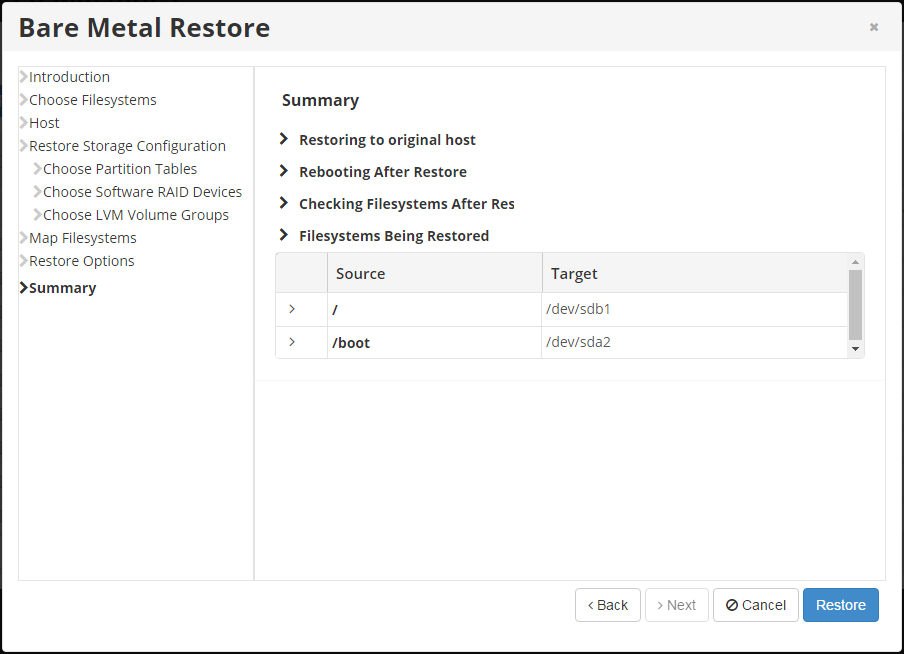
Step 18: On the "Summary" screen shown below, review and confirm your selected Bare-Metal Restore options. Each selected filesystem is listed, along with the name of the target device to which it is being mapped. Once confirmed, click on "Restore" to start the Bare-Metal restoration process. Click "OK" on the "Restore scheduled" pop-up message that will be displayed. This process can take a while. You can go to the "Task History" screen to observe the task progress.
When the process is complete, you can reboot the Server you just restored by pressing <Ctrl><Alt><Del> or by executing the reboot command in the root shell. Congratulations! You just performed a Bare-Metal Restore using R1soft.
Note: Follow the below steps while doing BMR for servers with LVM
If we do BMR for the server with lvm, we need to reinstall grub. For this, we need to untick "the server reboot after BMR" during configuring BMR, refer to step Step 17. If we tick reboot after BMR, we need to attach Ubuntu or similar live cd and update the grub. Please refer to the below steps to install and configure grub.
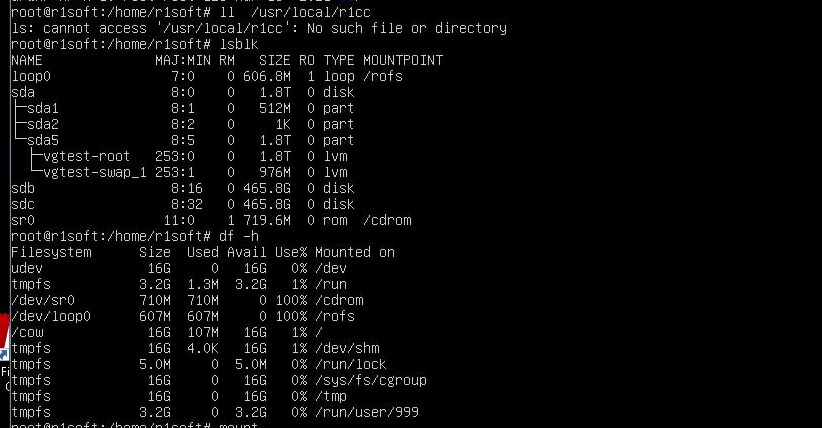
Mount the root/boot lvm using below command:
mount /dev/vgtest/root /mntfor i in /dev /dev/pts /proc /sys /run; do sudo mount -B $i /mnt$i; done chroot /mnt /bin/bash sudo update-grub sudo grub-install /dev/sda
in this case /dev/vgtest/root is the boot partition and /dev/sda is the disk. We can find the disk details using the below command. Please refer to the screenshot attached.
lsblk