

This article will show you how to install Odoo 15 on CentOS 8 / AlmaLinux 8
Prerequisites
- Operating system: CentOS 8 or AlmaLinux 8
- Access: Ability to connect to the server via SSH.
- Permissions: a user with root privileges (i.e. able to use the 'sudo' command).
Note: Although you can execute all the commands below from the root user, it is highly recommended that you use a separate user with 'sudo' privileges.
Step 1: Log in to AlmaLinux 8 server via SSH as the root user:
ssh root@IP_Address -p Port_numberReplace ‘IP_Address’ and ‘Port_number’ with your server’s respective IP address and SSH port number.
Step 2: Update the System
Once you’re connected to your server, update the list of available packages using the following command.
sudo dnf update -yStep 3: Install Python and other dependencies
Now, you need to install Python and other required dependencies on your server.
sudo dnf install python3 python3-devel git gcc git redhat-rpm-config libxslt-devel bzip2-devel openldap-devel libjpeg-devel freetype-devel -yStep 4: Install wkhtmltopdf package
Wkhtmltopdf is the package that allows Odoo 15 to print PDF reports. It converts HTML (web page markup) to PDF, but it's not present in the official package list nor the EPEL repository.
sudo dnf install https://github.com/wkhtmltopdf/wkhtmltopdf/releases/download/0.12.5/wkhtmltox-0.12.5-1.centos8.x86_64.rpmOnce all the packages are installed, It is high time for PostgreSQL and Odoo installation. Steps for its installation are given below.
Next, you will need to install the PostgreSQL package on your server.
Step 5: Create a Dedicated Linux User for Odoo
You need to create a dedicated Linux user in order to keep Odoo's permissions strict and pre-defined.
The following command will create a user named odoo and a user group of the same name. The home directory for the user will be /opt/odoo, and Bash will be the default shell.
sudo useradd -m -U -r -d /opt/odoo -s /bin/bash odooNote: you can choose any name for the user, but make sure to use that same name in the next step, when you will be creating a database user.
Step 6: Install PostgreSQL
You can install PostgreSQL with the following command:
sudo dnf install @postgresql:12 –yStep 7: Initialize PostgreSQL database
sudo /usr/bin/postgresql-setup initdbStep 8: Start the PostgreSQL process and make sure the database process is always running
sudo systemctl start postgresql
sudo systemctl enable postgresql
Step 9: Create a new PostgreSQL user (remember to use the user name from the previous step)
Now the user will have the right place to create a new PostgreSQL user set up for Odoo with the following command:
sudo su - postgres -c "createuser -s odoo"Step 10: Odoo Installation
Secondly for Odoo installation, log in to the Odoo user and download the Odoo 15.
sudo su - odoo
git clone https://www.github.com/odoo/odoo --depth 1 --branch 15.0 /opt/odoo/odoo15
cd /opt/odoo
Step 11: Set new Python virtual environment and its activation
The virtual environment is needed to separate Odoo's Python modules from the system's Python modules so that the two don’t interfere with each other.
python3 -m venv odoo15-venvsource odoo15-venv/bin/activateStep 12: Install required dependencies
Install required dependencies or Python module
pip3 install -r odoo15/requirements.txtStep 13: Deactivate dependencies
Deactivate the virtual environment and return to the previous system user (you won't need to do anything under the odoo user anymore)
deactivateStep 14: Prepare for Custom Odoo Addons
Create a separate directory for custom Odoo addons and change its owner to the odoo user
sudo mkdir /opt/odoo/odoo15-custom-addons
sudo mkdir /var/log/odoo15 && touch /var/log/odoo15/odoo.log
exit
Step 15: Create a Configuration File for Your Odoo Instance
Now, the time comes to configure the Odoo by using various commands:
sudo nano /etc/odoo15.confAdd the following lines:
[options]
admin_passwd = odoo_master_password
db_host = False
db_port = False
db_user = odoo
db_password = False
xmlrpc_port = 8069
logfile = /var/log/odoo15/odoo.log
logrotate = True
addons_path = /opt/odoo/odoo15/addons,/opt/odoo/odoo15-custom-addons
Close the after the configuration of the Odoo, but don’t forget to save it.
Step 16: Create a System Service File for Odoo
A system service file for Odoo can be obtained with the following command:
sudo nano /etc/systemd/system/odoo.serviceAdd the following lines:
[Unit]
Description=Odoo15
#Requires=postgresql-10.6.service
#After=network.target postgresql-10.6.service

[Service]
Type=simple
SyslogIdentifier=odoo15
PermissionsStartOnly=true
User=odoo
Group=odoo
ExecStart=/opt/odoo/odoo15-venv/bin/python3 /opt/odoo/odoo15/odoo-bin -c /etc/odoo.conf
StandardOutput=journal+console

[Install]
WantedBy=multi-user.target
Save and close the file then reload the systemd daemon to apply the changes:
sudo systemctl daemon-reloadNext, start the Odoo service and enable it to start at system reboot:
sudo systemctl start odoo
sudo systemctl enable odoo
Now verify the status of the Odoo service with the following command:
sudo systemctl status odooYou should get the following output:
odoo.service - Odoo15
   Loaded: loaded (/etc/systemd/system/odoo.service; disabled; vendor preset: disabled)
   Active: active (running) since Sun 2021-06-06 09:41:58 EDT; 4s ago
 Main PID: 23729 (python3)
    Tasks: 4 (limit: 25014)
   Memory: 55.6M
   CGroup: /system.slice/odoo.service
           └─23729 /opt/odoo/odoo15-venv/bin/python3 /opt/odoo/odoo15/odoo-bin -c /etc/odoo.conf
Nov 25 21:41:58 AlmaLinux systemd[1]: Started Odoo15.
At this point, Odoo is started and listening on port 8069. You can check it with the following command:
ss -antpl | grep 8069 You should get the following output:
LISTEN    0         128                0.0.0.0:8069
0.0.0.0:*        users:(("python3",pid=23729,fd=4))
Step 17: Configure Firewall
The firewall will allow you to port 8069. But here, you can also use the following command:
sudo firewall-cmd --permanent --zone=public --add-port=8069/tcpNow just apply the changes:
sudo firewall-cmd --reloadStep 18: Access Odoo Web UI
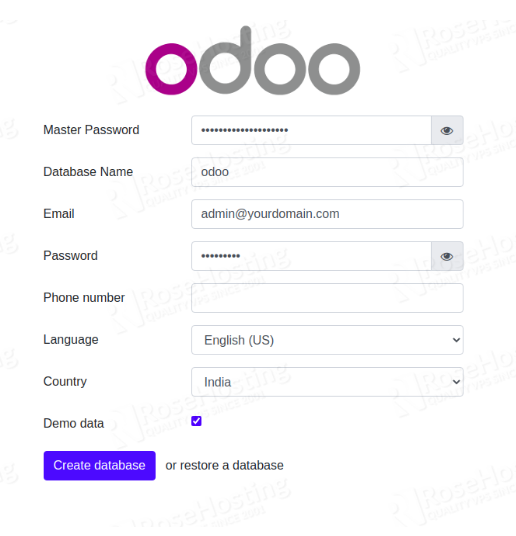
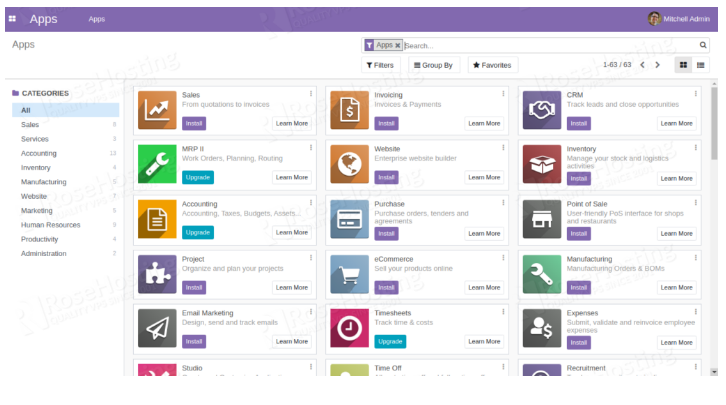
Insert your Odoo master password, database, admin username, password, email, and click on the Create Database button. You should see the Odoo dashboard on the following page:
Congratulations! You have successfully installed Odoo 15 on AlmaLinux 8.

