

This article will outline how to install Odoo 14 on Windows Server 2016 or Windows Server 2019. Odoo 14 installation on Windows is pretty easy and straightforward as opposed to installation on Linux-based machines. However, since we want to run Odoo 14 on a Windows server, we will cover both installation and how to route the Odoo traffic from localhost on port 8069 (Odoo's default) to a front-facing IP address or a publicly accessible URL on port 80 and 443 using a reverse proxy.
Step 1: Download the Odoo 14 *.exe file and installing
Go to this link on the official Odoo website, scroll down to Odoo 14 and download the windows version. After downloading, run the installer. This will install all the components i.e python modules, PostgreSQL, and Odoo 14 as a service running on port 8069. At this point, you can go to the browser and type this address and you will immediately be able to access Odoo 14.
http://localhost:8069You can also access Odoo 14 from another machine within the same network by replacing "localhost" with the server's IP address.
http://SERVER_IP:8069You should see the below screen.
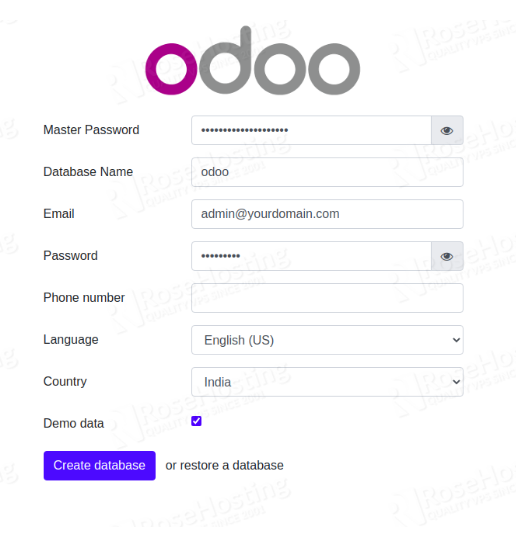 Odoo 14 is up and running on your server, however, we still need to make it accessible over the internet.
Note: This article will only cover serving Odoo 14 over HTTP. We will not go through the process of installing and configuring an SSL certificate that will enable us to serve Odoo 14 over HTTPS (which is more secure and recommended).
Step 2: Enabling IIS (Internet Information Services)
To be able to serve HTML pages on Windows, we should enable IIS which is a stable web server that runs on Windows systems. If IIS is already running on your system, you can skip this step. To enable IIS, follow the following steps.
- Open Server Manager and click Manage > Add Roles and Features. Click Next.
- Select Role-based or feature-based installation and click Next.
- Select the appropriate server. The local server is selected by default. Click Next.
- Enable Web Server (IIS) and click Next.
- No additional features are necessary to run Odoo 14, so click Next.
- On the Web Server Role (IIS) dialog box, click Next
- On the Select role services dialog box, verify that the web server components listed below are enabled. Click Next.
- Verify that your settings are correct and click Install.
- When the installation completes, click Close to exit the wizard.
Step 3: Download and install web platform components
To set up a reverse proxy, your Windows server needs these two components.
Follow the links, download and install the modules that correspond to your version of Windows Server.
If the components already exist on your server, you can skip this step. Installation of the modules will create a new icon "URL Rewrite" icon in the IIS Administration Console. This icon will be present on each site and web application that exist on the server. It allows you to configure rewrite rules which will apply from that level downwards.
Step 4: Setup a Reverse Proxy rule using the Wizard
Go to the IIS Manager Console and click on Default Web Site from the tree view on the left of the screen. Double click on the URL Rewrite icon on the middle pane to open the URL Rewrite interface. Choose the "Add Rule" action from the right pane of the management console then select the "Reverse Proxy Rule" from the "Inbound and Outbound Rules" category.
Fill in the routing information as shown in the below screenshot.
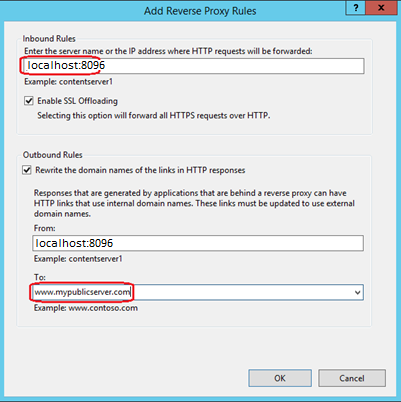
We've rerouted the service running on 'localhost:8069' to the public-facing address 'www.mypublicserver.com' running on the default HTTP ports 80 and 443. If every step has worked, the 'web.config' file at the root of your site should look like this:
<?xml version="1.0" encoding="UTF-8"?>
<configuration>
<system.webServer>
<rewrite>
<rules>
<clear />
<rule name="ERP_http_https” patternSyntax="Wildcard” stopProcessing="true">
<match url="*" />
<conditions logicalGrouping="MatchAny” trackAllCaptures="false">
<add input="{HTTPS}" pattern="o0ff" />
</conditions>
<action type="Redirect” url="https:// {HTTP HOST} {REQUEST URI}" redirectType="Temporary” />
</rule>
<rule name="ReverseProxyInboundRulel” stopProcessing="true">
<match url="(.*)" />
<conditions logicalGrouping="MatchAll” trackAllCaptures="false" />
<action type="Rewrite” url="http://127.0.0.1:8069/{R:1}”" />
</rule>
</rules>
<outboundRules>
<rule name="ReverseProxyOutboundRulel” preCondition="ResponseIsHtml11">
<match filterByTags="A, Form, Img” pattern="“http(s) ?://127.0.0.1:8069/(.*)" />
<action type="Rewrite” value="http{R:1}://myodooserver.com/{R:2}" />
</rule>
<preConditions>
<preCondition name="ResponselIsHtml1">
<add input="{RESPONSE_CONTENT_TYPE}”" pattern="“*text/html” />
</preCondition>
</preConditions>
</outboundRules>
</rewrite>
<httpRedirect enabled="false”" destination="https://mypublicserver.com” exactDestination="false" childOnly="true” />
</system.webServer>
</configuration>
Congratulations! You have installed Odoo 14 on your Windows Server 2016/2019 machine and are now serving your ERP over the internet using a reverse proxy.

