

This article will outline how to upgrade the R1Soft Backup Agent installed on a Windows machine. To upgrade the Server Backup Agent, you do not need to uninstall the previous version.
Step 1: Log on to the Windows server as a member of the local Administrators group.
Step 2: Download the latest R1Soft Windows Backup Agent. Go to this link to log in to the R1Soft customer portal. Navigate to the "Latest Product Downloads" page and go to the "Backup Agent" product group. Click on 32-bit (x86) for 32-bit binary hardware/OS or click 64-bit (x86_64/AMD64) for 64-bit binary hardware/OS depending on your OS. Download the corresponding file i.e. "ServerBackup-Enterprise-Agent-win32.zip" for a 32-bit system or "ServerBackup-Enterprise-Agent-win64.zip" for a 64-bit system.
Step 3: Extract the downloaded archive to the directory where you saved the Windows Backup Agent installation file.
Step 4: Run the installer file by double-clicking on it and then wait for the installer to run as seen below.

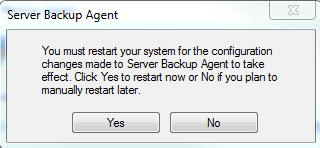
Step 5: Choose to restart the system when you see the following prompt when the installer has finished extracting the installation files. For the upgraded backup agent to work properly, a system restart is required.
Congratulations! You have successfully upgraded your Backup Agent. Due to the restart of the service, a full block scan will be conducted to ensure all the replicas are consistent.

