

This article will outline how to perform a Microsoft SQL Server database(s) recovery to an alternate location using the R1Soft Server Backup Manager.
Step 1: Click on "Protected Machines" in the main menu to see the list of all the protected machines.
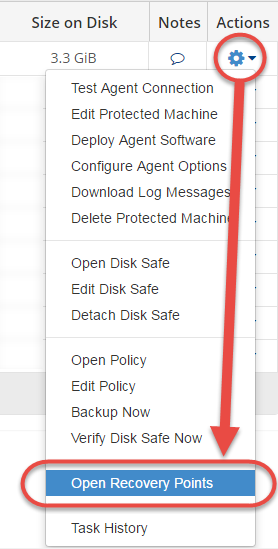
Step 2: Select the machine that contains the database that you want to restore. Then click on that machine's corresponding "Actions" icon on the right-hand side of the screen and select the "Open Recovery Points" options as shown below. This will display a list of all the recovery points for that machine.
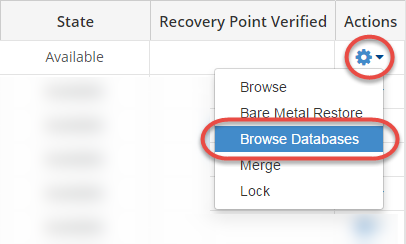
Step 3: On the "Recovery Points" interface, select the desired recovery point. Then click on that Recovery point's corresponding "Actions" icon on the right-hand side of the screen and select the "Browse Databases" option as shown below. If the recovery point contains a MS SQL database, this option will be available. You will see the "Browse Databases" interface.
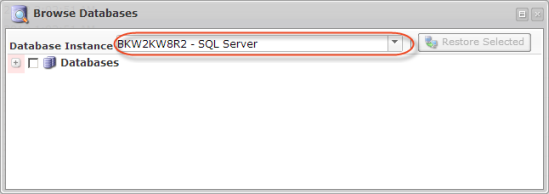
Step 4: On the "Browse Databases" window, select a database instance in the "Database Instance" dropdown field. You can then browse the database instance by clicking the corresponding "+" icons. Select the check box for the database you want to restore and click the "Restore Selected" button as shown below. You will see the "Restore Database" window.
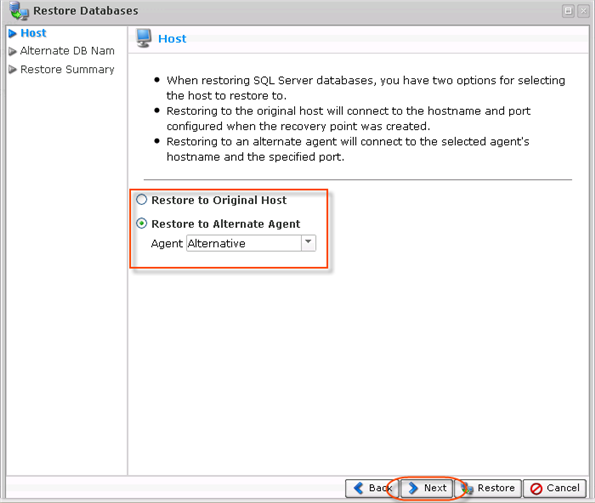
Step 5: In the "Restore Databases" screen shown below, there are two options for selecting the host to restore to:
- Restore to Original Host - Restoring to the original host will connect to the hostname and the port configured when the Recovery Point was created.
- Restore to Alternate Agent - Restoring to an alternate Agent will connect to the selected Agent's hostname and the specified port.
Select the "Restore to Alternate Agent" option then click "Next" to proceed.
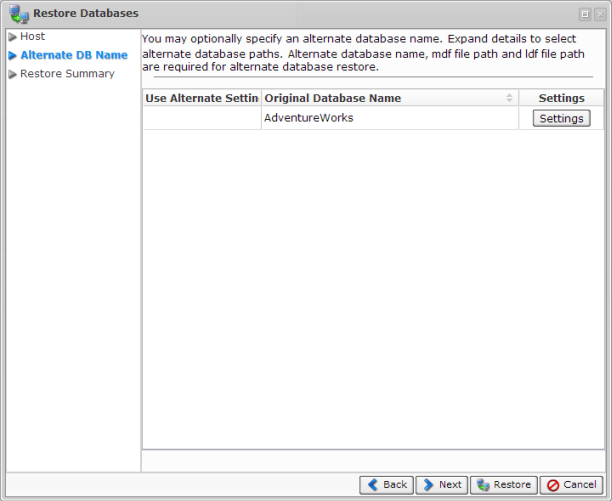
Step 6: On the "Alternate DB Names" screen shown below, you can define an alternate database name for any of the selected databases to be restored as a new step in the DB restoration process. If a database with the new name already exists, the restoration will fail and throw an alert.
To define alternate settings, click on the "Settings" button. The "Alternate settings" screen will open as shown below. Check the "Use Alternate Settings" checkbox to enable the alternate settings. Provide an alternate name for the database. Specify an alternate path. Make sure the existent and absolute paths have been entered. Otherwise, a warning message will appear.
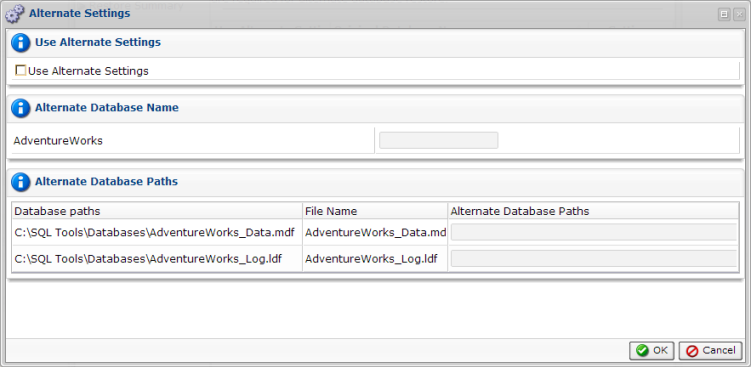
When performing an MS SQL Server restore to an alternate directory, the directory must already exist. Create an alternate restore directory before restoring the MS SQL Server to it. Once the alternate name has been specified, click "OK". You will see a green mark on the "Alternate Settings" column. Click "Next" to proceed.

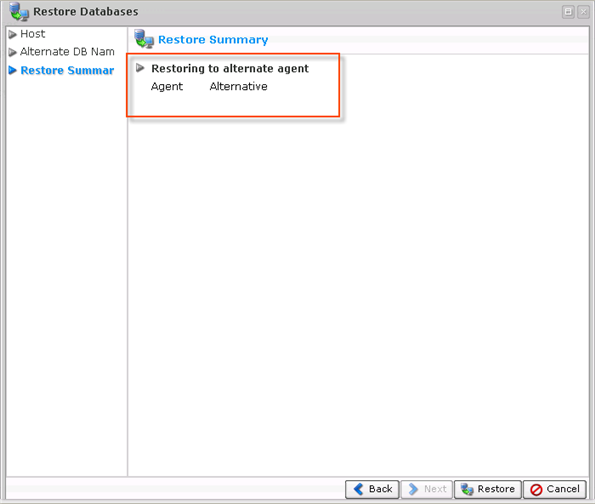
Step 7: On the "Summary" screen shown below, review the restoration settings before initializing the database restoration process. Once you have verified that the specified settings are correct, click "Restore." The restoration process will start immediately.
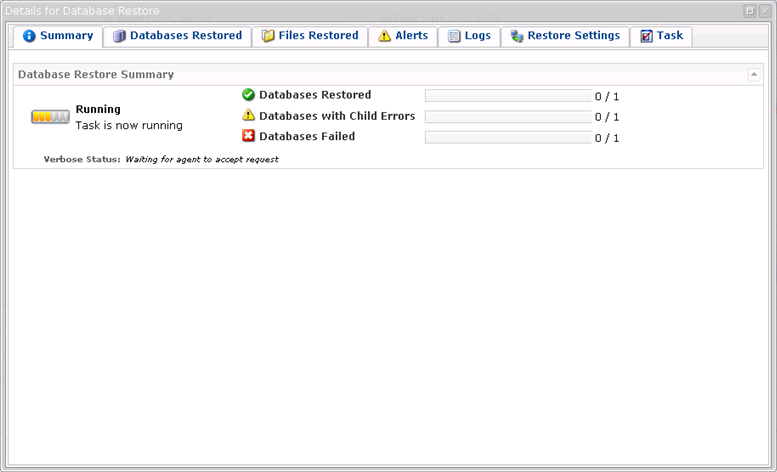
The "Details for Database Restore" screen will appear as shown below. It indicates that the restore process has been launched. You can watch the progress in real-time.
Once the process has finished, you will have successfully finished, you will have completed restoring your MS SQL database to an alternate location.

