

This article outlines how to edit disk-safe verification schedules in R1Soft.
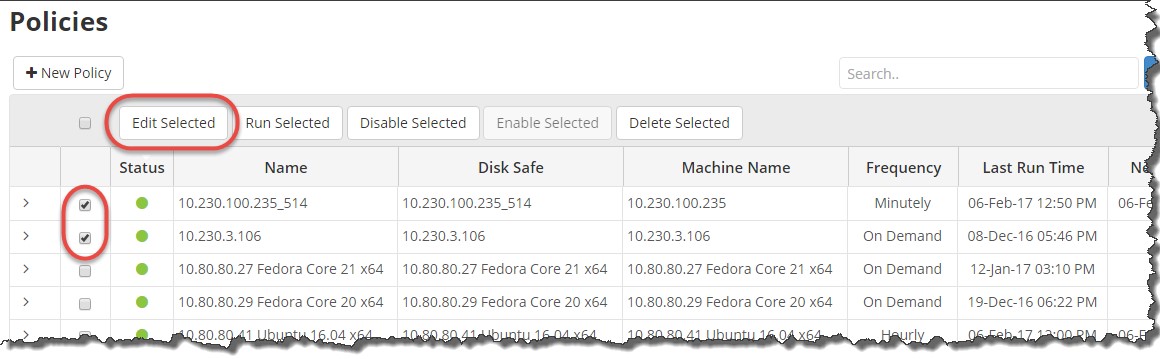
Step 1: Select the policies you want to edit by selecting the checkboxes in the first column in the "Policies" list. Click the Edit Selected button as shown below.
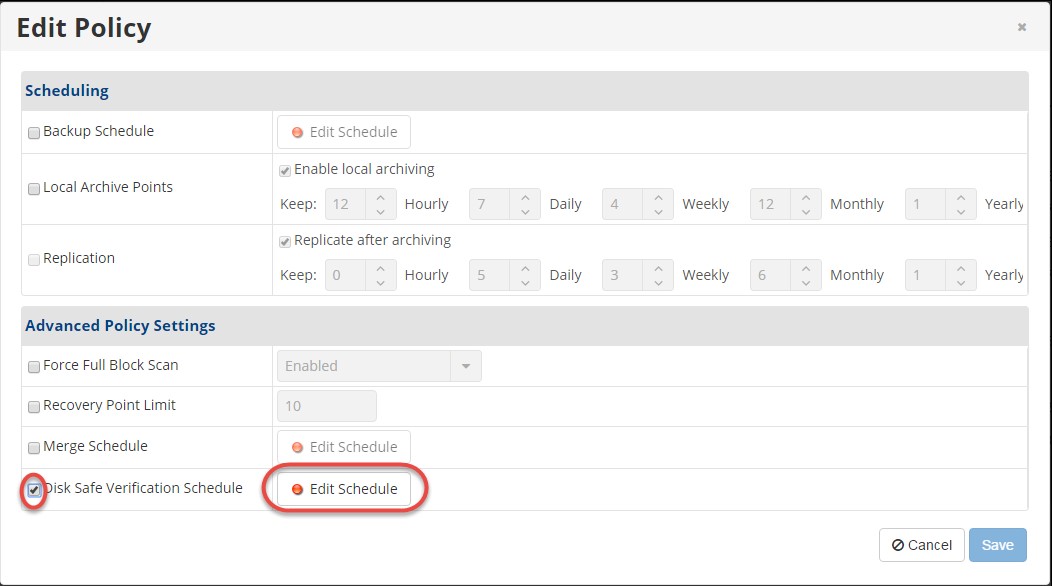
 Step 2: Select the "Disk Safe Verification Schedule" check box and click the "Edit Schedule" button as shown below.
Step 3: The "Edit Verification Schedule" window displays as seen below. Select the verification frequency from the "Verification Frequency" drop-down menu. The following options are available:
- On-Demand
- Daily
- Weekly
- Monthly
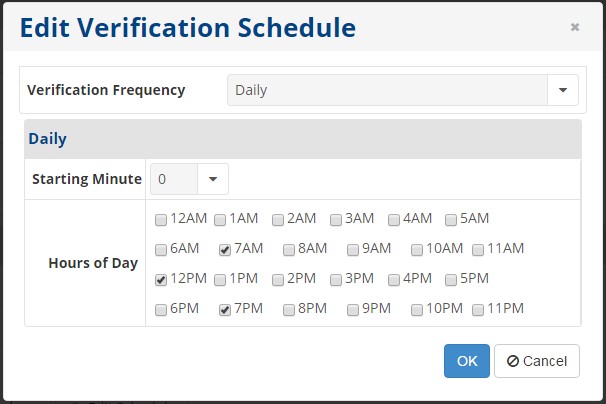
Step 4: Specify the exact time of the Disk Safe verification and click "OK". The times available will vary based on what you selected in the "Verification Frequency" field.
Step 5: The "Edit Verification Schedule window" closes and the "Edit Policy" window displays. When the verification schedule is defined, the "Edit Schedule" button displays a green indicator.

