

You can find yourself in a pickle and worry a little about losing the website if you need to test any new features or upgrade plugins or themes on your WordPress website. What is the worst that might occur? You won't be able to access the dashboard to make repairs when your website stops functioning. You must thus "clone" the WordPress website or establish a staging website to test everything before implementing the upgrade on your real website in order to minimize the risk of losing your website. The WordPress site will be flawlessly cloned in this article to a staging site so that modifications may be tested and applied there before being rolled out to the main site.
Step 1: Install and activate the Duplicator plugin. First, download the Duplicator plugin from the WordPress Dashboard > Plugins > Add New > Search “Duplicator”.
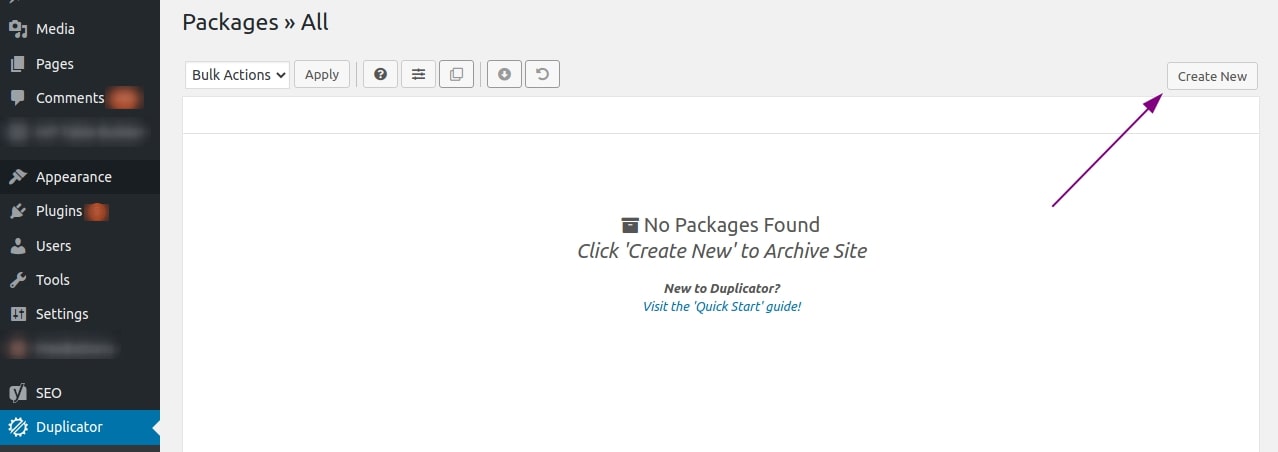
Step 2: Create a Copy of Your Website and Download it. After the Installation, move to the duplicator tab on your WordPress dashboard and click on the "Create New" button as shown below.
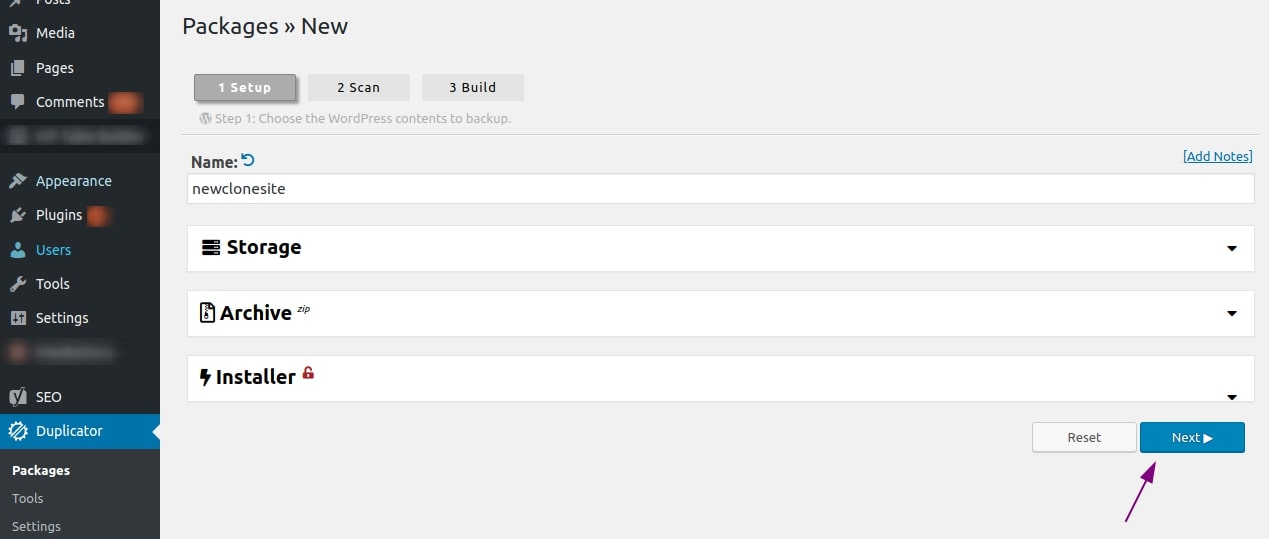
 A duplicator package is a group of files that creates a website clone on a different server. You can create as many packages as you'd like with the plugin, which comes with a standalone installer and an archive. Enter your name for identification purposes. There are various storage choices available. After that, choose database and archive files and alter installer settings. When finished, press the Next button as shown below.
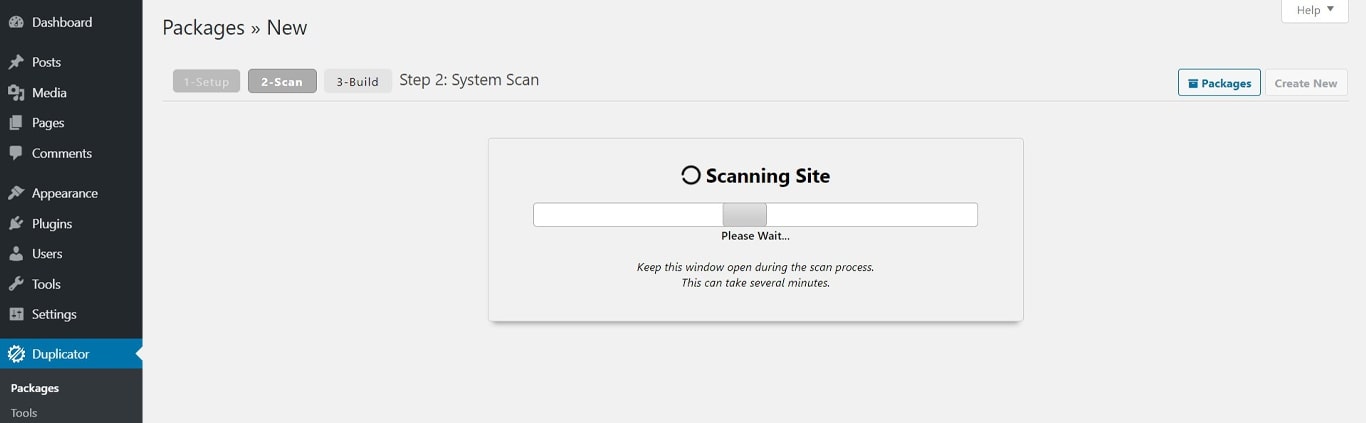
The plugin will now check your website for errors or other problems and provide you with a report and the choice to proceed.
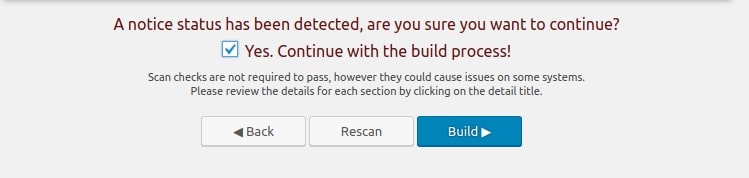
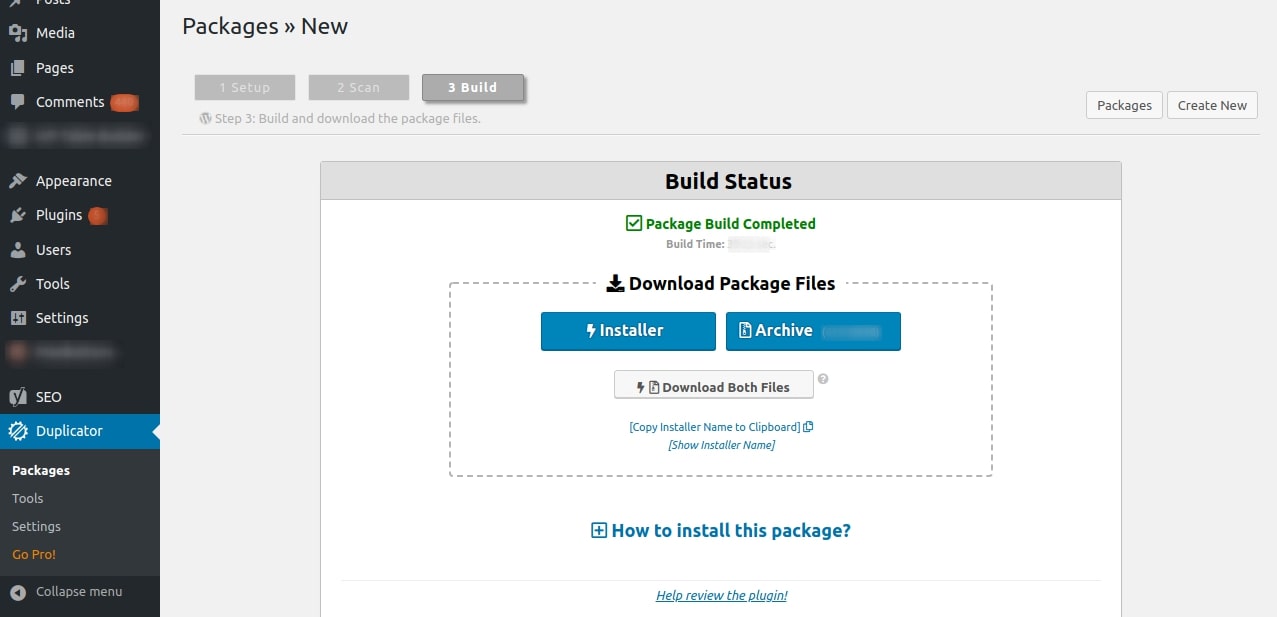
 Depending on your web provider or the size of your site, you may need to select Yes to continue with the Build process if there is an error throughout the process. Click on the "Build" button as shown below and then leave the plugin to operate. When the procedure is complete, you will have the choice between the installer and the archive.
Make sure to download both files to your computer as you would any other file in the following step, and keep track of where you store them since you will need them shortly.
Step 3: Upload the files to a new server. Use a file transfer program to upload them to your server. FTP accounts that have been set up are required for that. You have two choices: the file manager provided by your host, or Filezilla. To upload the files, you must first log onto the FTP server. Ensure that the files are uploaded to the website's primary directory, typically referred to as public_html.
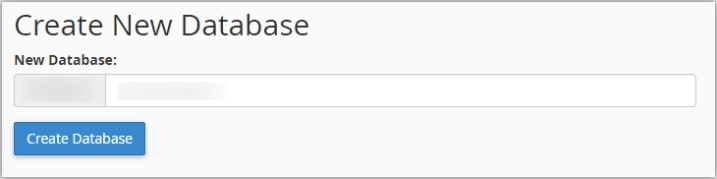
Step 4: Set up the Website Clone’s Database, In order to prepare for our next step, we will first create an empty database where the cloned website will be stored. Then, import the data from your old website's database to the new one using a duplicator installer. We need to establish a new database and search for existing MySQL databases in your cPanel. Confirm your choices and come up with a name that fits your website. When you reach the "Add New User" area, scroll down. Add your name and password, then validate your selection. Then look for the user's database addition option. Finally, choose the newly generated user and add it to the newly formed database. The plugin will display a question for you to answer.
Step 5: Run the Installer. You are on the root server where the files are. Run the installer now to copy your website. Add /installer.php to the following URL to view your new website: http://www.myclonesite.com/installer.php. This will give you access to the Installer file you previously downloaded and allow you to begin the cloning process.
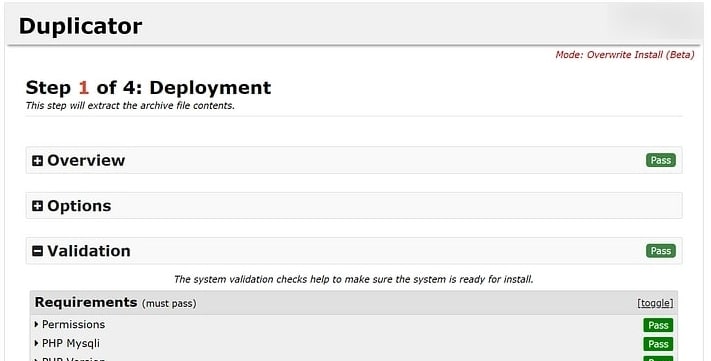
Before processing, the Duplicator will look for faults, notify you, and then request your approval. Select Next. All of your old site files will be transferred to the new one by the Duplicator as it begins to extract the archived data. You must enter your database information in the following step.
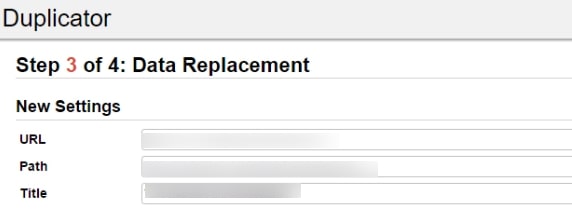
You will need to confirm your site's URL, title, and installation path while using Duplicator. Click the Next button after completing those files. Finally, the Installer will ask you to test your cloned site to see if it is functioning properly before asking you to adjust the permalink structure. The duplicator will do the remainder of the work if you click on each button.
Congratulations! You have successfully cloned your WordPress website!

