

This article will outline how to download a full backup using the R1Soft Server Backup Manager. The R1Soft Server Backup Manager allows you to restore individual files from any recovery point. You can restore your selected files to the original location, to another server, or download them to a local HDD.
Step 1: Click on "Protected Machines" in the main menu to see the list of all the protected machines.
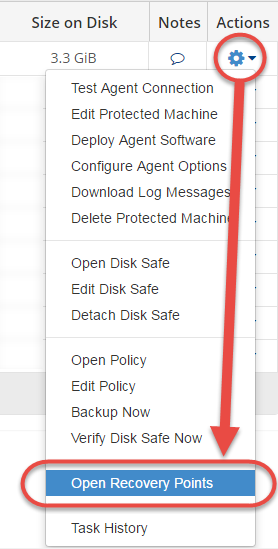
Step 2: Select the machine that contains the files that you want to restore. Then click on that machine's corresponding "Actions" icon on the right-hand side of the screen and select the "Open Recovery Points" options as shown below. This will display a list of all the recovery points for that machine.
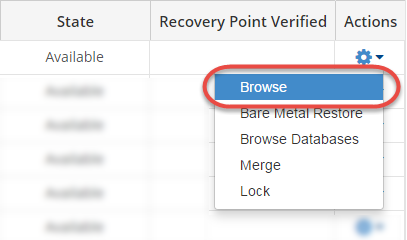
Step 3: On the Recovery Points interface, select the desired recovery point. Then click on that Recovery point's corresponding "Actions" icon on the right-hand side of the screen and select the "Browse" option as shown below. If you had enabled encryption when creating the disk safe, you will be prompted to enter the encryption password. You will see a list of files and folders that are present in that recovery point.
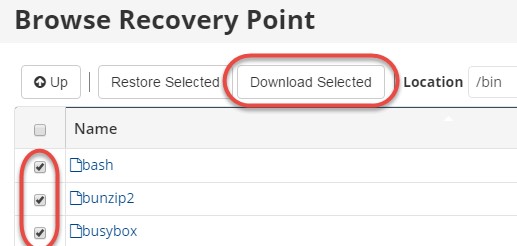
Step 4: Since you want a full backup download, select all the checkboxes next to the files and folders you want to restore and click the "Download Selected" button as shown below.
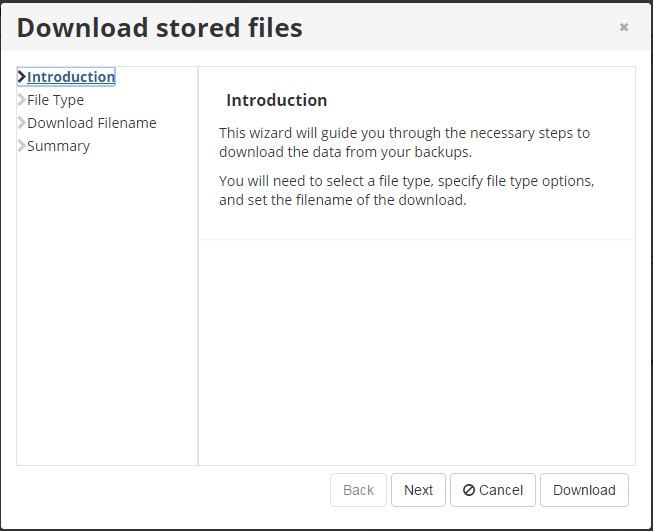
Step 5: The "Download Stored Files" wizard displays as below. Click "Next" to continue generating the archive for downloading.
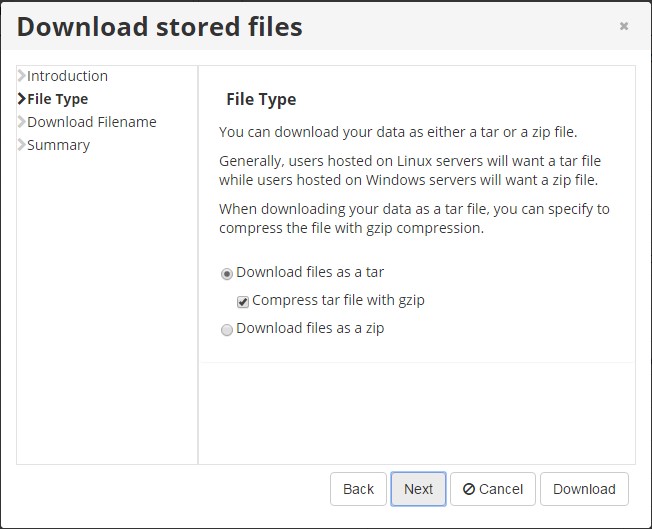
 Step 6: On the "File Type" screen shown below, select the type of the archive file then click "Next". The following options are available:
- Download files as a tar - Select this option to download data as a .tar file. This option is preferable for Linux users.
- Compress tar file with gzip - Check this box to compress a .tar file with gzip compression.
- Download files as a zip - Select this option to download data as a .zip file. This option is preferable for Windows users.
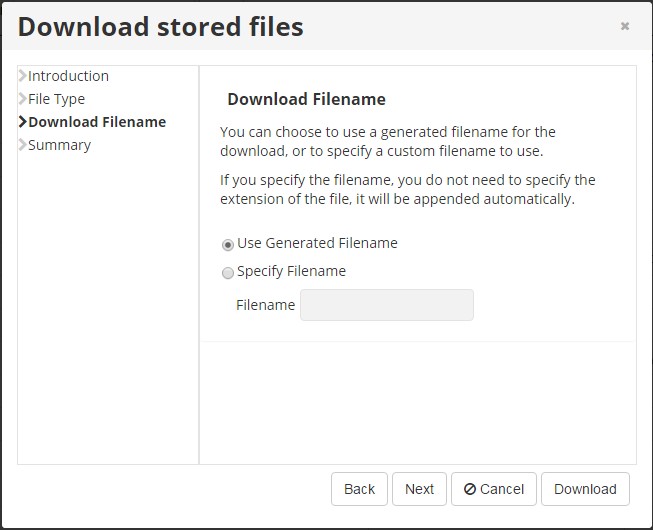
Step 7: On the "Download Filename" screen shown below, define the name of the archive then click "Next". The following options are available:
- Use Generated Filename - Select this option to generate the file name automatically. The name will be in the following format:
cdp-data-[date of Recovery Point creation]-[time of Recovery Point creation]Example: cdp-data-2011-07-09-03-00-06.tar.gz
- Specify Filename - Select this option to input a custom file name in the corresponding "Filename" field. The file extension will be appended automatically.
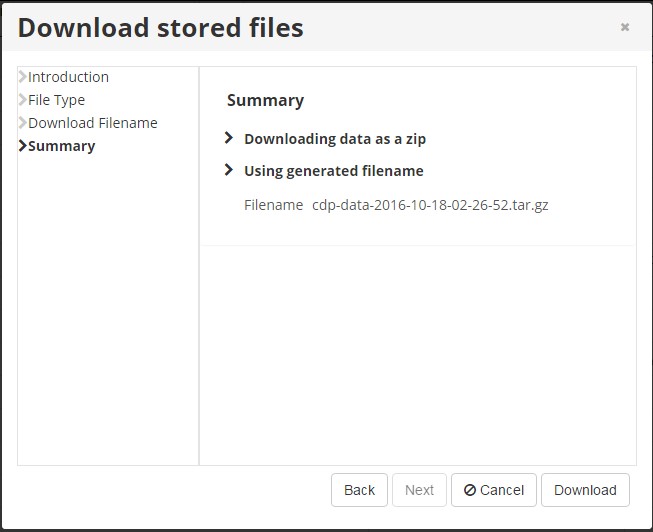
Step 8: On the "Summary" screen shown below, review the settings you have selected and click the "Download" button to obtain the archive.
Congratulations! Your full backup will now download. Note that the time taken by the download is dependent on the size of the backup being downloaded and your internet speed.

