

A bare-metal restore is a form of complete disk-image recovery that restores a system to a computer with an empty “bare-metal” disk drive. When performing a bare-metal restore to a machine with different hardware, the restoration process might fail or result in the new machine not booting. This is because the system lacks the specific drivers to work with the new hardware such as the CPU, motherboard, HDD (Hard Disk Drive), RAID (Redundant Array of Inexpensive Disks) controller, network, graphic card, etc. These drivers and the HAL (Hardware Abstraction Layer) should be changed during the recovery to make the new hardware compatible with the system. Acronis Universal Restore is the Acronis proprietary technology that helps recover and boot up an operating system on dissimilar hardware or a virtual machine by installing critical boot device drivers during the recovery process. This article will outline how to perform a bare-metal restore using Acronis Universal Restore.
Preparation for Recovery
To recover your system to a new piece of hardware, you will need the following:
- A disk-level backup of your system disk or Entire PC Backup.
- A bootable media with Acronis True Image and Acronis Universal Restore.
- The extracted drivers for the new hardware.
Saving your Disk-level Backup or Entire PC Backup to an External Drive.
Creating a disk-level backup or entire PC backup is covered in this article. You can download the entire machine or disk to an external disk using this article as your guide.
Creating a Bootable Media with Acronis True Image and Acronis Universal Restore
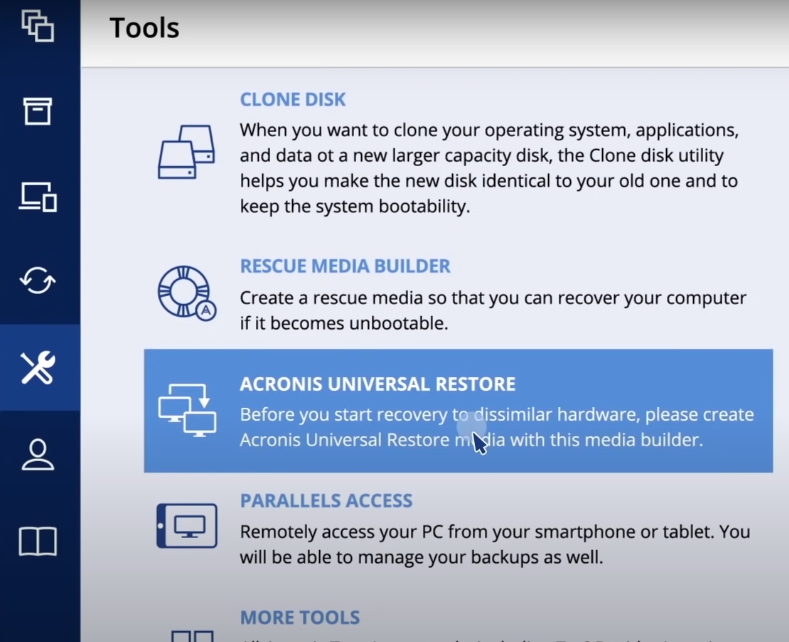
Step 1: Start Acronis True Image and navigate to the "Tools" menu as shown below. Click on "Acronis Universal Restore".
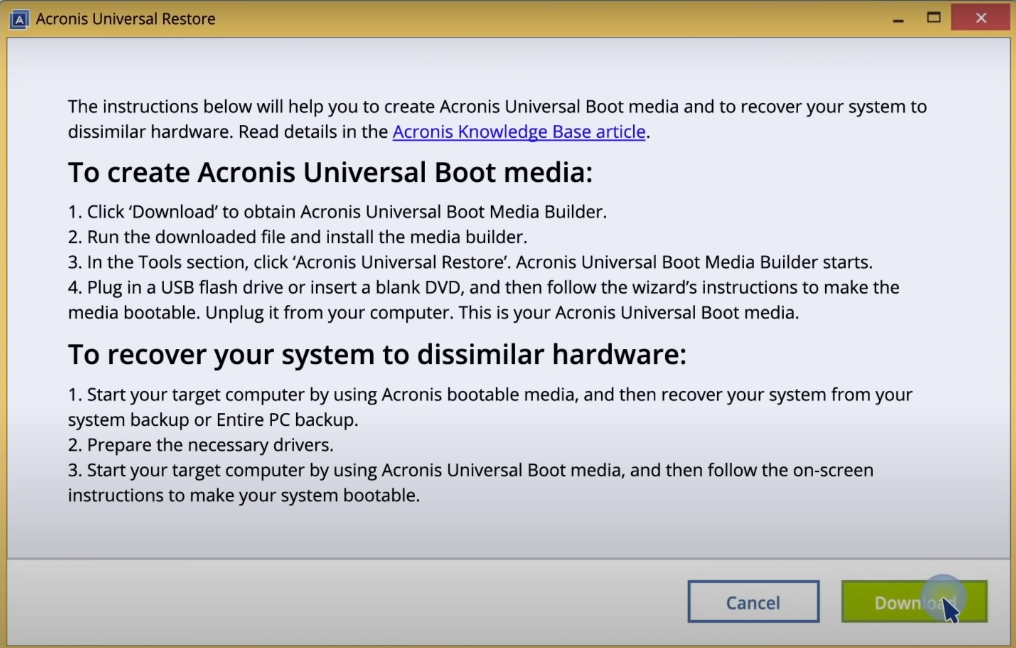
Step 2: On the screen below, click on "Download" to obtain the Acronis Universal Boot Media Builder. Once the download is complete, run the downloaded file, accept the end-user license agreement, and follow the wizard to install the Acronis Universal Boot Media Builder using all default settings.
Step 3: Plug a USB flash drive in or insert a blank DVD into the machine.
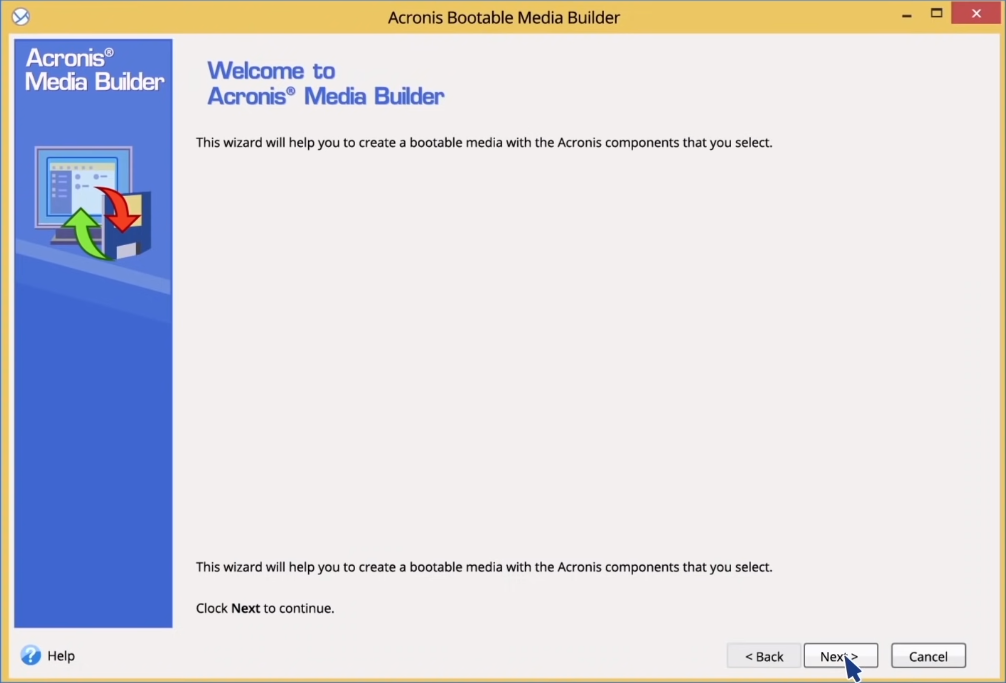
Step 4: To start the Acronis Universal Boot Media Builder, open Acronis True Image and navigate to the "Tools" menu as above. Click on "Acronis Universal Restore" again. This time since the boot media builder is installed, you will see the screen below. Click on "Next" to proceed.
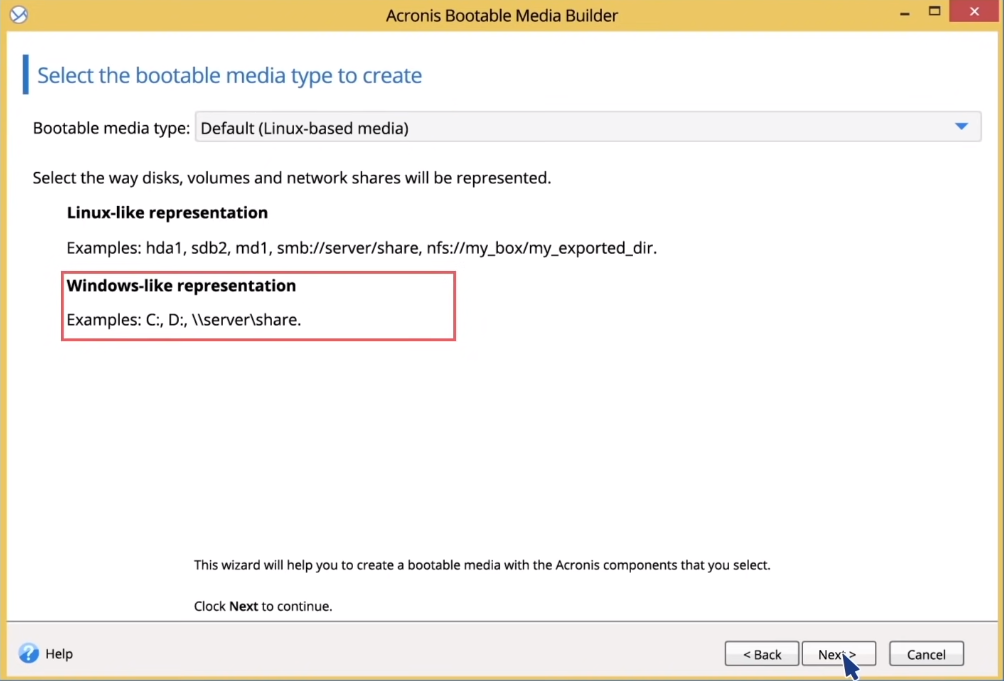
Step 5: On the next screen that appears as shown below, select the bootable media type to create and the way disks, volumes, and network shares will be represented. Click on "Next" to proceed.
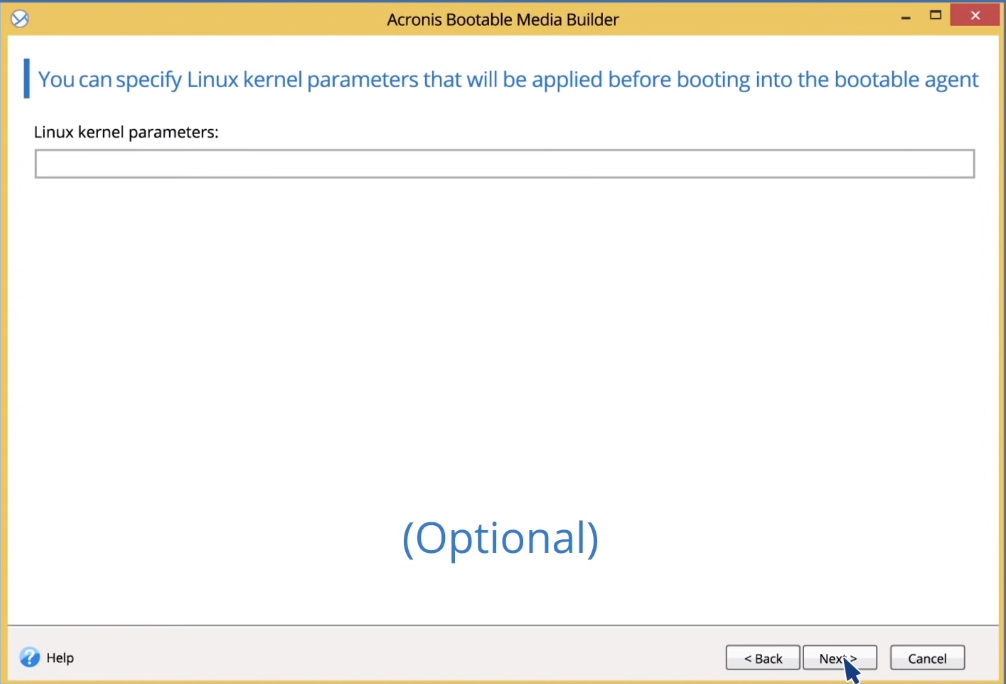
Step 6 (Optional): On the next screen shown below, you can specify Linux kernel parameters if needed. See the Acronis documentation for more details on this. Click on "Next" to proceed.
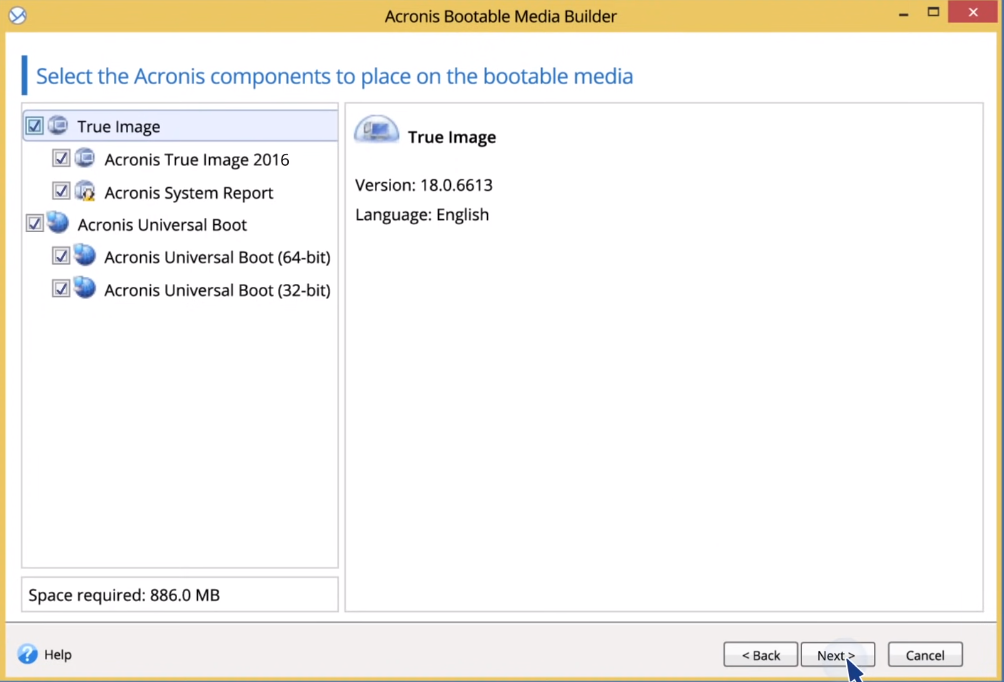
Step 7: On the next screen shown below, select the components you would like to add to your bootable media. Select both the 32-bit and 64-bit components of the Acronis Universal Boot so that the bootable media can work on any type of hardware. Also select all the components of Acronis True Image as shown below. Click on "Next" to proceed.
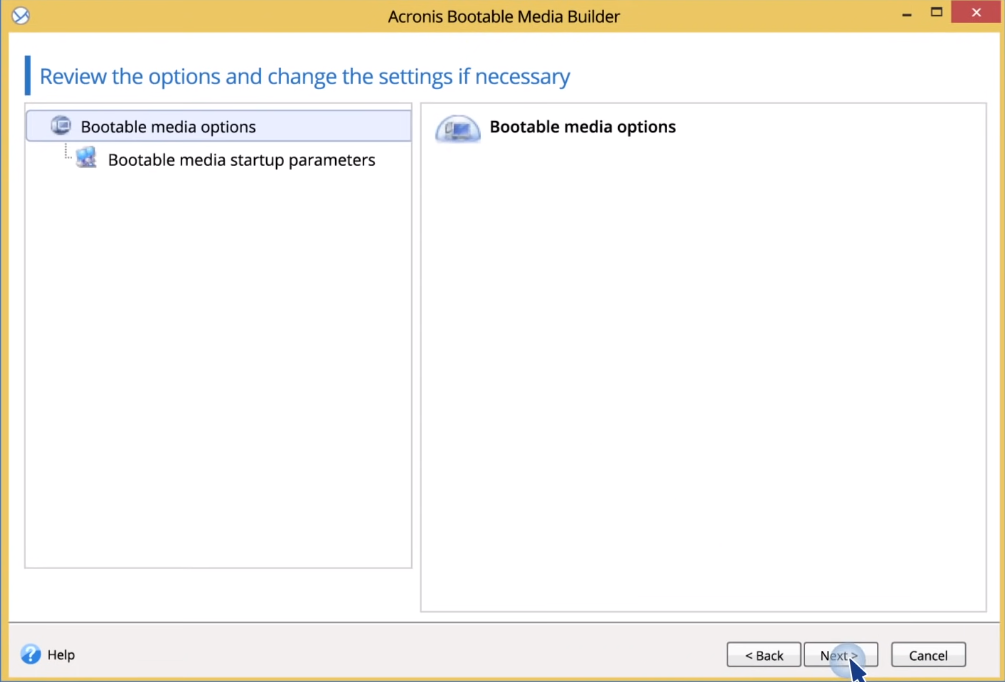
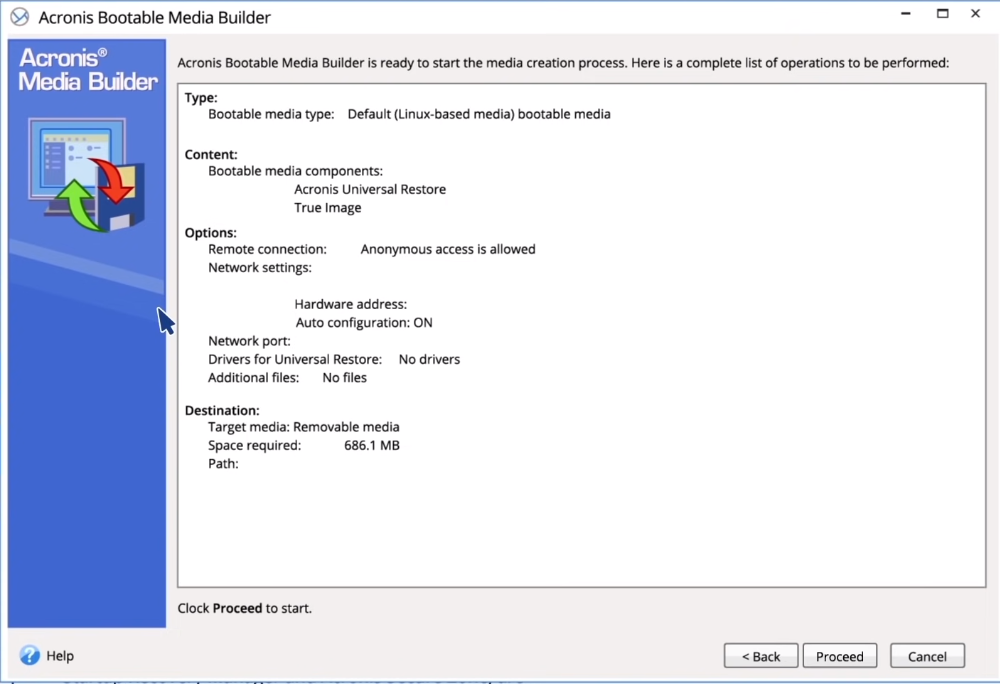
Step 8: On the next screen shown below, review the selected options and make any changes in case you had made a mistake. Click on "Next" to proceed.
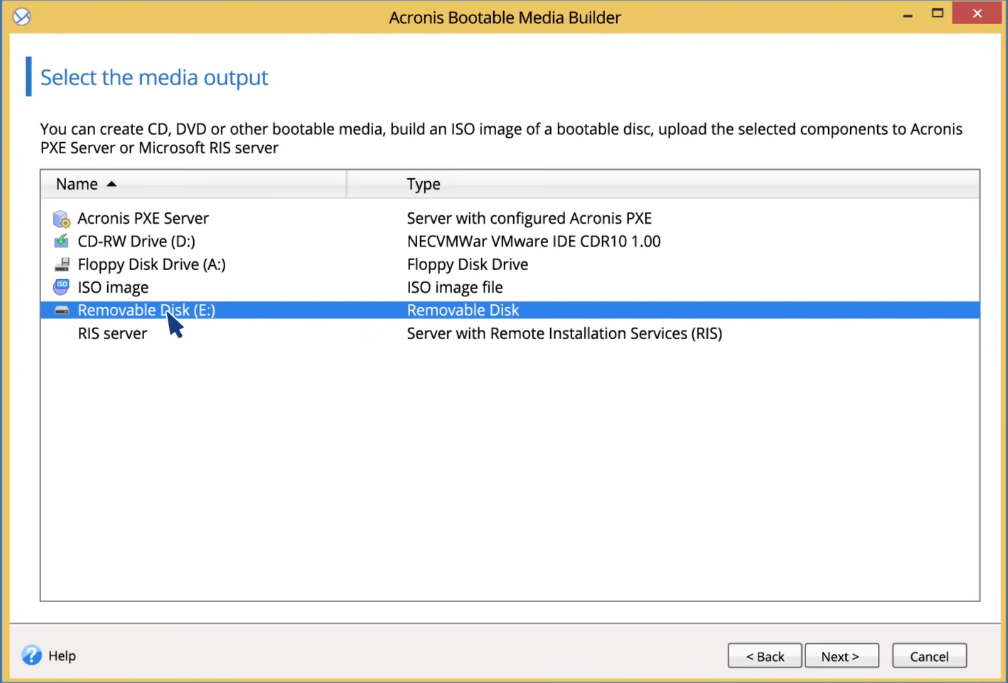
Step 9: On the next screen shown below, select the destination drive for the bootable media. This is the USB flash drive or blank DVD inserted in step 3 above. Click on "Next" to proceed.
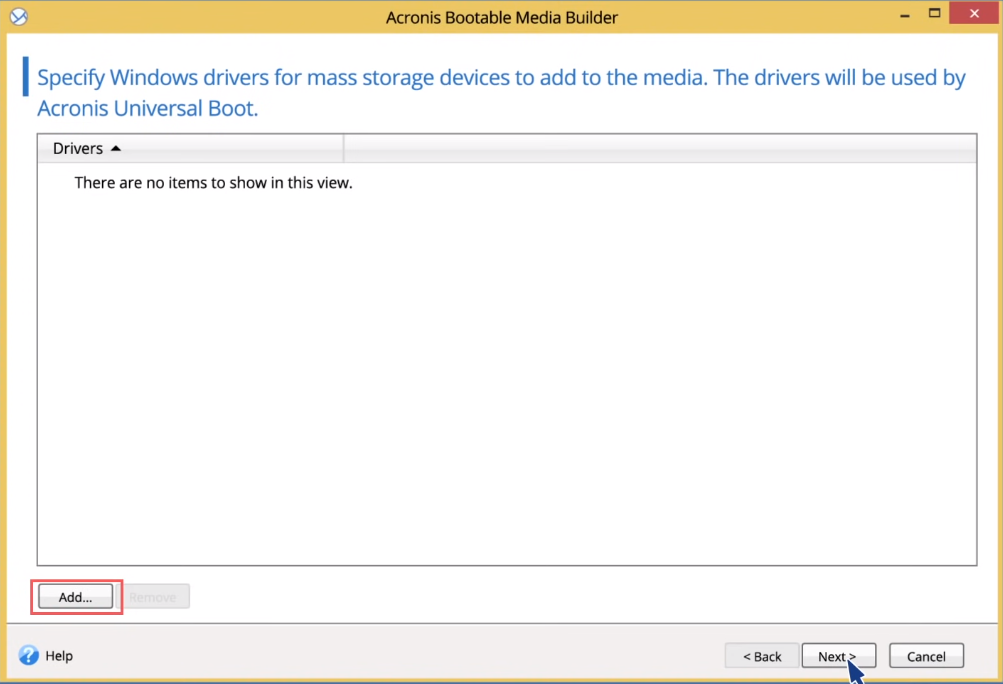
Step 10: On the next screen shown below, you can specify the Windows drivers for mass storage to be used by Acronis Universal Boot. This step can be skipped and the drivers can be added later when applying Universal Boot to a computer. Click on "Next" to proceed.
Step 11: When the media has been created, you will see the screen below. Unplug the drive or remove the DVD from the machine. You have successfully created your boot media with Acronis True Image and Acronis Universal Restore.
Preparing Drivers
Before applying Universal Restore to a Windows operating system, make sure that you have the drivers for the new HDD controller and the chipset. These drivers are critical to start the operating system. Use the CD or DVD supplied by the hardware vendor or download the drivers from the vendor’s Web site. The driver files should have the *.inf, *.sys or *.oem extensions. If you download the drivers in the *.exe, *.cab or *.zip format, extract them using a third-party application (e.g. free 7-zip tool or any other).
Make sure you have access to the device with drivers when working under bootable media. Even if you configure system disk recovery in a Windows environment, the machine will reboot and recovery will proceed in the Linux-based environment. Use WinPE-based media if the device is available in Windows but Linux-based media does not detect it.
Performing the Restoration
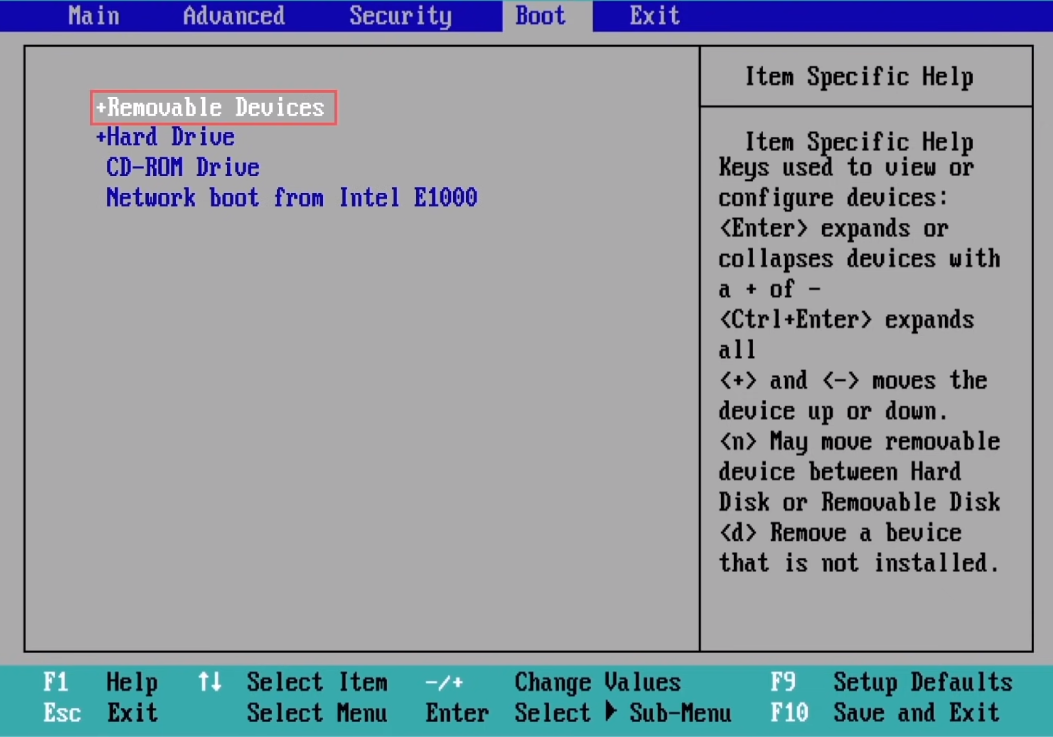
Step 1: Make your created bootable media the first boot device in BIOS as shown below.
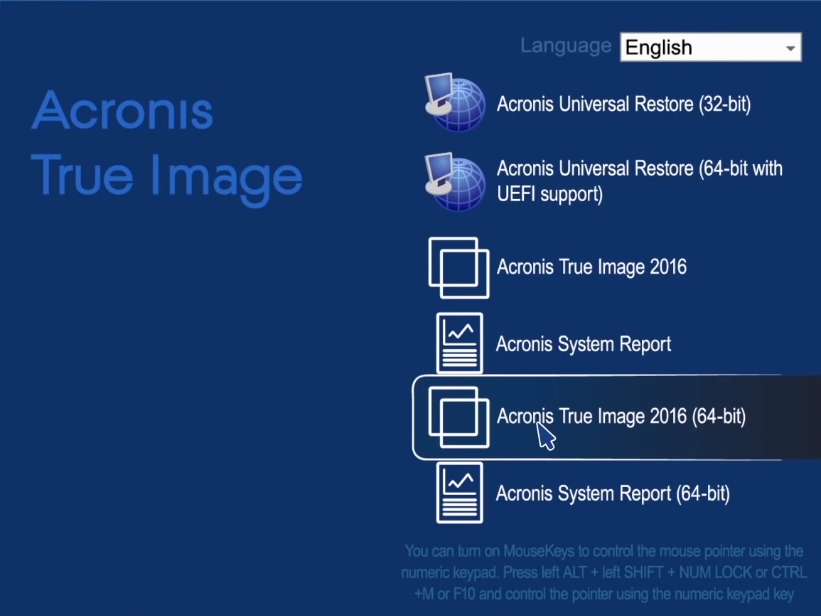
Step 2: Boot the computer from the boot media and select "Acronis True Image" as shown below.
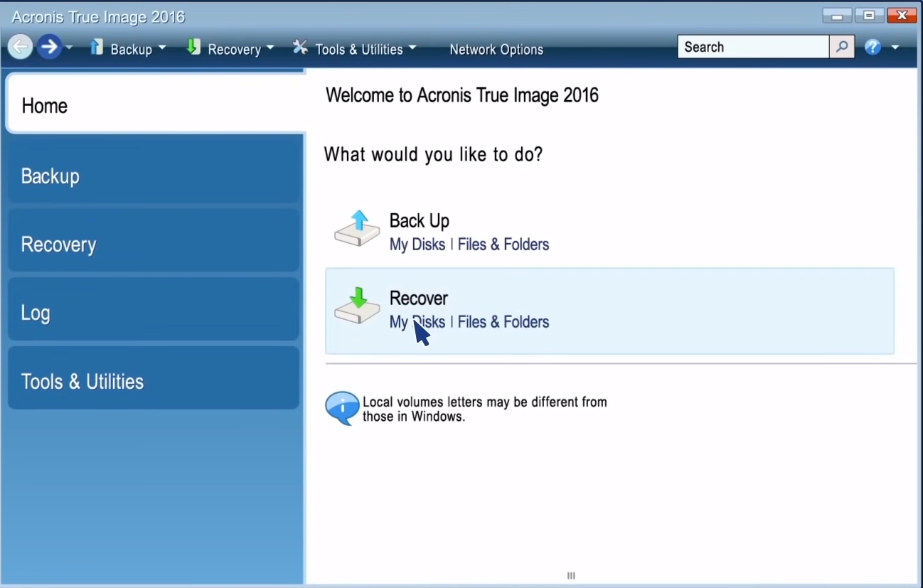
Step 3: On the Acronis True Image home screen shown below, select "My Disks" under "Recover".
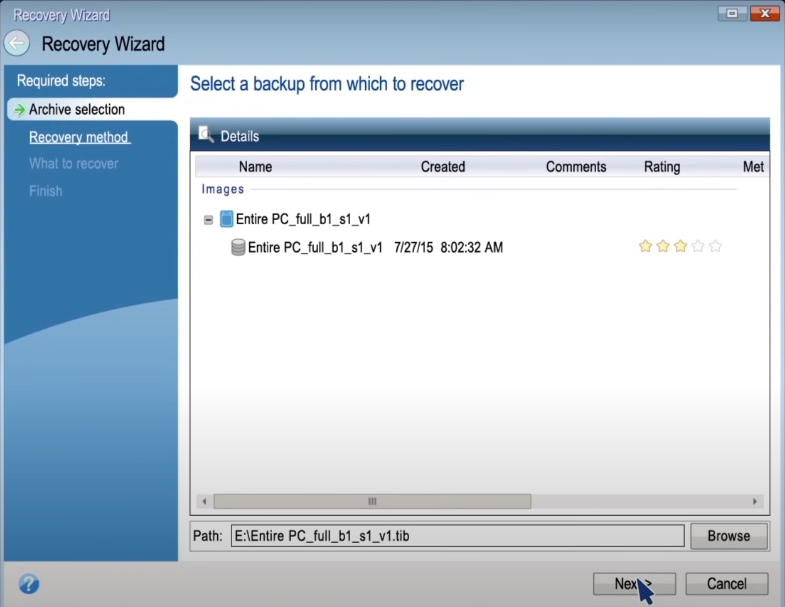
Step 4: Navigate to the drive where the disk backup or PC backup resides as shown below. Select the backup then click "OK". Click on "Next" to proceed.
Step 5: On the next screen shown below, select "Recover Whole Disks and Partitions" then click "Next" to proceed.

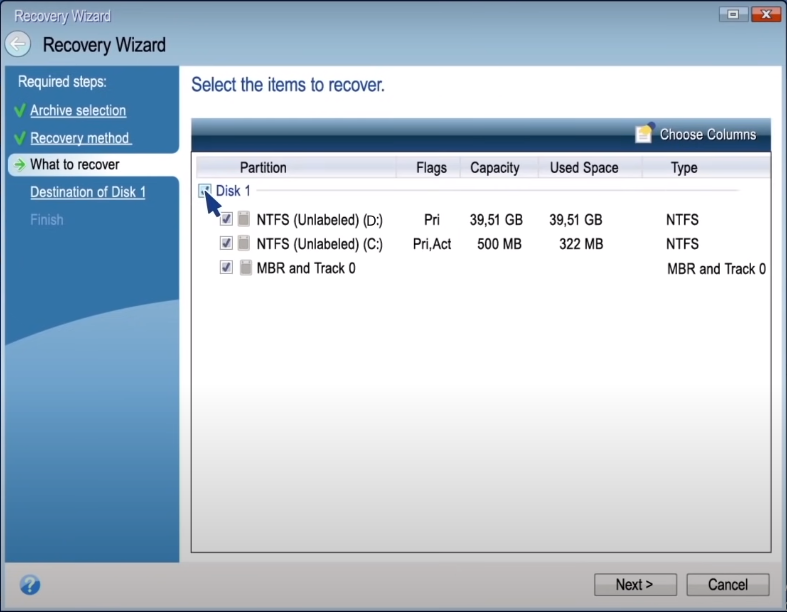
Step 6: On the "What to recover" screen shown below, select the disks you want to recover. If you want to recover your system only, select the system partition (usually C:). If the system has a system reserve partition, you need to select both the system reserve partition and the system partition fo r recovery. If you want to restore the entire PC, select the entire disk. Click "Next" to proceed.
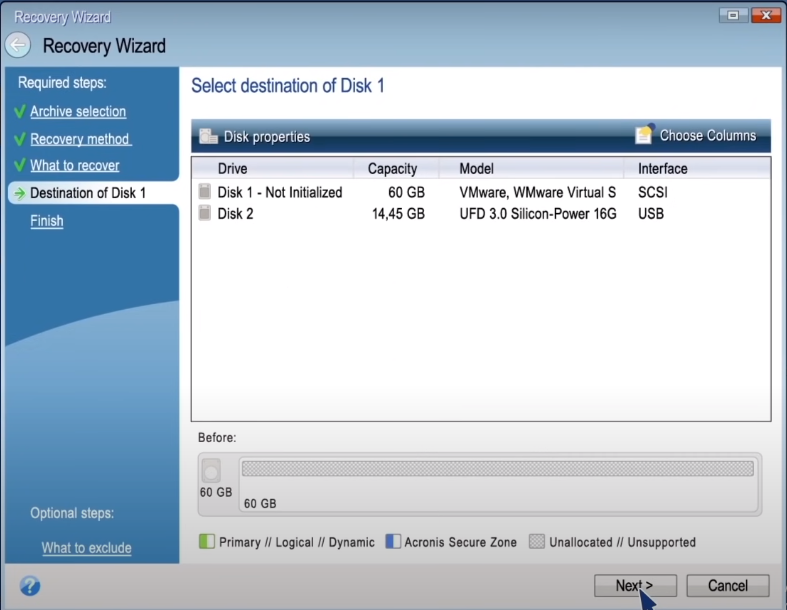
Step 7: On the next screen shown below, select the destination disk where the recovered files will be written to. Make sure the selected destination has enough storage space for the entire backup to fit. Click "Next" to proceed.
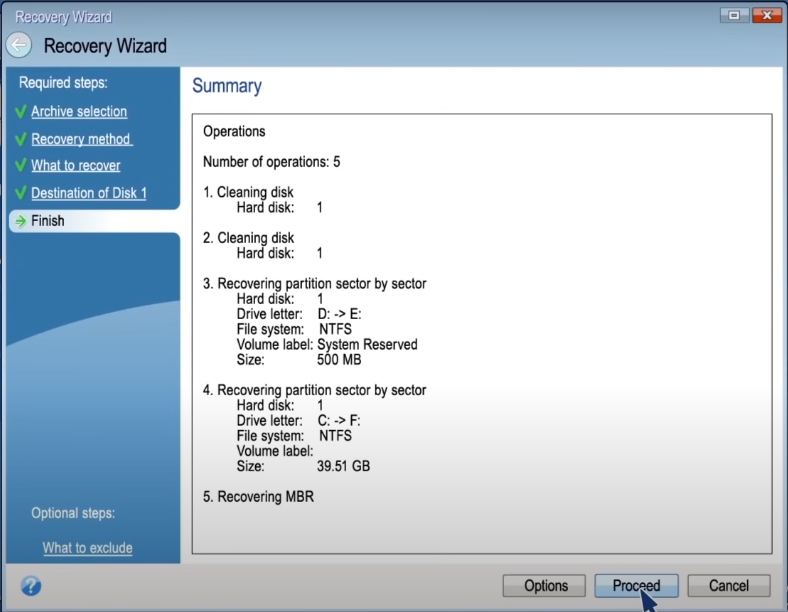
Step 8: On the summary screen shown below, carefully read the summary of operations. Click "Proceed" when you are sure everything is in order. The recovery process will start. When the operation finishes, click "OK" to exit the standalone Acronis True Image.
Step 9: Reboot the computer from the bootable media again. This time, select "Acronis Universal Restore" as shown below.

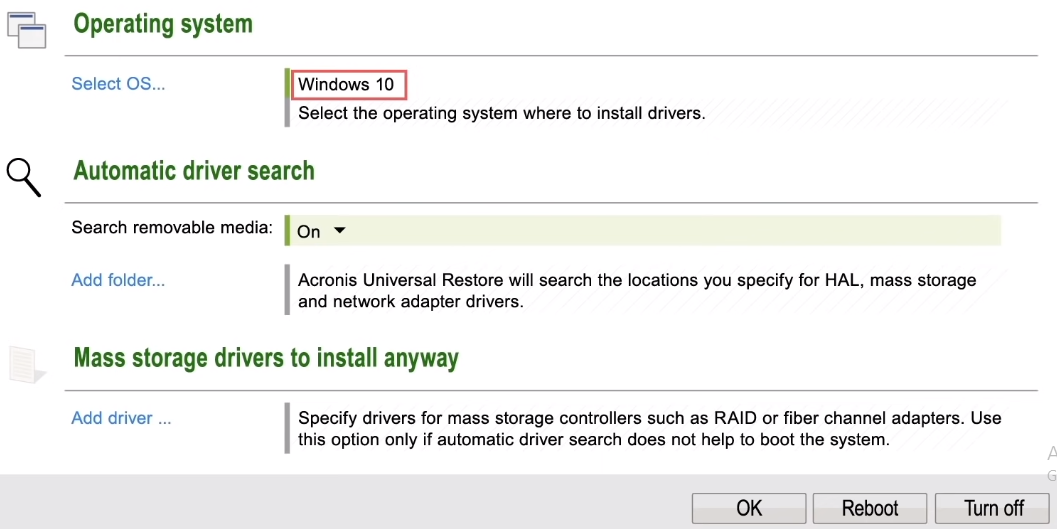
Step 10: The Acronis Universal Restore will show as below. If there are multiple operating systems on the machine, you will be prompted to select which one to apply Universal Restore to. Specify where the program will search for the HAL (Hardware Abstraction Layer), HDD controller drivers, chipset drivers, and network adapter drivers. In addition, the Universal Restore will search the Windows default driver storage folder. After you've specified the required settings, click "OK".
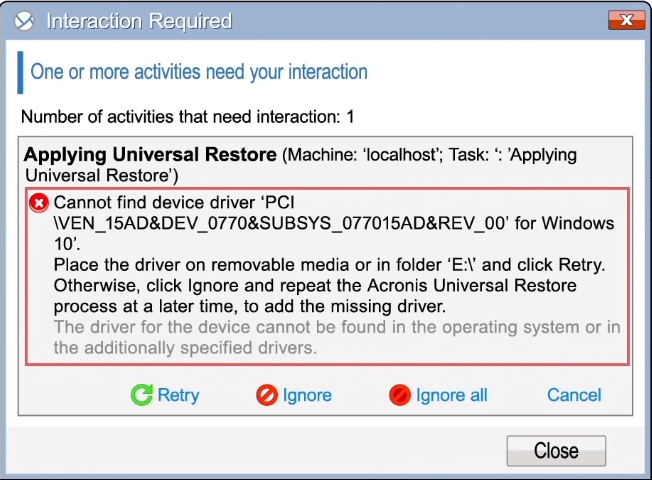
If Universal Restore cannot find the compatible drivers in the specified location, you will see the following error prompt. When you see the prompt, you should try to add the drivers to the location you have specified then click on "Retry". You can also click "Ignore" if you do not remember the location of the drivers.
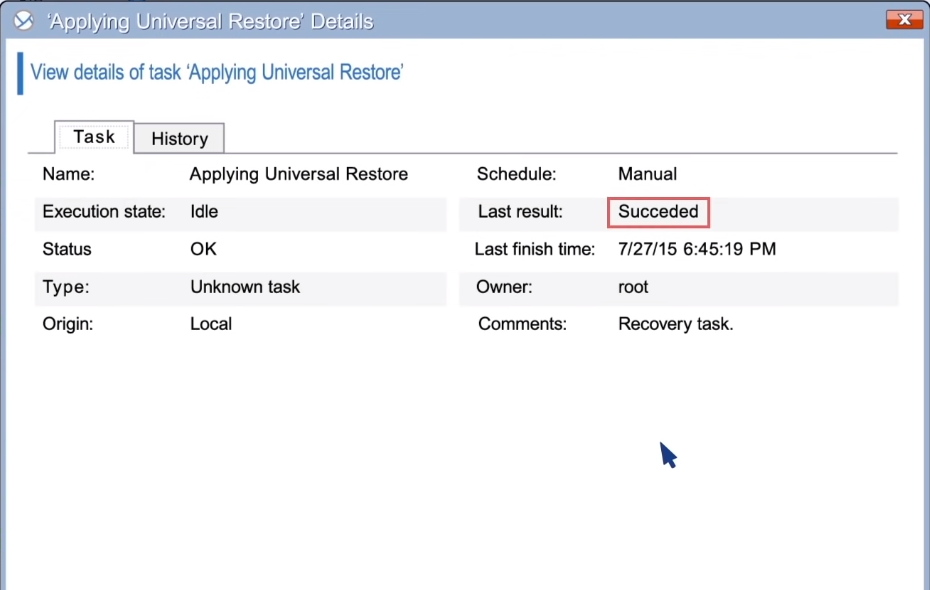
If you do not see a success message as below, you can always retry to apply the universal restore with the correct drivers.
After the restoration process finishes successfully, remove the bootable media and restart the machine. Once Windows boots, it will initialize the standard procedure for installing new hardware drivers to add network adapters, video adaptors, USB, and other drivers. Congratuolations! You have successfully performed a bare-metal restore using Acronis Universal Restore.

