

Continuous Data Protection is an innovative feature of Acronis Cyber Protect that allows you to seamlessly backup even minor changes to selected files and data between scheduled backups on a continuous basis. This significantly reduces the number of full and incremental backups required to protect the machine in question, therefore reducing the server load dramatically. You can track files modified by specific applications e.g. tracking changes made to an MS Word document to ensure the changes are not lost. In case of a malware infection, you can restore the data from the last backup and apply the latest collected changes so that no data is lost.
This article will outline how to enable tracking of Microsoft Word for a specific machine. Alternatively, we can track changes to specific folders or files which are frequently updated and are crucial to business continuity.
Step 1: Log in to the Acronis Cyber Protect console, navigate to the "Devices" page and select the machine in which you would like to turn on document tracking.
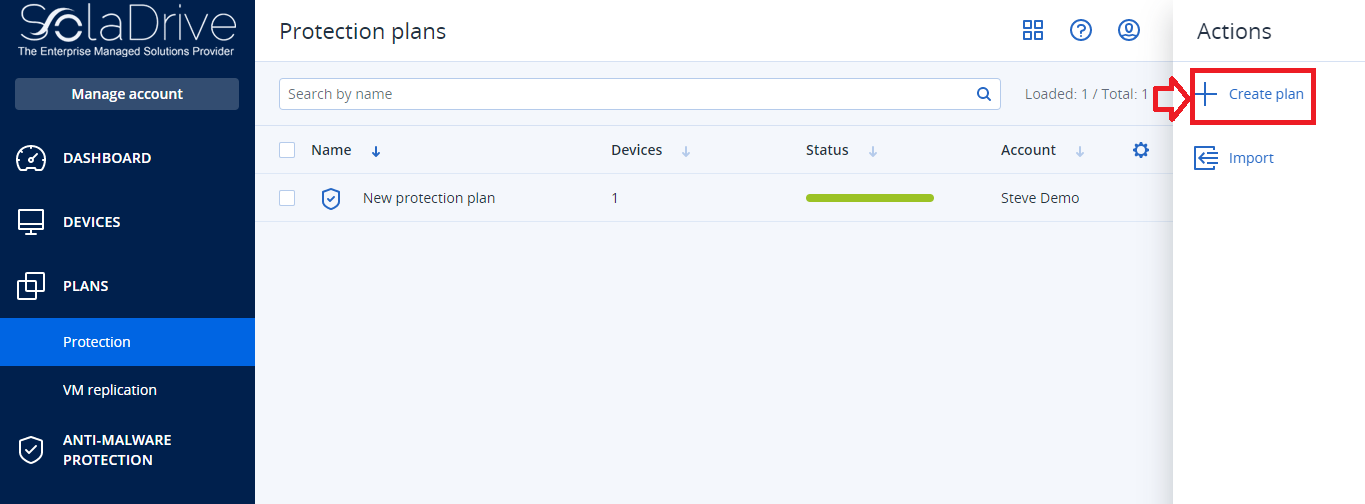
Step 2: Click on the "Create Plan" button on the right-hand side popup panel as shown below.
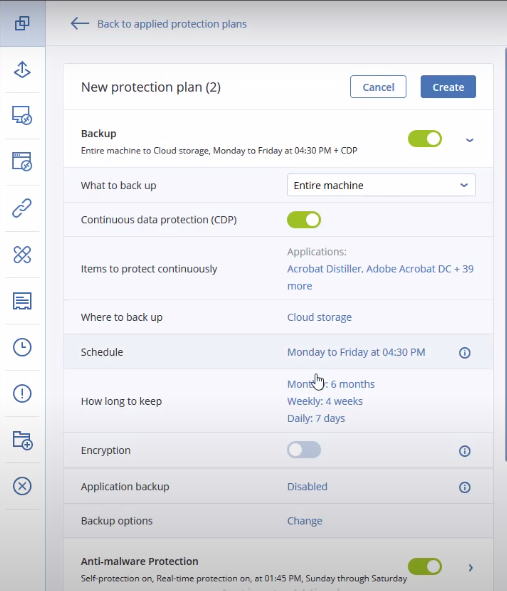
Step 3: Expand the "Backup" module as shown below and enable "Continuous Data Protection".
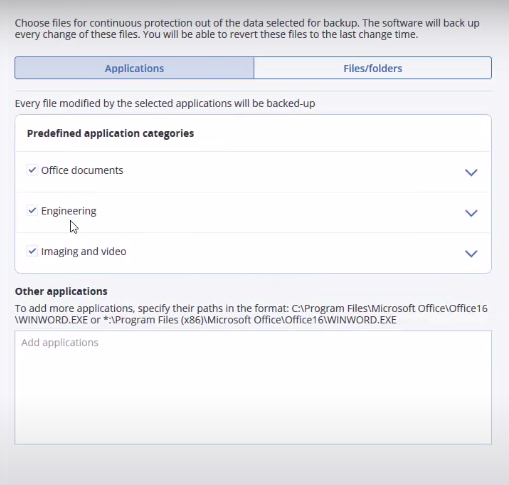
Step 4: On the "Items to protect continuously" section, click on more. You will see a list of pre-defined application categories as shown below. Deselect the "Engineering" and the "Imaging and video" options since we are only interested in tracking documents.
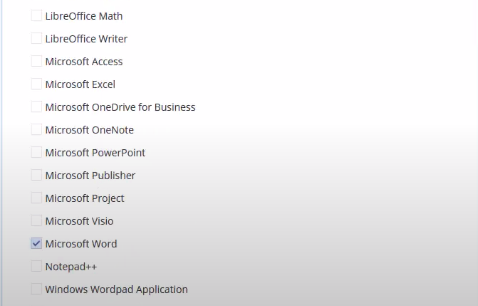
Step 5: Expand the "Office Documents" section, deselect all other options except "Microsoft Word" as shown below. Click "OK" to proceed
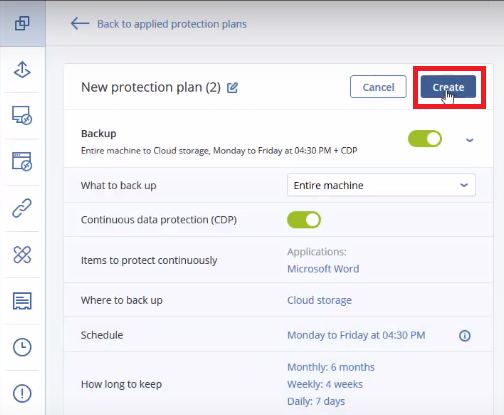
Step 6: If needed, you can alter the other protection plan settings as described in this article. Click on the "Create" button as shown below to creeate the protection plan.
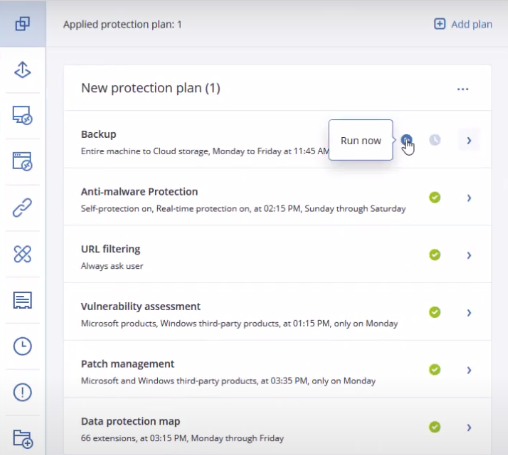
Step 7: Click on the "Run Now" button as shown below to initiate the backup process manually.
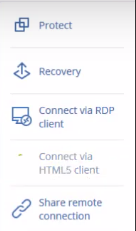
Step 8: Navigate to the "Devices" page and select the machine which we just started tracking. On the right-hand side panel, click on "Connect via HTML5 Client" as shown below.
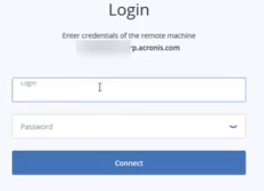
Login to the machine remotely and securely in the login screen shown below.
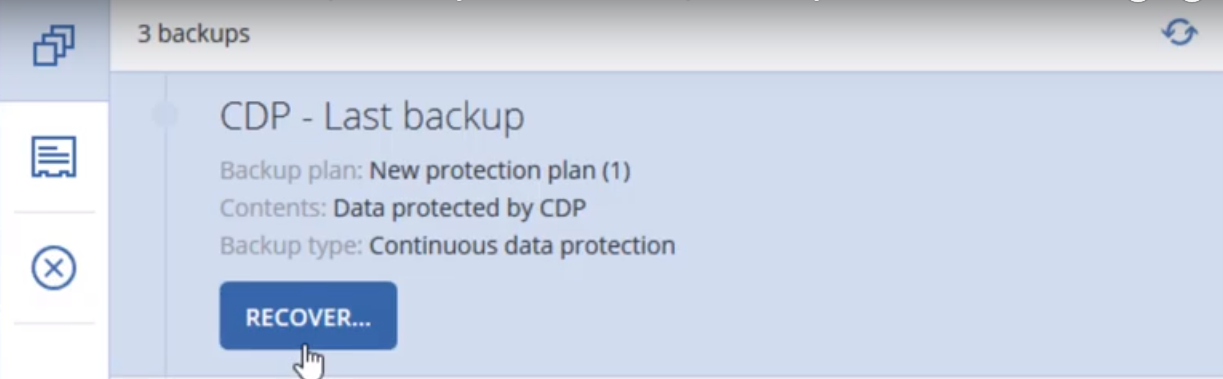
 Step 9: Navigate to the local folder specified in the Continuous Data Protection settings. Create a new Word document using the Microsoft Word application and save it. Quit the remote connection session. In the Acronis Cyber Protect console, navigate to the backups storage for this machine and open the latest backup. You can see, the Word document you just created is already seamlessly integrated into the existing backup. No new backup has been created.
Congratulations! You have successfully enabled Continuous Data Protection for Microsoft Word documents in a protection plan.

