

In ERPNext, you can add a custom module that fulfills some functionality that you wanted but does not come out of the box with the software. This article outlines how to install an addon module to ERPNext.
Step 1: Copy the new module directory and all its contents to the "Apps" directory of your ERPNext instance.
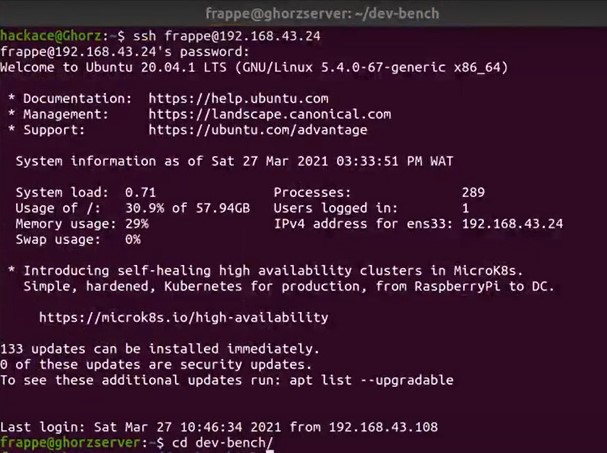
Step 2: Log in to your server via SSH and navigate to the ERPNext installation location (the dev-bench directory). All terminal commands will be run from this location.
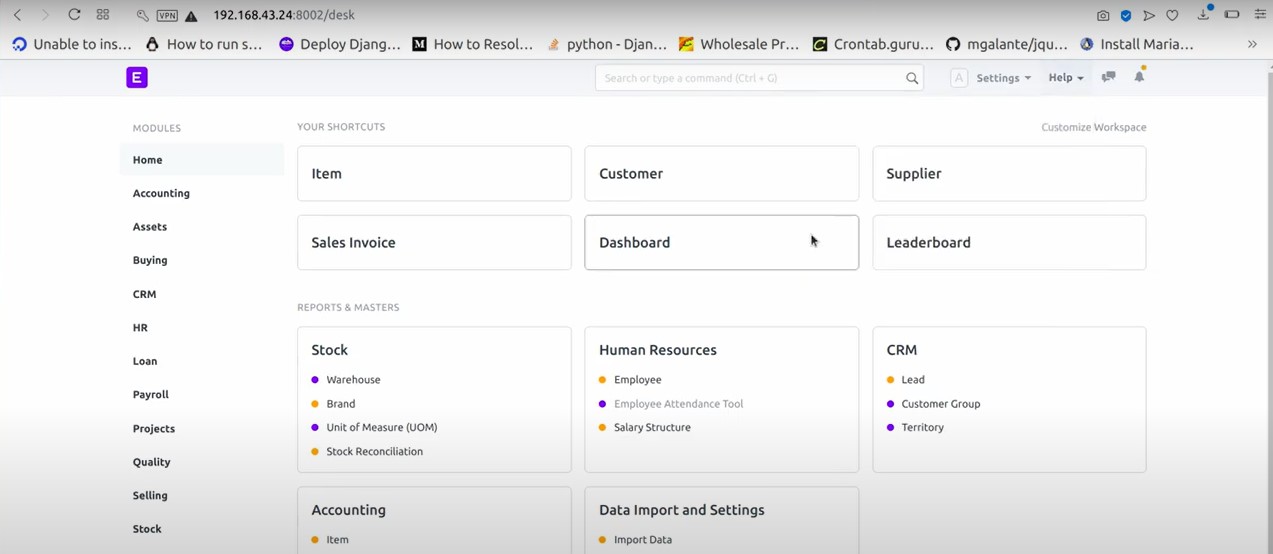
Step 3: Log in to your ERPNext instance as an administrator to access the dashboard.
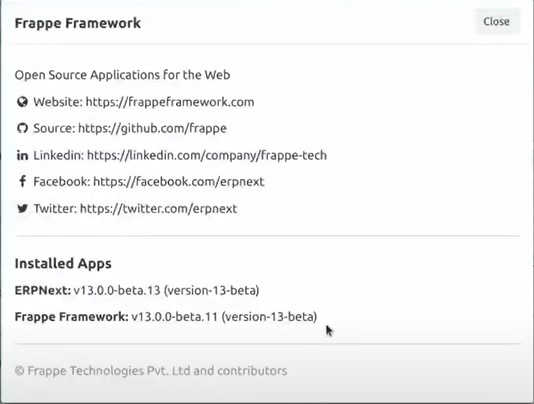
 Step 4: Check the apps that have been installed. Click on “Help” in the top-right corner, then select “About”. Most likely, your new module will not yet appear. After installation, it will be listed here.
 Step 5: Check if the new module appears on the "apps.txt" file in the "sites" directory. Run the following commands in your terminal window to do this.
ls sites
nano sites/apps.txt
This file lists all the modules available within the ERPNext instance. Your new module should be listed in this file. You are now ready to perform the actual installation.
Step 6: Install the addon module using the following command.
bench --site dev.local install-all [app_name]Step 7: Run database migrations. We perform a database migration to set up any new tables or database configurations that the newly installed module requires. This is done by running the following command:
bench migrateCongratulations! You have successfully installed a new addon module in ERPNext.
See Soladrive's managed ERPNext service plans here

