

Using WooCommerce Integration, you can automatically create Sales Orders in ERPNext for orders placed on WooCommerce via the WooCommerce webhook. This guide walks you step by step through the integration process.
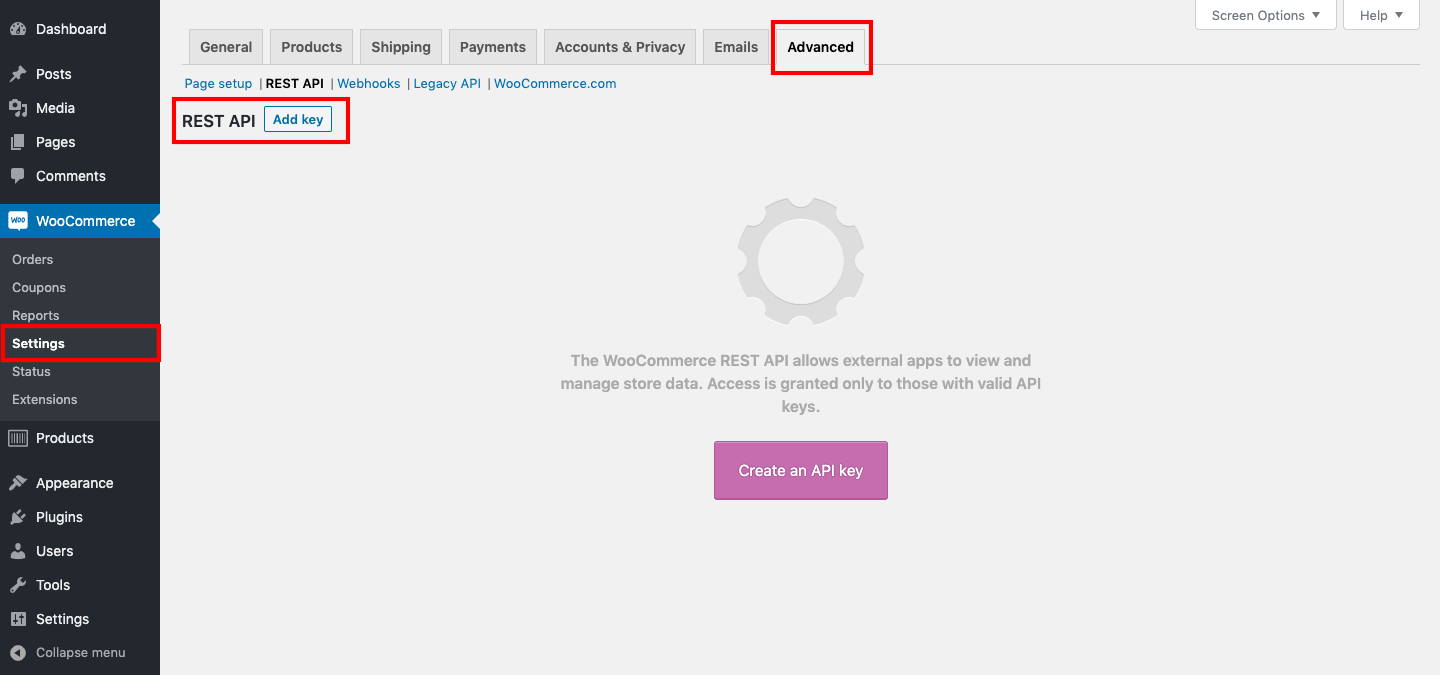
Step 1: You first need to generate an API Key and API Secret from your WooCommerce site.
-
Log in to the WordPress dashboard.
-
Go to WooCommerce > Settings > Advanced > REST API.
-
Click on “Add key”.
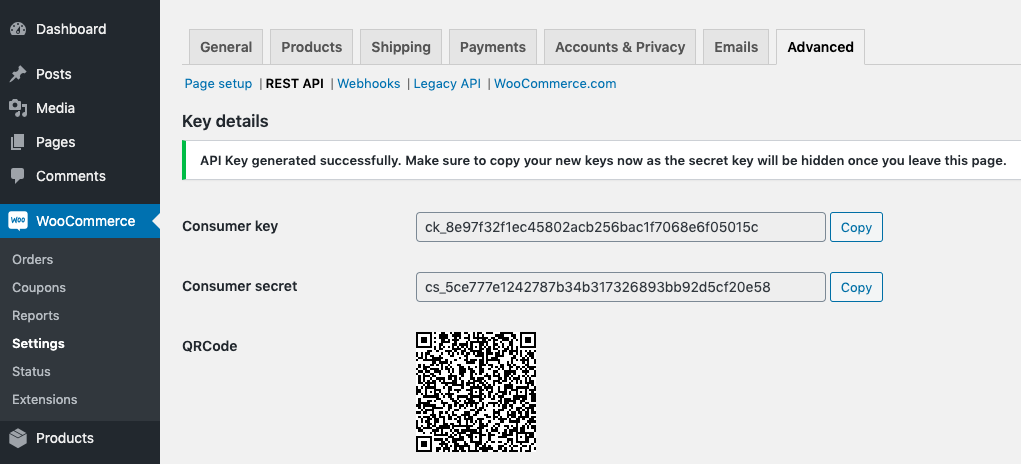
Step 2: Click the “Add key” button, fill in the required details, and then click “Generate API key”. You will now see your Consumer Key and Consumer Secret (make sure to copy and store them safely). You will see the generated keys like below:
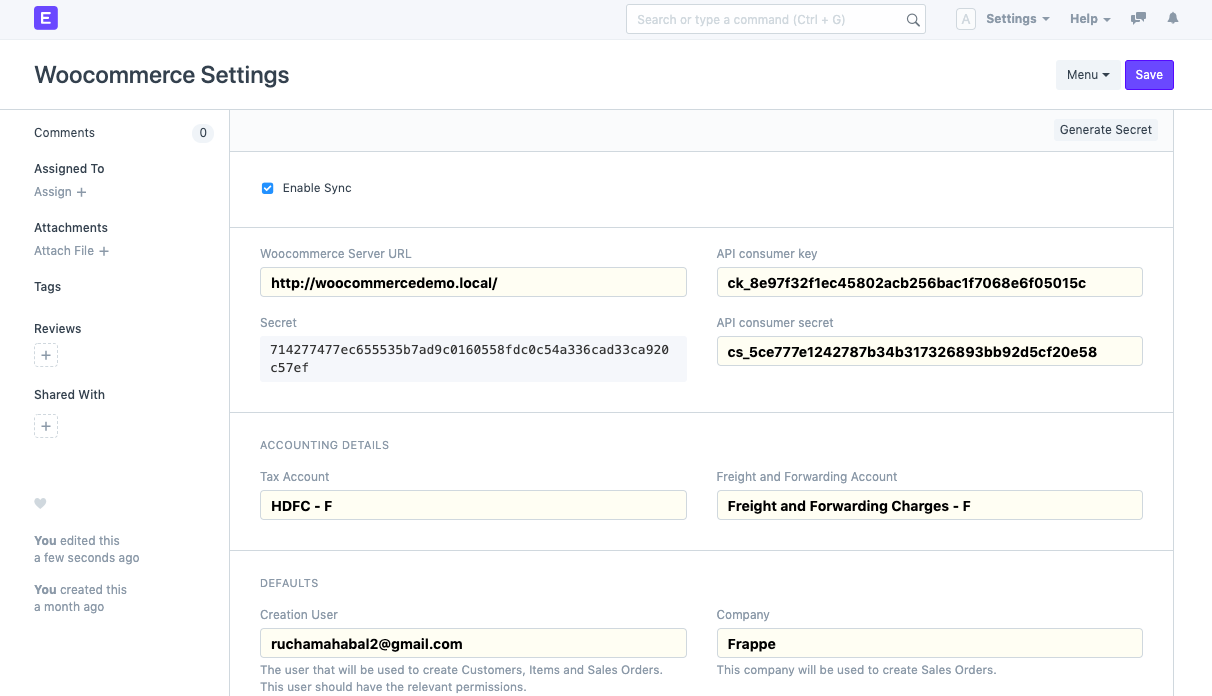
 Step 3: In your ERPNext instance:
-
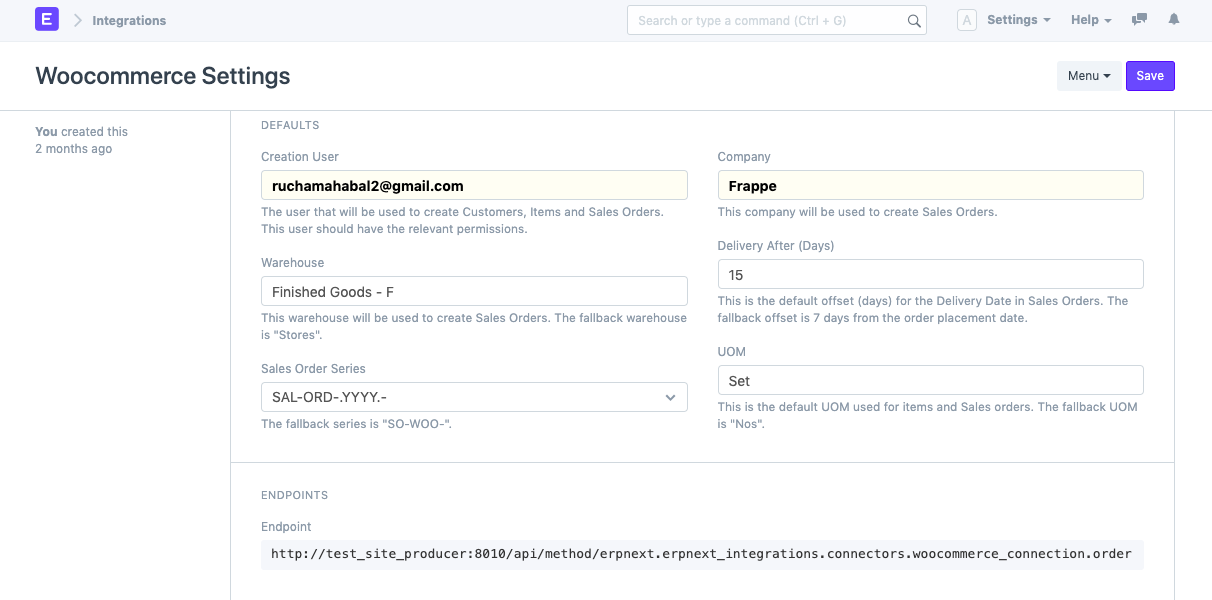
Navigate to Home > Integrations > Settings > WooCommerce Settings.
-
Paste the API consumer key and API consumer secret generated in Step 2.
-
Enter your WooCommerce Server URL.
-
Ensure “Enable Sync” is checked.
-
Select the Tax Account and Freight & Forwarding Account in the Account Details section.
-
Under Defaults, choose the Creation User (this user must have permissions to create Customers, Items, and Sales Orders).
-
Select the Company to link Sales Orders.
-
Click Save
After saving, ERPNext automatically generates a Secret and an Endpoint.
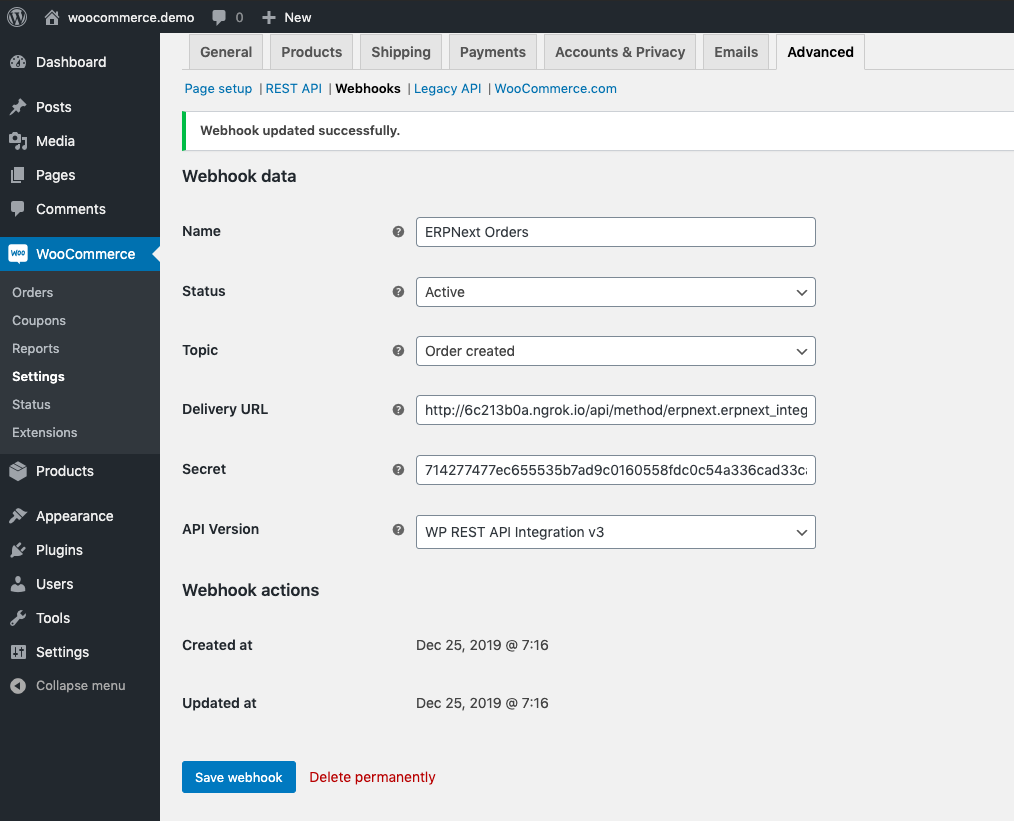
Step 4: On your WooCommerce site:
-
Go to WooCommerce > Settings > Advanced > Webhooks.
-
Click on “Add webhook”.
-
Enter a webhook name of your choice.
-
Set Status to Active.
-
Select Topic = Order created.
-
Copy the Endpoint from ERPNext and paste it into Delivery URL.
-
Copy the Secret from ERPNext and paste it into the Secret field.
-
Leave API version as default and click Save Webhook.
Step 5: From your WooCommerce website, register yourself as a user on the Account page. Now Click on the "Addresses" option and enter the required details. Click on the "Shop" option. You can now see the available products. Add the desired products to the cart and click on "View Cart". From the cart, once you have added the desired products, you can click on "Proceed to Checkout". All billing details and Order details can be seen now. Once you are ok with it, click on the "Place Order" button. An "Order Received" message can be seen indicating that the order has been placed successfully. Now on your ERPNext instance, check the following Document Types: Customer, Address, Item, and Sales Order. They will be fetched and created from the webhook data. In case the orders are not synced, you can check the error in "Home" > "Settings" > "Core" > "Error Log".
After everything has been set up, you will notice that some settings have been configured by default in ERPNext's WooCommerce settings as follows:
- Warehouse: This Warehouse will be used to create Sales Orders. The default Warehouse is "Stores".
- Delivery After (Days): This is the default offset (days) for the Delivery Date in Sales Orders. The default offset is 7 days from the order placement date.
- Sales Order Series: You can set a separate series for Sales Orders created via WooCommerce. The default series is "SO-WOO-".
- UOM: This is the default UOM used for Items and Sales Orders. The default UOM is "Nos".
Congratulations! You have successfully integrated ERPNext with WooCommerce for a fluid E-Commerce workflow.
See Soladrive's managed ERPNext service plans here

