

Integrating ERPNext with Shopify provides a seamless hybrid solution where sales orders generated through a Shopify store are automatically pulled into ERPNext for processing and fulfillment. This article outlines how to integrate ERPNext with Shopify efficiently..
Step 1: Install the Shopify Connector for ERPNext. If your ERPNext instance is hosted on Frappe Cloud, you can quickly install the app by going to your site Dashboard. The app is available in Frappe Cloud Marketplace. If you are self-hosting ERPNext you can install the app using Frappe bench. Refer bench documentation for installing Frappe Apps.
bench get-app ecommerce_integrations --branch mainStep 2: To create a custom app in Shopify, click on "Apps" in the menu bar.

Step 3: Click on "Develop apps for your store" as shown below.

Step 4: Create a new "ERPNext Integration" app as shown below.
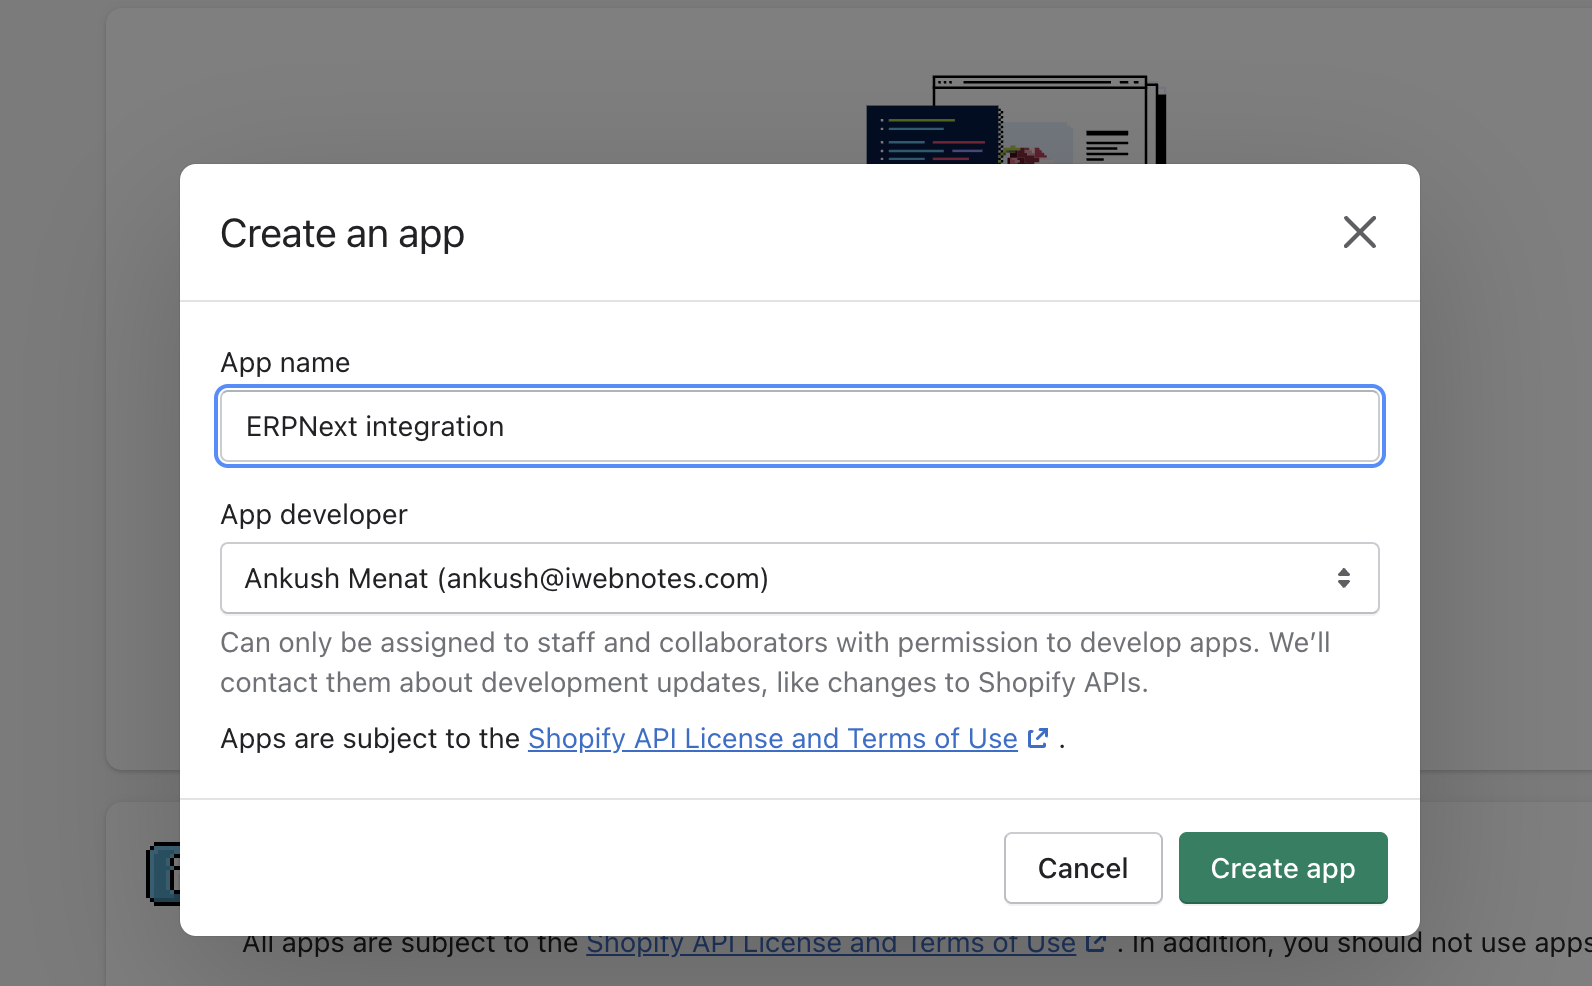
Step 5: Enter all the details and create the app. Each app has its own API key, Password, and Shared secret. You will see the following screen after you create the app.
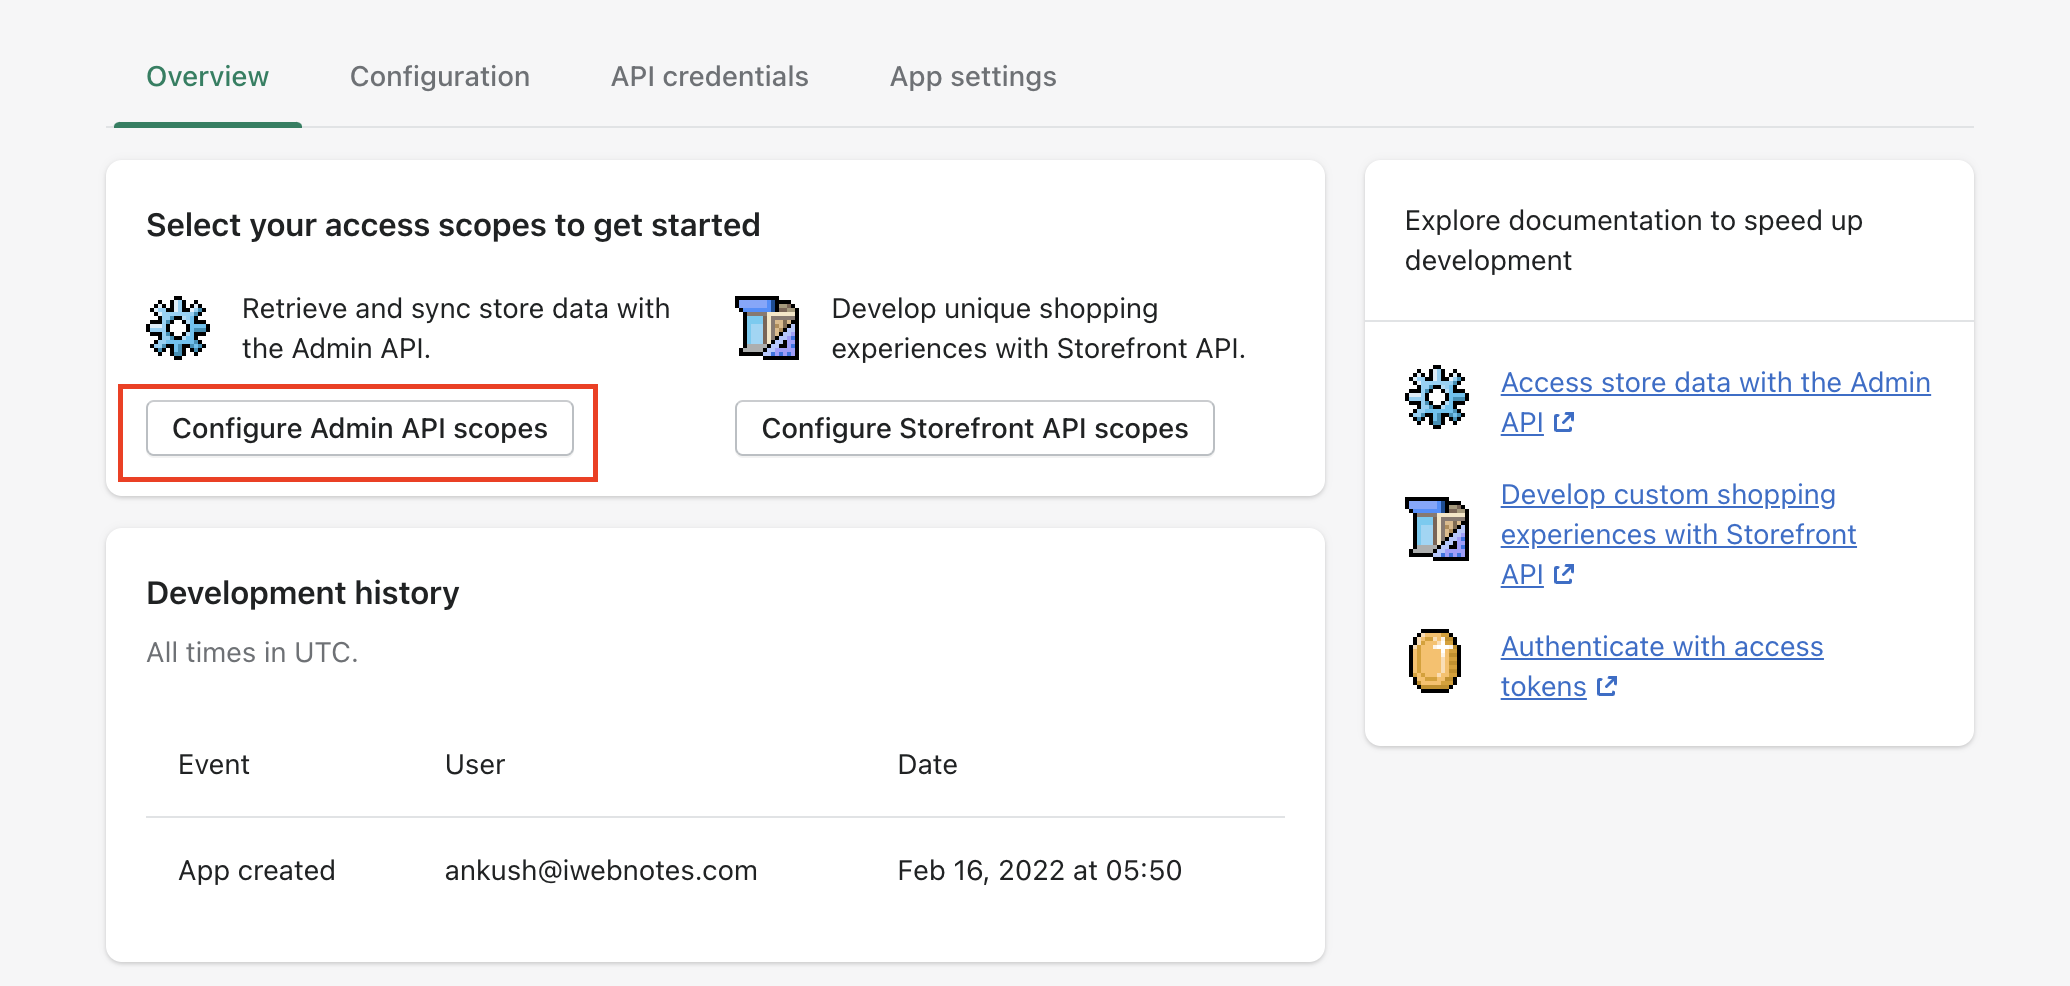
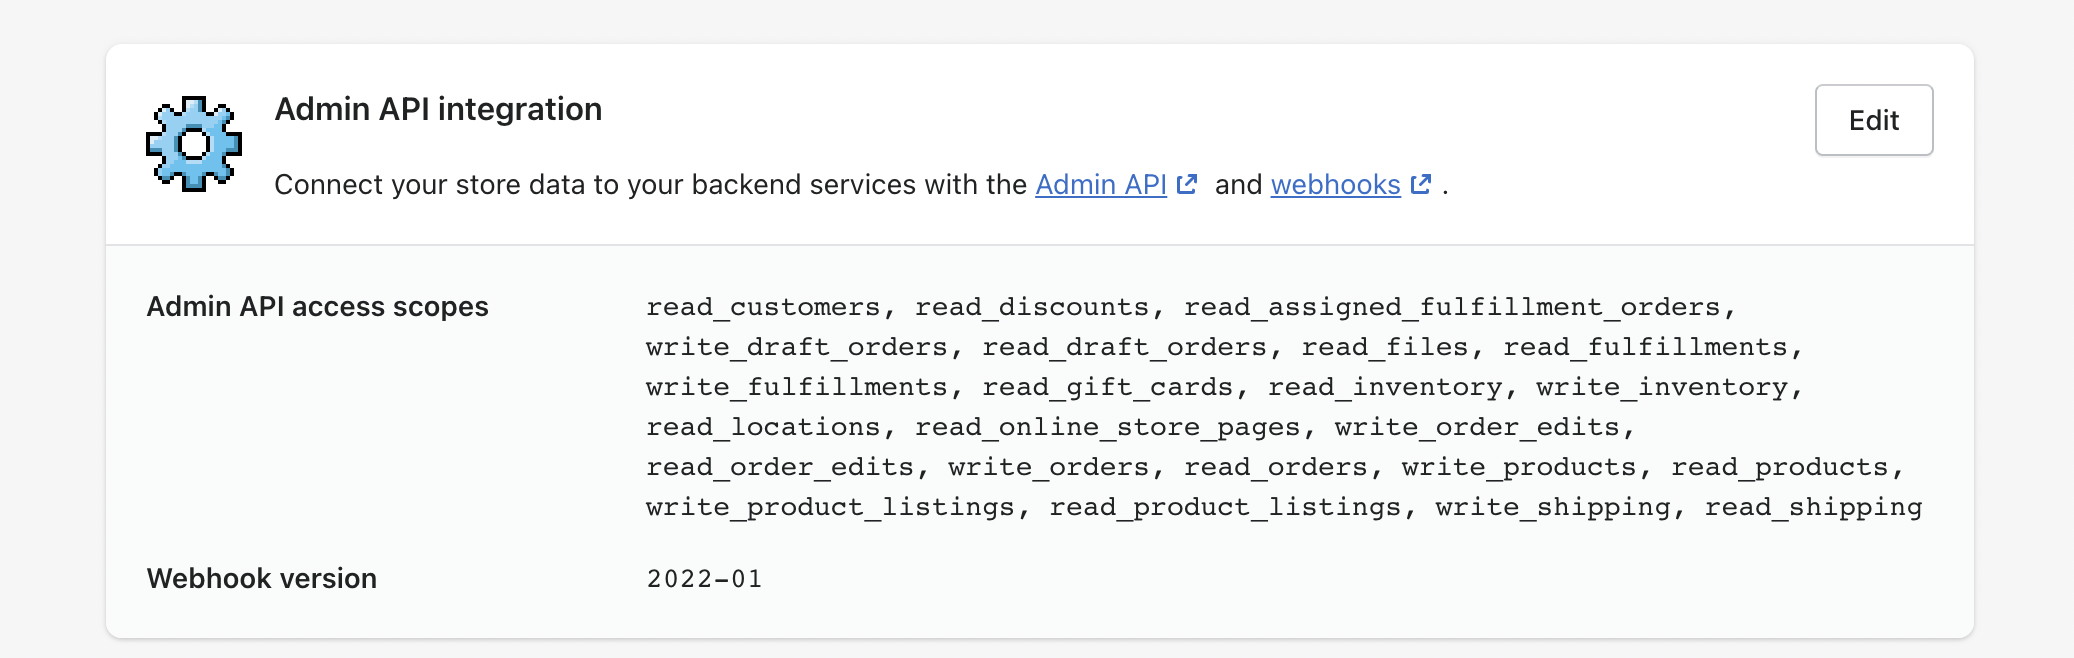
Step 6: Click on "Configure Admin API scopes" as shown above. Set the permissions to the app as follows:
- Draft Orders - Read and Write
- Orders - Read and Write
- Location - Read
- Customers - Read
- Assigned fulfillment orders - Read and Write
- Products - Read and Write
- Product listings - Read and Write
- Inventory - Read and Write
Once done, the admin scopes should appear as follows:
Step 7: Install the app on the dialogue shown below.

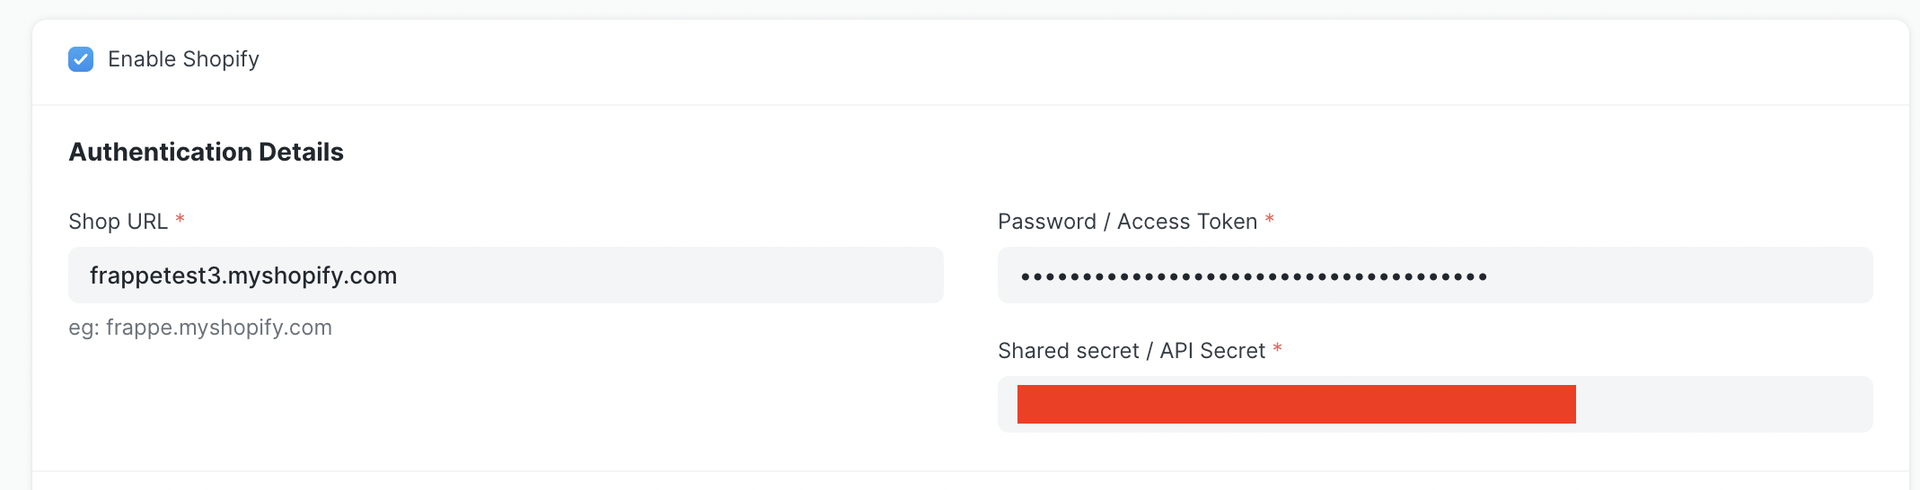
Step 8: Once you have set up ERPNext on Shopify, you need to set up Shopify on ERPNext. Go to "Shopify Settings" and enter the Shopify site URL, access token, and API Secret from Shopify's Private App as shown below.

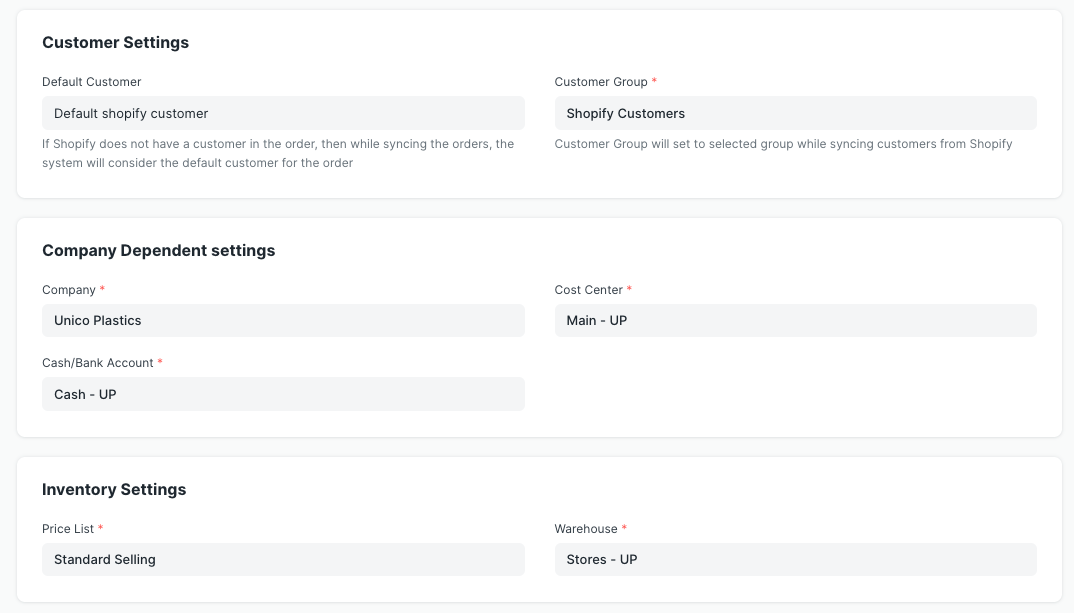
Step 9: Setup Customer, Company, and Inventory configurations as shown below.
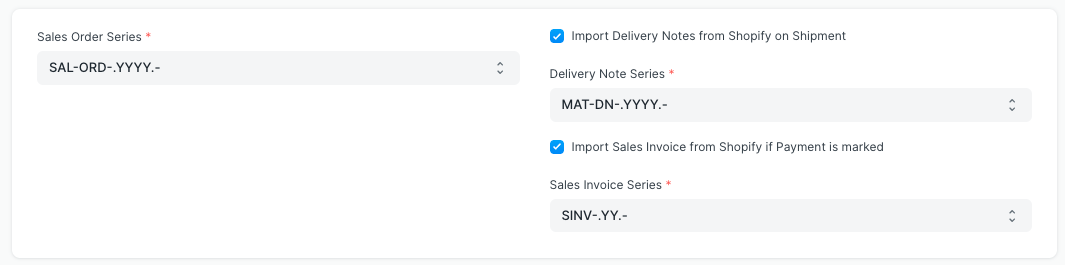
Step 10: Configure Sync Settings. ERPNext pulls Orders from Shopify and generates Sales Orders. You can configure ERPNext to capture payments and fulfillments against these orders automatically.
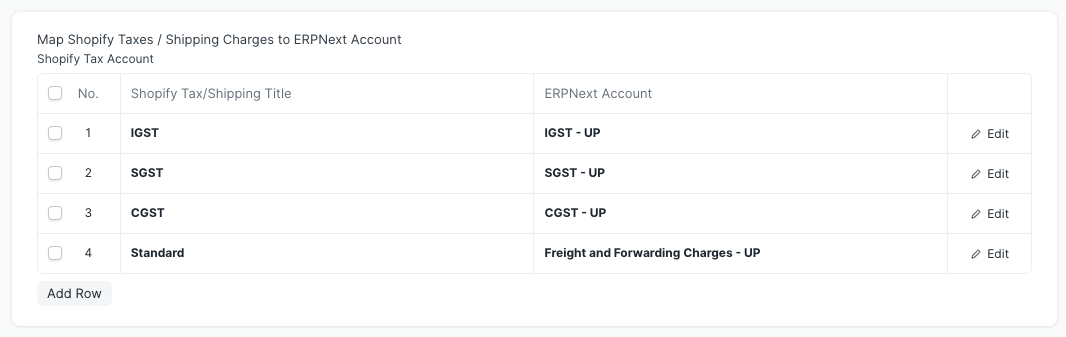
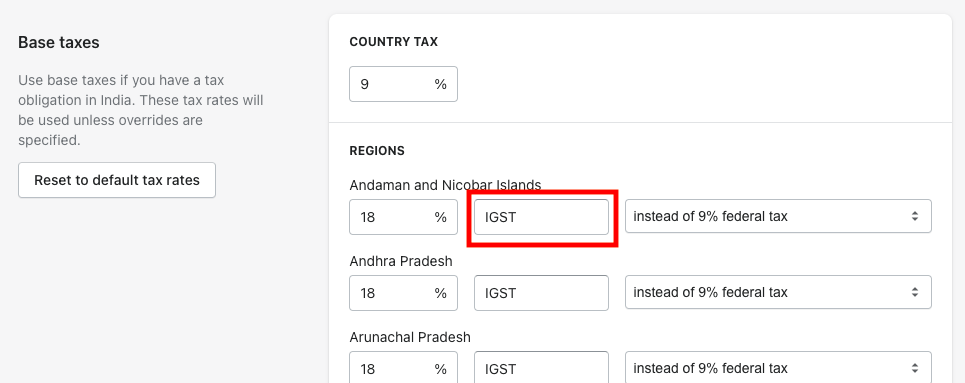
Step 11: Configure the Tax Mapper. Prepare the tax and shipping charges mapper for each tax and shipping charge you apply in Shopify as shown below. You can find the name of your taxes on your Shopify Admin page.
Once all configurations are set, enable Shopify sync and save the settings. This registers the API with Shopify and initiates automatic order synchronization between Shopify and ERPNext.
Congratulations! You have successfully integrated Shopify’s front-end with ERPNext’s back-end.
See Soladrive's managed ERPNext service plans here

