

Email communication is integral to managing business operations efficiently, and Odoo, a robust ERP and CRM platform, offers powerful tools to streamline this process. Configuring email servers within Odoo ensures seamless communication with customers, suppliers, and team members. In this guide, we'll walk you through the steps to set up both incoming and outgoing mail servers in Odoo. You need to log in to Odoo as an administrator.
Configuring Outgoing Mail server
Step 1: Access Odoo Settings. Log in to your Odoo instance as an administrator then go to Settings >> Technical >> Outgoing email servers. Here you can set up the outgoing servers.
Step 2: Configure SMTP Server: Click on "Create" or "Edit" to configure a new SMTP server. You will see the interface below.
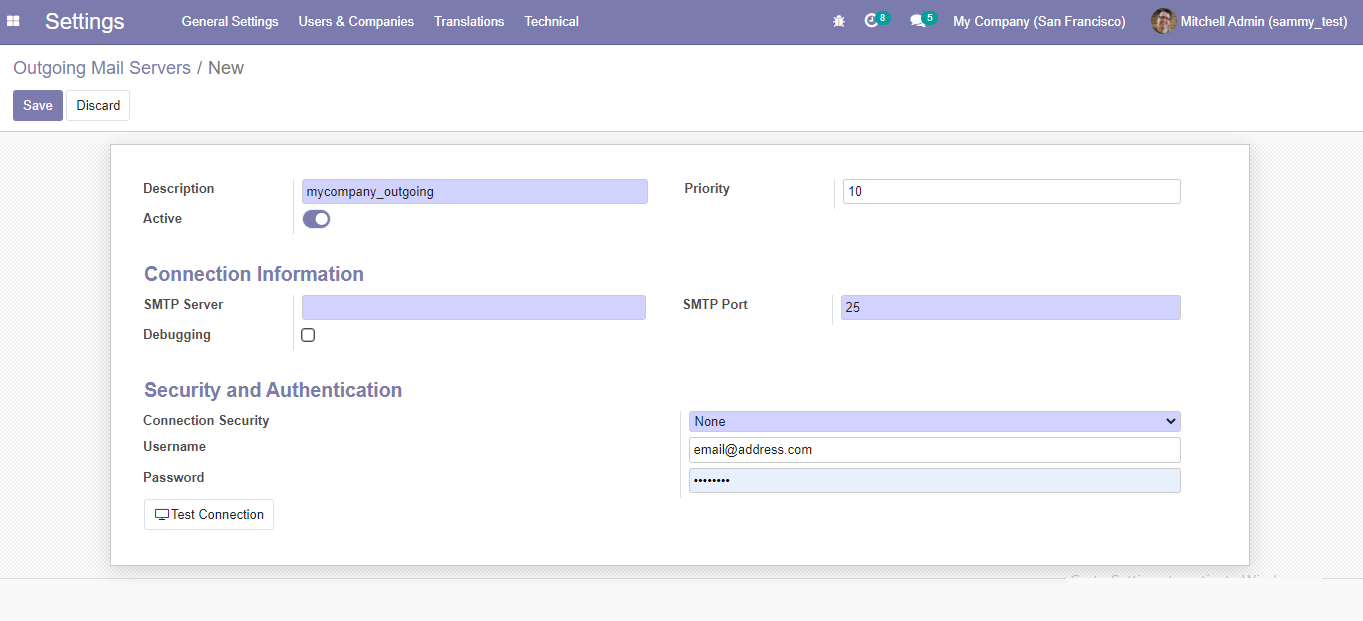
Follow the below descriptions of the fields to help you configure the SMTP Outgoing Mail Server
- Description: A description of the outgoing mail server.
- Priority: The priority of your mail server. The lower the number the higher the priority. This will mean that the e-mail server with the lowest number will be used the most.
- SMTP server: The pointer to the SMTP of your server, for example, smtp.gmail.com.
- SMTP Port: The port of your SMTP server, for example, port 465 for Gmail.
- Connection security: The type of security. It would be best if you chose SSL/TLS for Gmail. The data is then sent over HTTPS.
- Username: Your e-mail account, in this example [email protected]
- Password: The password of your e-mail account
Once you've filled out the form, click on test connection if testing is successful you will get a connection successful message.
TIP: by default, the time that Odoo sends e-mails from Odoo is every 1 hour. If you wish to modify this you should go to Settings > Automation > Scheduled Actions and open up the record ‘Email Queue Manager’. Modify the time to your liking. For example every 2 minutes.
Configuring Incoming Mail server
Step 1: Access Odoo Settings. Log in to your Odoo instance as an administrator then go to Settings >> Technical >> Incoming email servers. Here you can set up the incoming servers.
Step 2: Configure SMTP Server: Click on "Create" or "Edit" to configure a new SMTP server. You will see the interface below.

Here are the field descriptions for incoming mail servers.
- Name: A name that you can choose, take something that lets you know which email server this is.
- Server Type: You can choose for POP, IMAP, and local here. POP is the most used one and is used for getting emails from the server to a client.
- Server Name: The name of the server. Usually, you can find this with a simple Google search (pop.gmail.com).
- Port: The port where the server (e-mail) listens to.
- SSL/TLS: Check if you want to encrypt messages with SSL/TLS.
- Username: The e-mail address which you want to fetch e-mails from.
- Password: The password for your email address
For example, the configuration for Gmail will look like this: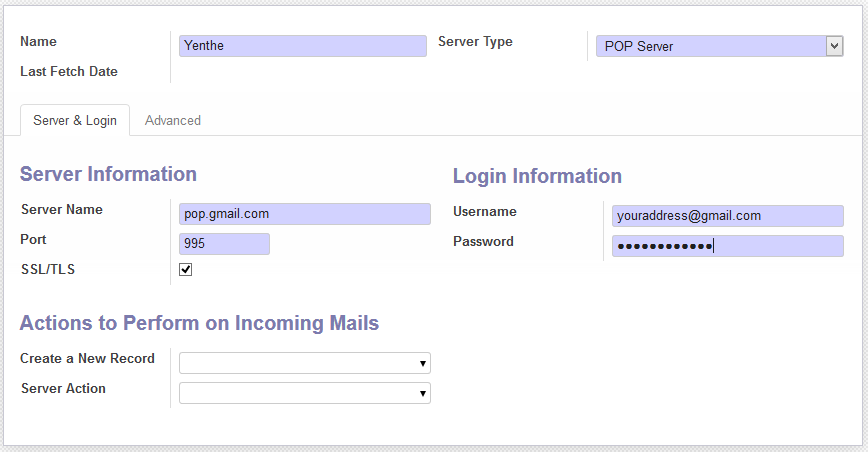
Once you've filled out the form, click on test connection if testing is successful you will get a connection successful message.
Final Checks:
- Email Routing: Ensure that you've set up proper email routing rules within Odoo to direct incoming emails to the appropriate channels (e.g., Leads, Opportunities, Support Tickets).
- Security Considerations: Regularly review and update your email server configurations to maintain security standards. Enable two-factor authentication if available.
- Monitoring and Troubleshooting: Monitor email logs within Odoo to track email activities and diagnose any issues that may arise.
By following these steps, you can effectively configure both outgoing and incoming mail servers in Odoo, facilitating seamless email communication within your organization. Regularly review and update your email settings to adapt to changing business needs and ensure optimal performance.

