

Odoo ERP is equipped with powerful and easy-to-use reporting features. Each module has aspects of reporting that allow the users to generate customized reports based on any desired parameters. Besides the reports created within each module, some general reports (generic and dynamic) are available for every business across all countries. These include reports such as balance sheets, profit and loss reports, executive summaries, and general ledgers amongst others. Reports help business managers to accurately review the performance of the business and therefore be able to make informed decisions to improve the business. This article explores how to customize the headers and footers of reports in Odoo for your company.
Report layouts in Odoo are written using HTML/QWEB. Header and footer customization can be achieved either by creating a new layout or by inheriting an existing one. In this article, we will see how to customize headers and footers by inheriting existing layouts.
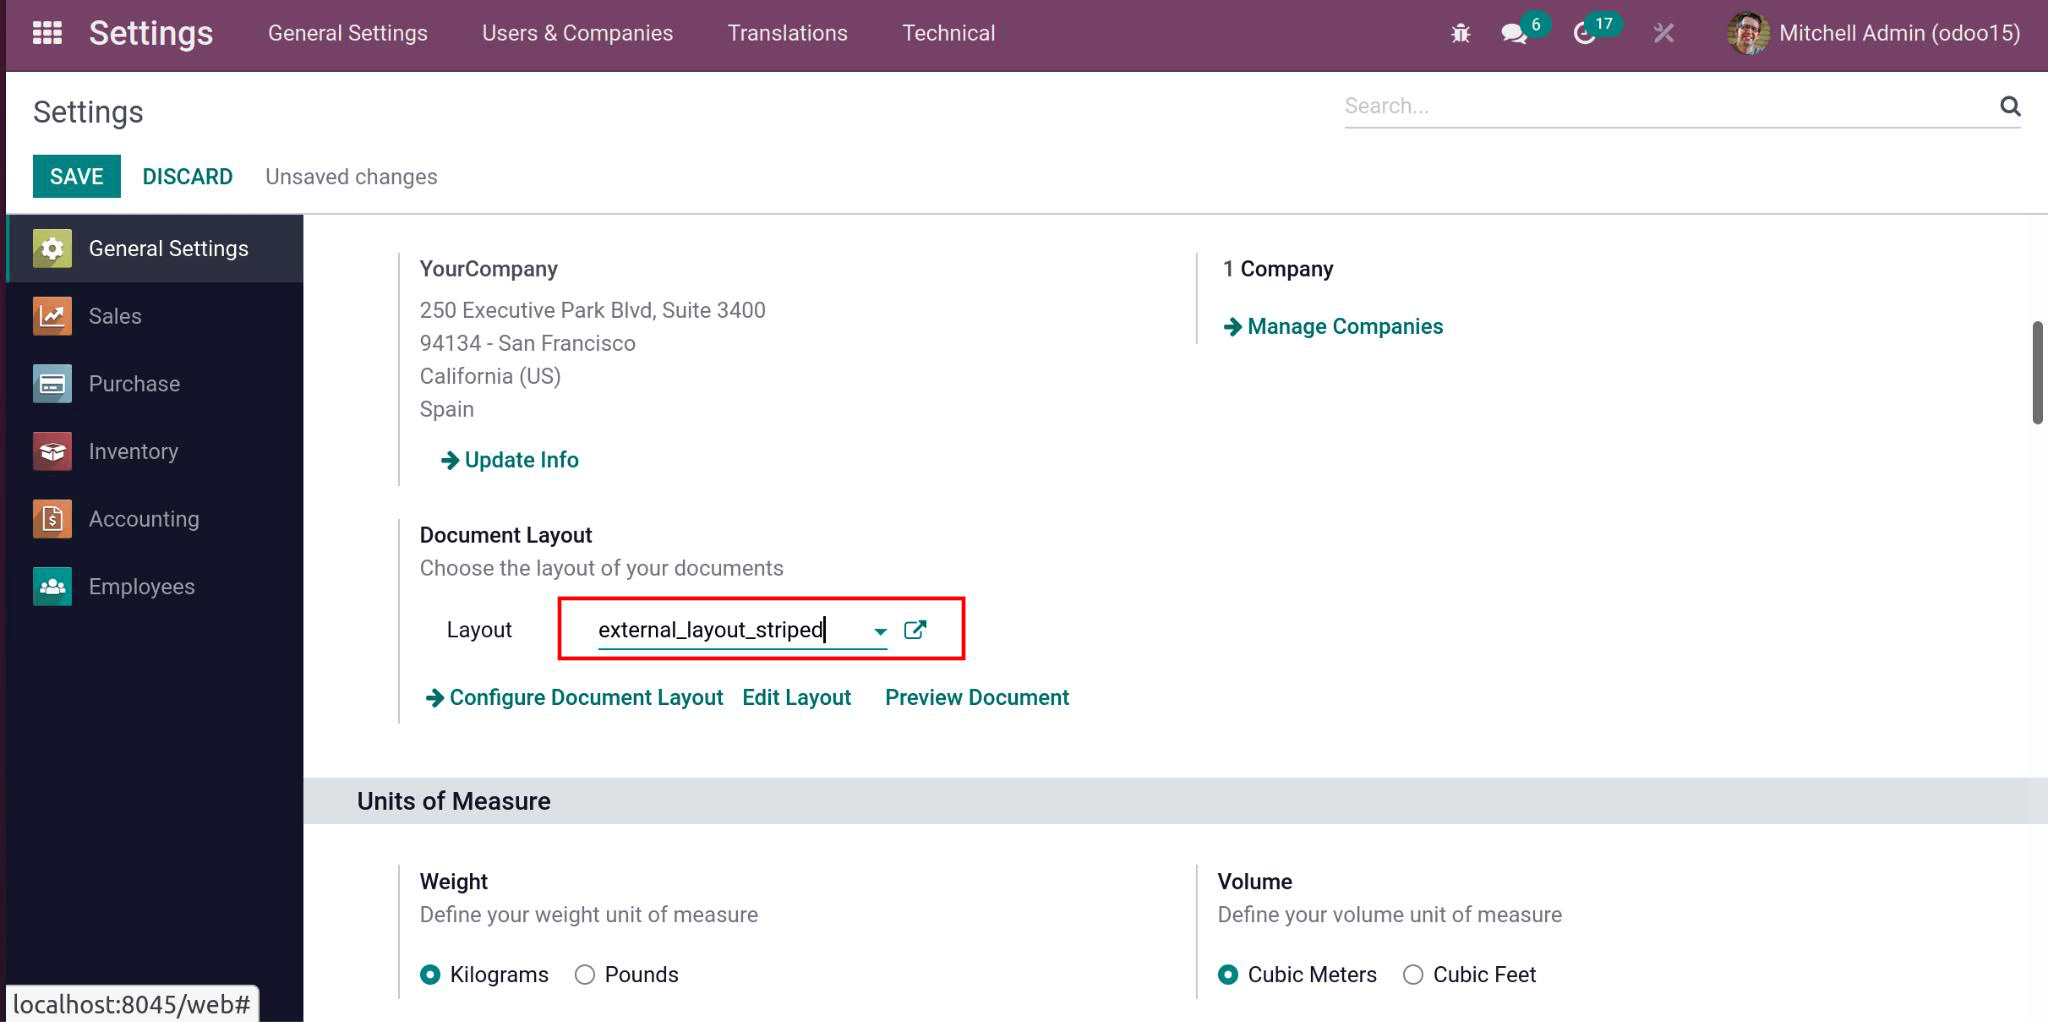
When you enable debug mode in your Odoo instance, you will have the option to choose the layout of your documents on the "Setting" page as shown below.
You can inherit the template from the UI by clicking on Edit layout->Inherit view, then create the inherited view. You can also inherit the layout by using backend code. In this article, we will discuss how to inherit the layout from the backend code.
Click on Edit to be able to edit the layout code.
To inherit a layout, you need to mention the "inherit_id" of the layout you are inheriting using the following code format.
<template id="custom_layout_name" inherit_id=”module_name.layout_name”>In this example, we will inherit the "external_layout_striped" layout into our custom layout. The code for declaring the custom layout and inheriting the "external_layout_striped" layout into it will appear as follows
<template id="custom_purchase_header_footer" inherit_id="web.external_layout_striped">
     //XML layout code goes here
</template>
The layout "external_layout_striped" has defined its own header and footer layout as shown below.
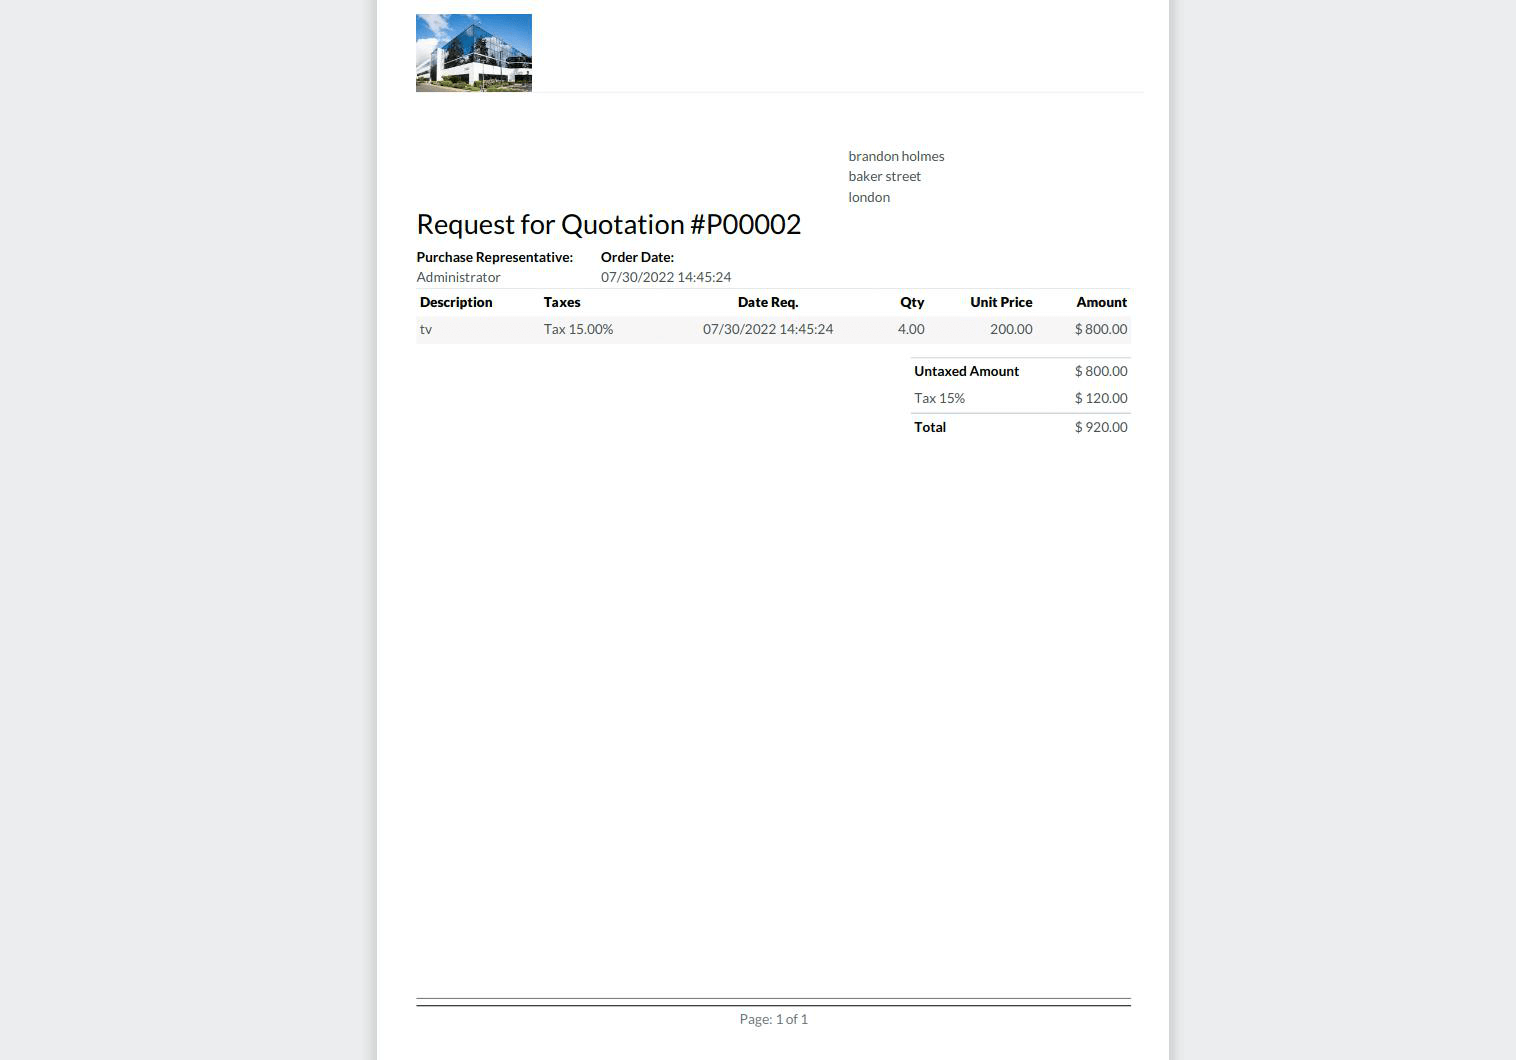 We want to our custom layout to appear as shown below.

After inheriting the "external_layout_striped" into our custom layout, the next step is to replace the header section with our custom header design. To do this, we use the XPath expression with the "replace" position. Our code will now appear as follows:
<template id="custom_purchase_header_footer" inherit_id="web.external_layout_striped">
  <xpath expr="//div[1]" position="replace">
    <div t-attf-class="o_company_#{company.id}_layout header" t-att-style="report_header_style">
      <div class="o_background_header" style="position:absolute;">
        <div class="float-right">
	  <h3 class="mt0 text-right" t-field="company.report_header"/>
	</div>
	<div class="header_content float-right">
	  <div class="logo" style="">
	    <img t-if="company.logo" style="max-width:260px;max-height:89px;" t-att-src="image_data_uri(company.logo)" class="float-left" alt="Logo"/>
          </div>
        </div>
        <div class="float-left">
          <div class="details">
	    <table class="table_partner" style="width:120%;">
	      <tr>
	        <td>
	          <b style="color:black;"> Client Details:</b>
	        </td>
	      </tr>
	      <tr>
	        <td>
	          <b>
		    <span style="color:black;" t-if="company" t-esc="o.partner_id.name"/>
	          </b>
		  <br/>
		  <t t-if="o.partner_id.street">
		    <span t-esc="o.partner_id.street"/>
		    <br/>
		  </t>
		  <t t-if="o.partner_id">
		    <span t-esc="o.partner_id.city"/>
		    <br/>
		  </t>
	        </td>
	      </tr>
	    </table>
	  </div>
        </div>
      </div>
    </div>
  </xpath>
</template>
We have successfully created a custom header. The next step is to customize the footer. To do this, we still use the XPath expression with the "replace" position. However, this time we reference the style class of the div to be replaced. Since the class "text-center" is unique to the footer, in the parent layout, the XPath tag in this case will look as follows.
<xpath expr=”//div[hasclass(‘text-center’)]” position=”replace”>
  //code goes here
</xpath>
The complete code after adding the company name and page number to the footer now appears as follows:
<template id="custom_purchase_header_footer" inherit_id="web.external_layout_striped">
  <xpath expr="//div[1]" position="replace">
    <div t-attf-class="o_company_#{company.id}_layout header" t-att-style="report_header_style">
      <div class="o_background_header" style="position:absolute;">
        <div class="float-right">
	  <h3 class="mt0 text-right" t-field="company.report_header"/>
	</div>
	<div class="header_content float-right">
	  <div class="logo" style="">
	    <img t-if="company.logo" style="max-width:260px;max-height:89px;" t-att-src="image_data_uri(company.logo)" class="float-left" alt="Logo"/>
          </div>
        </div>
        <div class="float-left">
          <div class="details">
	    <table class="table_partner" style="width:120%;">
	      <tr>
	        <td>
	          <b style="color:black;"> Client Details:</b>
	        </td>
	      </tr>
	      <tr>
	        <td>
	          <b>
		    <span style="color:black;" t-if="company" t-esc="o.partner_id.name"/>
	          </b>
		  <br/>
		  <t t-if="o.partner_id.street">
		    <span t-esc="o.partner_id.street"/>
		    <br/>
		  </t>
		  <t t-if="o.partner_id">
		    <span t-esc="o.partner_id.city"/>
		    <br/>
		  </t>
	        </td>
	      </tr>
	    </table>
	  </div>
        </div>
      </div>
    </div>
  </xpath>
  <xpath expr="//div[hasclass('text-center')]" position="replace">
    <center>
      <h5 style="color:black;"><b><t t-esc="o.company_id.name"/></b></h5>
      <h6 style="color:black;">Your company details</h6>
      Page: <span class="page"/> / <span class="topage"/>
    </center>
  </xpath>
</template>
This code is now complete and will produce the desired layout as shown above. The possibilities for customizing report layouts in this manner are numerous. You can replicate any style you desire in the header and the footer. After saving the layout, you can inherit it into other reports to replicate the new design in these other reports.

