

Exporting and importing data in Odoo ERP is a seamless process that allows businesses to efficiently manage their information. Exporting data involves extracting selected records or entire datasets from Odoo and saving them in a desired format such as Excel or CSV. This feature enables users to analyze and manipulate the data externally, facilitating tasks such as reporting, data cleansing, or integration with other systems.
Importing data, on the other hand, entails bringing external data into Odoo, ensuring smooth integration, and maintaining data integrity. This functionality allows users to easily migrate data from legacy systems, import vendor catalogs, or update existing records in bulk. With Odoo's intuitive import and export tools, businesses can streamline their operations, enhance data accuracy, and leverage the full potential of their ERP system.
This article will cover the process of exporting and importing data in Odoo.
How to Export Data From Odoo
In Odoo, data export is a commonly used function accessible within the List view of any form.
Step 1: To initiate the data export process, begin by selecting the relevant check boxes located on the left-hand side of the form. Now go to Actions-> Export as shown below.
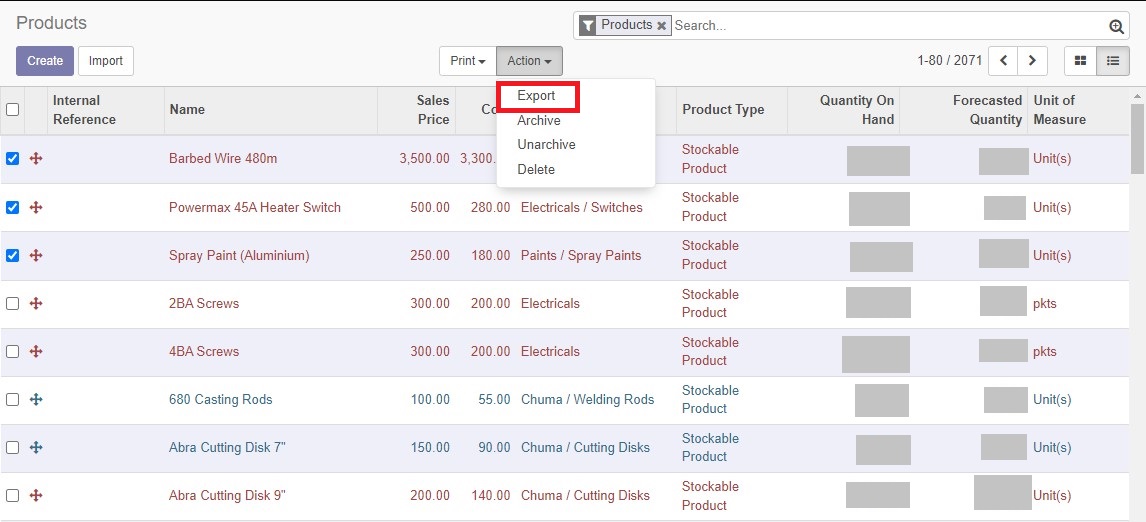
After clicking on the "Export" button, you will see an interface similar to the one below.
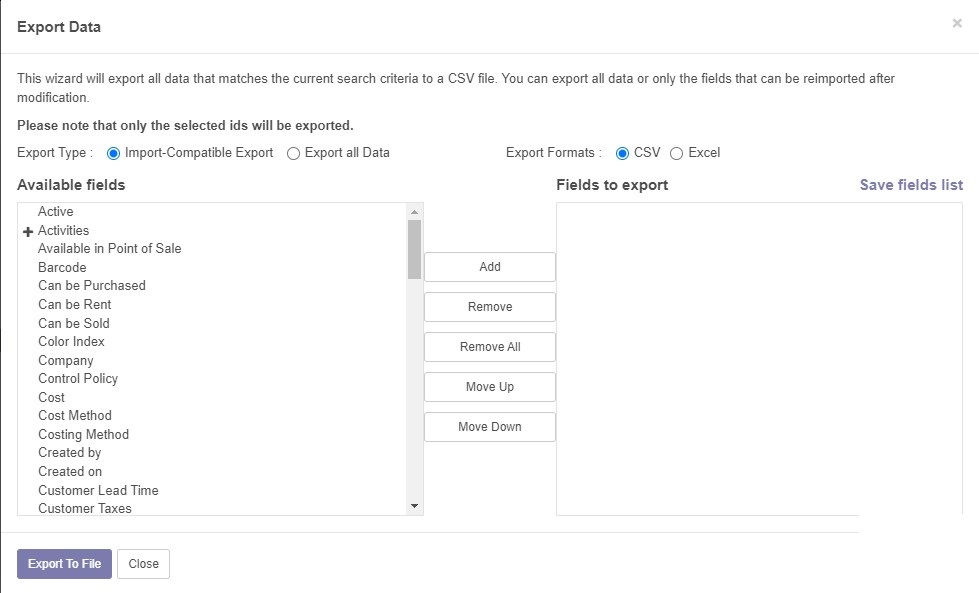
Step 2: Select the fields you wish to export. To do this, you can either select one field at a time and then click on the "Add" button, or you can CTRL-click multiple fields and add multiple fields at once. The entire list of fields that are available for export is displayed on the left-hand side of this dialog box. The fields to be exported appear on the right-hand side. Use the "Move Up" and "Move Down" buttons to order the fields as they should be exported. There are some options of consideration in this dialog box as follows:
- Export type - This option allows you to choose between "Import-compatible Export" and "Export All Data." Selecting "Import-compatible Export" exports the data in a format that is compatible with Odoo's import functionality, making it easier to re-import the exported data back into the system if needed. On the other hand, choosing "Export All Data" exports the complete dataset without any restrictions.
- Export formats - This option allows you to choose between "CSV" and "Excel" formats for the exported data. Selecting "CSV" exports the data in a comma-separated values format, which is widely supported and can be easily opened in various applications. Choosing "Excel" exports the data in a format compatible with Microsoft Excel, allowing for further analysis and manipulation using Excel's features.
In certain situations, you might prefer not to export your data immediately or want to preserve the chosen fields for future exports. In such cases, you have the choice to save these settings for later use. To achieve this, simply click on "Save fields List" and assign a name to your export configuration.
Step 3: Export the data. Once you have verified that everything is in order, proceed to click on the "Export" button to initiate the export process and generate a CSV/Excel file with the resulting data. Make sure to save the file to your local computer for further use or analysis.
How to Import Data Into Odoo
Occasionally, there is a need to import a fresh dataset into the ERP system to update existing data or fulfill other requirements. In Odoo, users have the flexibility to import various types of data in different formats. By default, Odoo supports data import in Excel (.xlsx) or CSV (.csv) formats for any business object within the system. This functionality allows users to effortlessly import details such as contacts, products, bank statements, journal entries, sales orders, and more into Odoo using either of the aforementioned formats.
The process of importing data into Odoo involves selecting and uploading the desired data file in .csv or .xlsx format. However, errors can occur when mapping the fields between the file and the Odoo database. To prevent such errors, it is recommended to export a sample dataset of the relevant model, use it as a template to populate the exported file with new data, and then import it back into Odoo. This approach ensures accurate field mapping and reduces the likelihood of data errors.
Step 1: Export a sample dataset in Excel format. Follow the steps above to export a sample dataset with all the fields that you want to import. Make sure to check the "Import-compatible Export" option.
Step 2: Edit the exported file and populate it with the data you wish to import. For the dataset we exported above, the file would look as below.
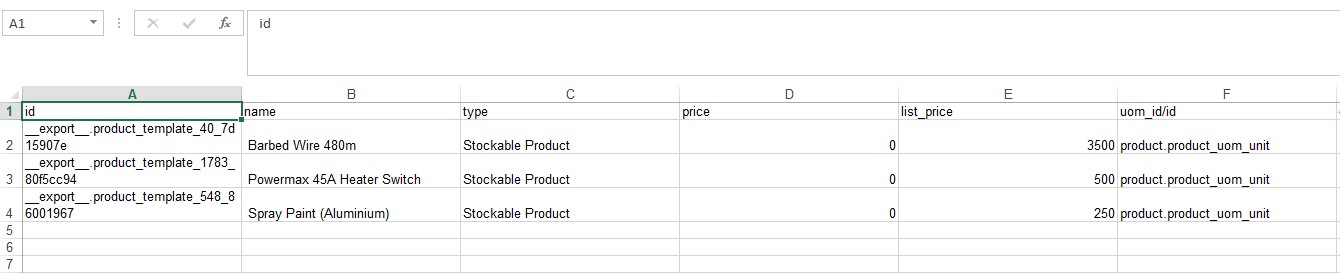
Using this format, fill all the columns with all the data you wish to import. Doing this will ensure all fields are correctly mapped into the database during the import. We have now successfully created an import template and populated it with the import data.
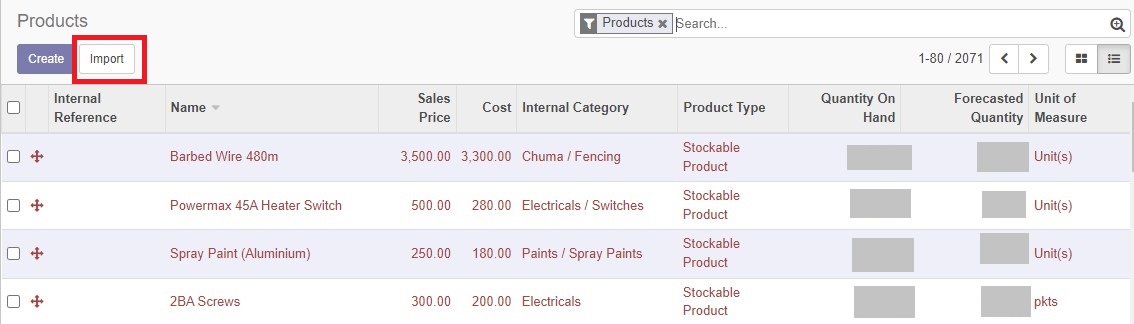
Step 3: Import the data. Go to the products page and click on the "Import" button as shown below.
This will bring you to the following dialogue where you navigate to the file with your data to be imported. After selecting the file, you will see the table header and the first ten rows as a preview of our data. See the image below.
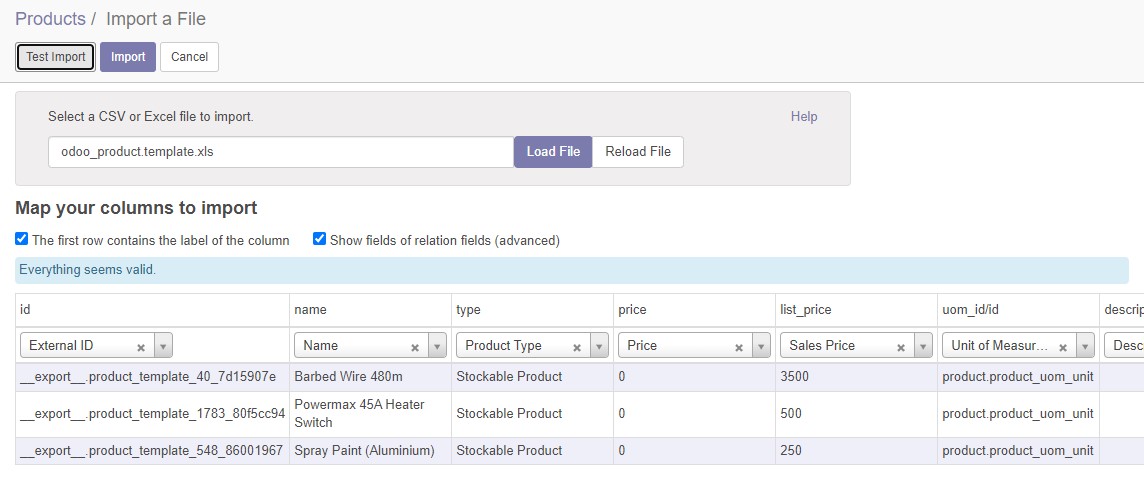
If Odoo is unable to automatically assign the correct data fields using the technical field labels, we have the option to manually select the data field from a list of all available fields. Another alternative is to indicate that a column should not be imported at all. Prior to the final data import, it is advisable to conduct a test import by utilizing the "Test" button. This allows us to identify any errors or inconsistencies in the import file and receive specific error messages indicating the row where the issue occurred. In such cases, we can make necessary adjustments to the import file based on the provided information and re-upload it to Odoo. If the test import is successful, Odoo provides a confirmation of the successful import process.
Step 4: Import the data. To complete the data import process, simply click on the "Import" button. Odoo will display a small pop-up indicating the successful import of x data sets. Subsequently, you will be automatically directed back to the overview of the corresponding objects for which the data was imported.
There is also another method of importing data that does not require the export of a template first. This involves manually mapping the fields in any imported file to the Odoo database. This method is prone to errors and we would recommend contacting us to assist you as it is technical and requires knowledge of the inner workings of the Odoo database.

