

In an era where data breaches and cyberattacks are increasingly common, the security of sensitive business data is paramount. ERP systems like Odoo handle vast amounts of crucial information, making them a prime target for malicious actors. Ensuring the security of your Odoo instance should be a top priority to protect your business.
Understanding Role-Based Access Control (RBAC)
What is RBAC?
RBAC is a security model that restricts system access to authorized users. In Odoo, this means that different users have different levels of access based on their roles. Each role is defined by a set of permissions, ensuring that users only have access to the data and functionality necessary for their specific tasks.
Key Components of RBAC
- Roles (Groups): These define the user's job function within the organization.
- Permissions: These specify what actions a user with a particular role can perform.
- Users: Each user is assigned one or more roles, determining their level of access within Odoo.
Benefits of RBAC in Odoo
Improved Security: RBAC significantly enhances the security of your Odoo system by minimizing the risk of unauthorized access. Users only gain access to the information and functions needed to perform their roles, reducing the exposure of sensitive data.
Enhanced Data Protection: With RBAC, you can segment data more effectively. Sensitive data can be further protected from unauthorized access, safeguarding the confidentiality and integrity of critical information.
Simplified User Management: RBAC streamlines user management by categorizing users into roles and granting permissions accordingly. This makes it easier to manage user access, especially in larger organizations.
User Groups in Odoo
Central to the effective implementation of RBAC in Odoo is the use of user groups. User groups are collections of users who share similar job responsibilities or access needs. These user groups serve as the building blocks for configuring access control rules and permissions. They are highly flexible and can be tailored to align with your organization's structure and requirements.
User Access Group Types:
-
User Types: There are three Odoo user types. Internal Users who have full access to Odoo applications and are often members of multiple application access groups, portal Users who are typically customers or suppliers and have access to their relevant documents only, and public users who can only access the website.
-
Application Access Groups: Application access groups define specific functionalities such as Inventory User, Purchase Administrator, and Accountant.
-
Technical Settings Access Groups: These groups relate to specific technical settings, like managing multiple units of measure, analytic accounting, multi-currency, multi-company access, and more. Some Technical Groups grant access to views and menus.
Role Definition and Assignment
To implement RBAC effectively, organizations must first define clear roles and responsibilities within the company. These roles should be designed based on job functions and access requirements. Once the roles are defined, they can be associated with user groups in Odoo. For instance, roles such as "Sales Manager," "Inventory Clerk," or "Financial Analyst" can be created and linked to the corresponding user groups.
The next step involves assigning roles to individual users. Users are grouped into the relevant user groups based on their job positions or responsibilities. This step ensures that each user has the necessary permissions and access rights as specified by their assigned role.
RBAC is best implemented using Application Access Groups. User access groups in Odoo often inherit permissions from other groups. For example, Purchase Manager inherits Purchase User rights, and Purchase User inherits Internal User rights. However, Technical Settings groups usually do not inherit access, with some exceptions, like 'Advanced Pricelists' inheriting from 'Basic Pricelists.' As such, Application Access Groups offer a lot of flexibility for cases where there is an overlap in user access needs across modules.
Application Access Groups in Detail
Let's delve into the access groups for the Sales application as an example:
- Sales Administrators (Managers)
- Sales/User: All Documents
- Sales/User: Own Documents Only
Inheritance plays a significant role in these groups. For instance, the "Own Documents" group inherits "Internal User" access and can also access related apps like Subscriptions and Events. The "All Documents" group inherits the "Own Documents" group, making all its access rights available to users in the "All Documents" group. The highest level for Sales, the Administrator (Manager), inherits the "Sales/User: All Documents" group and may inherit additional access if the website app is installed.
Access to Menus, Views, and Models: Access groups provide varying levels of access to menus, views, and models. For instance, the "Own Documents" group grants access to specific sales menus and some views, while the "All Documents" group may not have additional menus or views. The Sales Administrator group, as expected, has access to more menus and views.
Model Access Rights: Model access rights are crucial for security in Odoo. The level of access granted affects a user's ability to read, write, create, and delete records. Different access groups may grant varying levels of access to models. For example, the "Sales/Own Documents" group may have access to 54 models, while the "Sales/Administrator" group may grant full access, allowing users to create, amend, and delete records.
Record Rules: Record rules control access to records within a model (database table). Access groups may have different record rules that limit access to specific records. For example, the "Personal" rules in the "Sales/Own Documents" group limit users to their sales orders only, while the "All Documents" group has access to all records.
Technical User Access Groups: In addition to application access groups, Odoo has "Technical" groups that serve a more limited purpose. These groups often grant less access, and their significance may not be immediately evident in the user interface. Examples of technical groups include "Manage Product Variants," "Manage Multiple Stock Locations," "Analytic Accounting," and others.
Extra Rights and Other Access Groups: Some access groups grant users additional rights, such as Contact Creation, Multi-Company & Multi-Currency flags, and Technical Features. These rights serve specific purposes within Odoo.
Access: A user's overall access is a combination of permissions (Read, Write, Create, Delete) from all the groups assigned to them. Users may have different access levels for models and records, making it important to understand how access groups interact.
Configuring User Groups and Permissions
In Odoo, configuring user groups and permissions is a crucial step in implementing Role-Based Access Control (RBAC). This section provides a detailed guide on how to create and manage user groups and customize their permissions.
Step 1: Accessing User Groups
To begin configuring user groups and permissions, follow these steps:
- Activate the developer mode, then go to .
- Within "Users & Companies," you'll find the "Groups" option. Click on it to access user group settings.
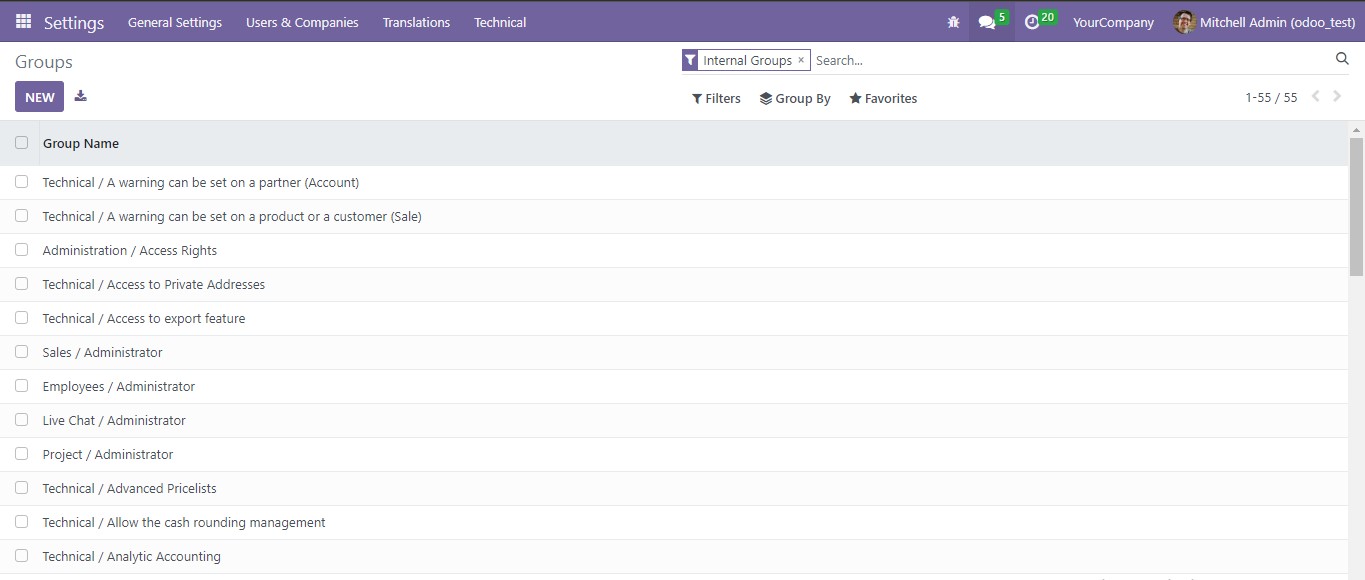
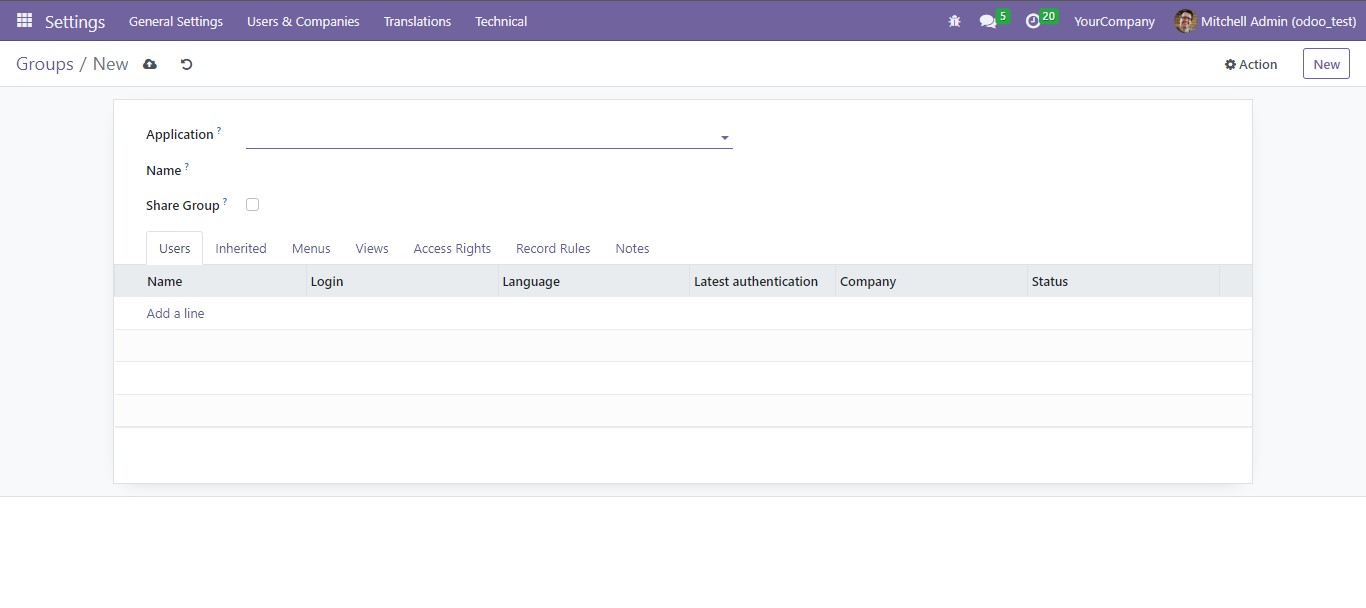
Step 2: Creating a New User Group
To create a new user group, follow these steps:
- Click the "Create" button to initiate the process of creating a user group.
- Select the application to be associated with this group.
- If your organization's structure requires it, you can define parent user groups under the "Inherit" tab to create a hierarchical structure. Parent groups can inherit permissions to simplify management. You can also select if this group can be inherited by other groups.
- After defining the user group's name and parent groups, click "Save" to create the user group.
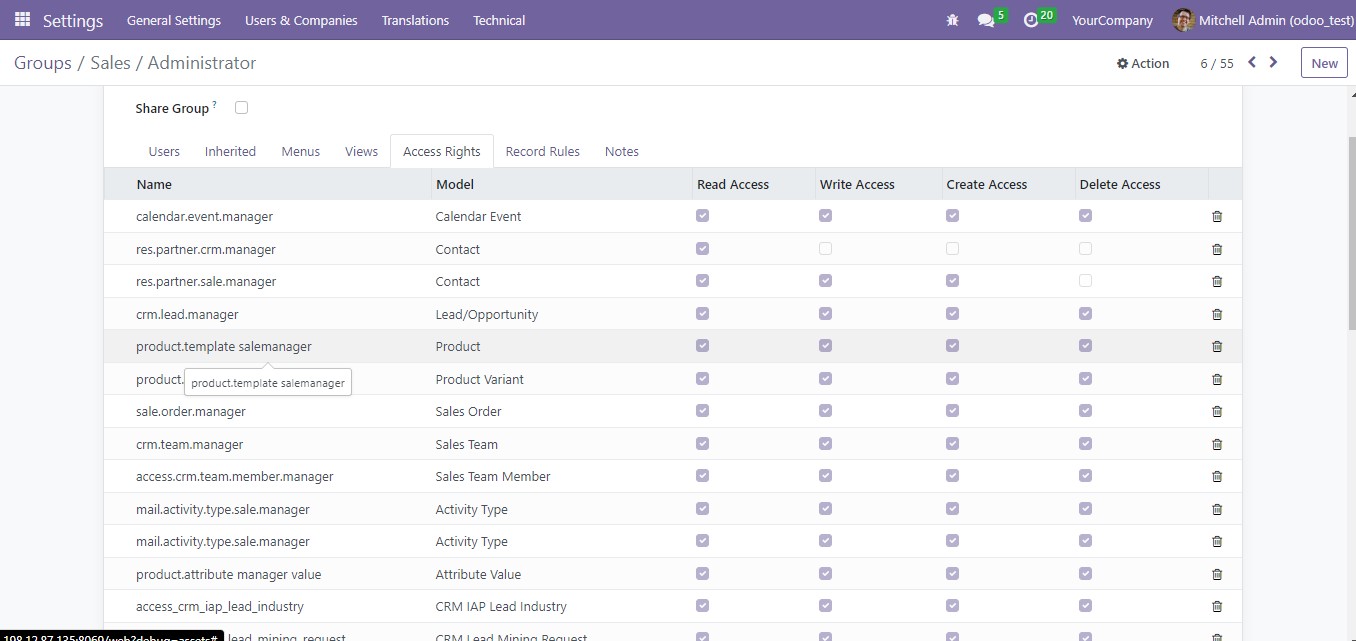
Step 3: Defining Permissions
The heart of RBAC in Odoo is the ability to specify access rights and permissions for user groups. Here's how you can define these permissions:
- Once the user group is created, you can access the permissions configuration by selecting the user group from the list.
- In the user group's details, go to the "Access Rights" section. This is where you customize what the user group can access.
- Select the relevant applications and modules for which you want to configure permissions. You can drill down to specific features and data, providing fine-grained control over access rights.
- Customize the permissions by ticking the appropriate checkboxes. You can specify whether users in this group can view, create, edit, delete, or manage specific resources.
- Be sure to save your changes after configuring the permissions for the user group.
Assigning Users to User Groups
Now that you've configured user groups and defined their permissions, it's time to assign users to these groups. This step ensures that users are granted the access rights dictated by their roles and responsibilities.
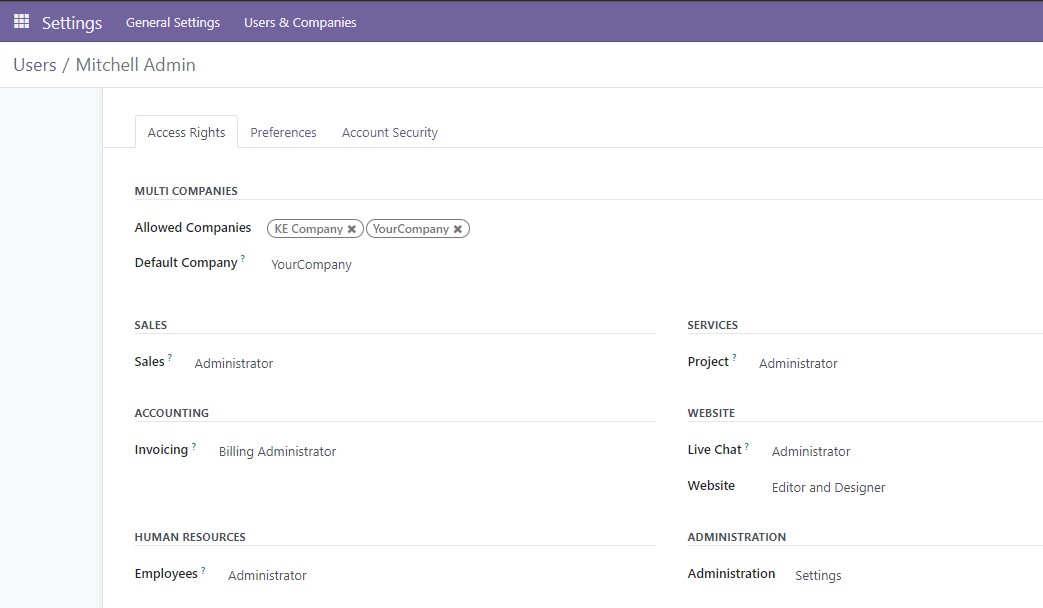
Step 1: Accessing User Details
To assign a user to a specific user group, you need to access the user's details. Follow these steps:
- In the "Users & Companies" section of the "Settings" menu, select "Users" to view the list of users in your Odoo instance.
- Click on the user to whom you want to assign a user group to access their profile.
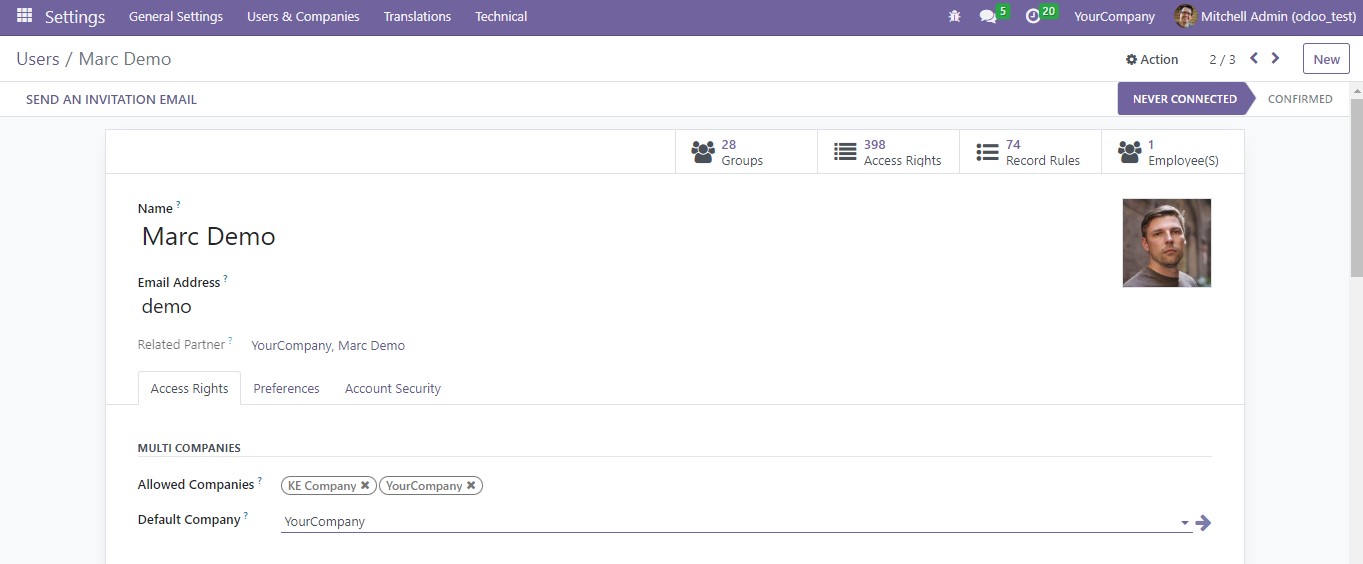
Step 2: Assigning User Groups
In the user's profile, you can assign them to one or more user groups. Here's how you do it:
- Go to the "Access Rights" tab of the user's profile. This is where you can configure their group memberships.
- You will see the different applications each of which you can select a group to assign the user to.
- After assigning the user to the relevant group(s), be sure to save your changes to update their access rights.
By following these steps, you effectively configure user groups and assign users to them in Odoo, ensuring that each user has the appropriate access rights and permissions aligned with their roles and responsibilities, thereby enhancing data security and access control.
Auditing and Monitoring User Group Access
To maintain a secure environment, it is crucial to monitor user group activities. Odoo offers built-in tools for auditing access, enabling organizations to track user actions and access history. Regularly reviewing logs and monitoring user group activities allows administrators to identify potential security vulnerabilities and unauthorized access attempts, enabling timely intervention.
Best Practices for RBAC Implementation in Odoo
Successful implementation of RBAC in Odoo hinges on the following best practices:
- Establish a clear and well-defined role structure within your organization.
- Regularly review and update access controls to adapt to changing business needs.
- Train users and administrators on RBAC best practices and the effective use of user groups.
Conclusion
Implementing Role-Based Access Control in Odoo using user groups is a fundamental step in securing your organization's data and resources. RBAC streamlines access management, reduces the risk of data breaches, and enhances data security. By defining roles, creating user groups, customizing permissions, and assigning users, organizations can achieve a balance between data protection and efficient business operations. Adopting RBAC in Odoo is a strategic move towards ensuring the integrity and security of your business data.

