

Social media authentication, on the other hand, allows users to log in to your Odoo system using their social media credentials, such as Facebook or Google accounts. This simplifies the user registration and login process and offers an enhanced user experience.
In the Odoo platform, the conventional login procedure involves entering a username and password. In addition to this standard method, users have the option to access Odoo by utilizing their Google or Facebook credentials, offering an alternative way to log in.
Google Authentication
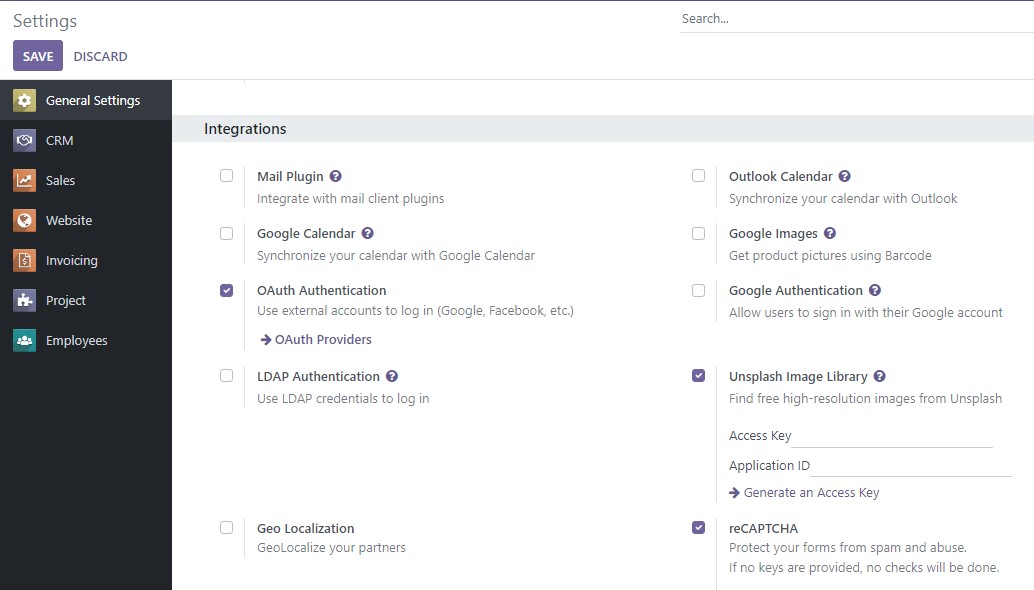
Step 1: Go to settings -> general settings and enable the option OAuth Authentication. Then click on save. After saving, you will see the option of seeing OAuth providers as seen below.
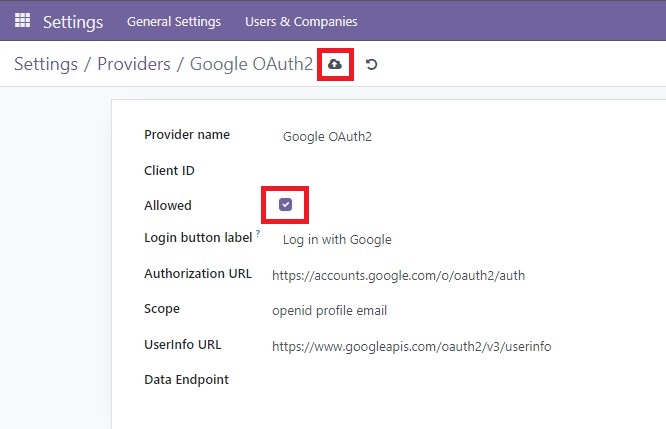
Step 3: Enable Google Authentication to allow users to sign in with their Google account. To do this, click on "Google OAuth2" to pull up the interface below. Click on the "Allowed" check box as highlighted below. Then click on the "Save Manually icon" also highlighted.
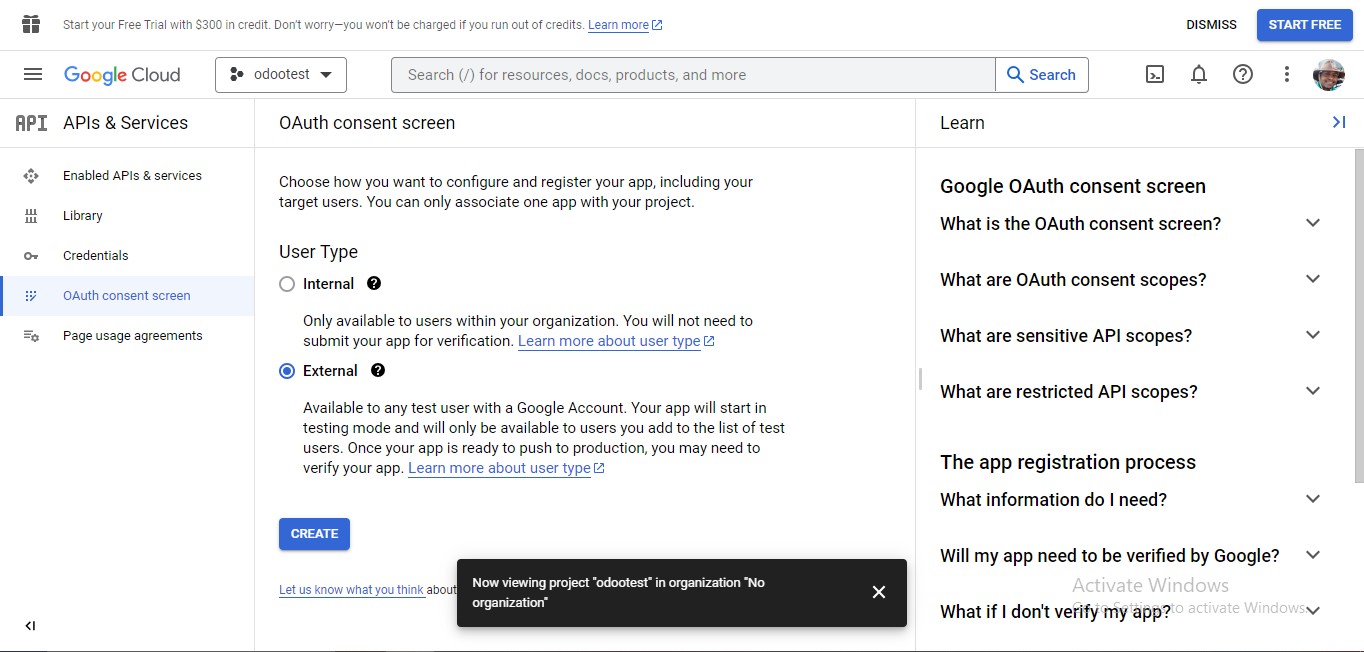
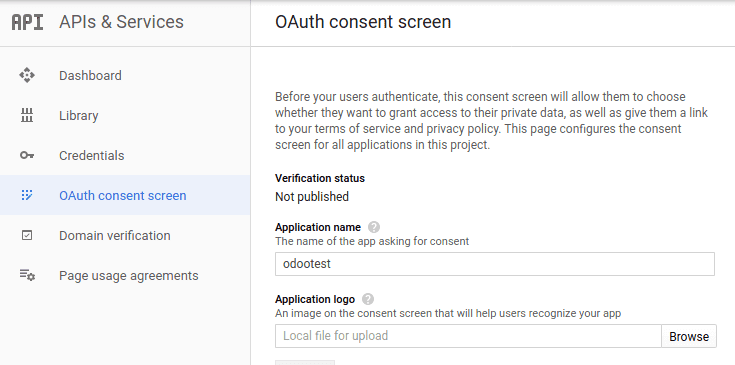
Step 4: To obtain the client ID, access your Google account and navigate to https://console.developers.google.com/. Then, initiate a new project and access the authorization consent screen. You will see the screen below. Select the type of users you wish to engage, then click on "Create".
Step 5: On the next screen as shown below, fill in the details of your Odoo instance then click on "Save and Continue",
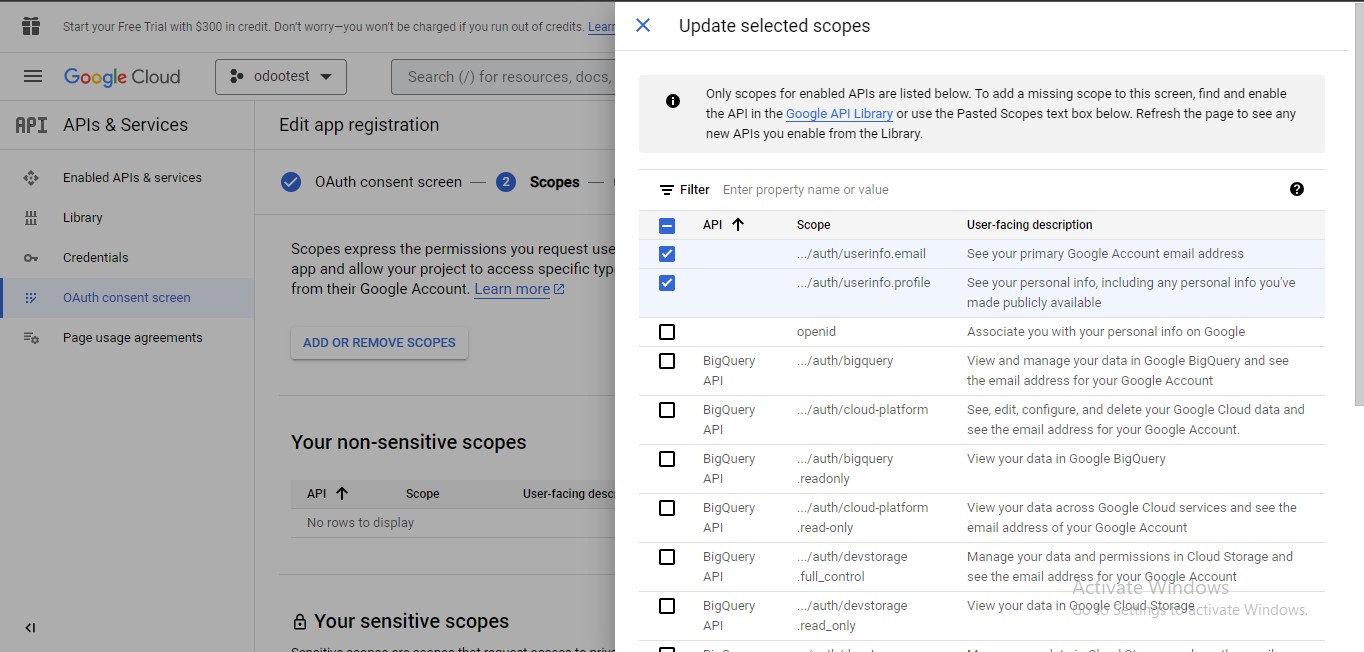
Step 6: Set the scopes on the next screen as shown below. Scopes describe the permissions you request users to authorize for your app and allow your project to access specific types of private user data from their Google Account. Click on "Save and Continue". Fill out the next steps until you have a new project.
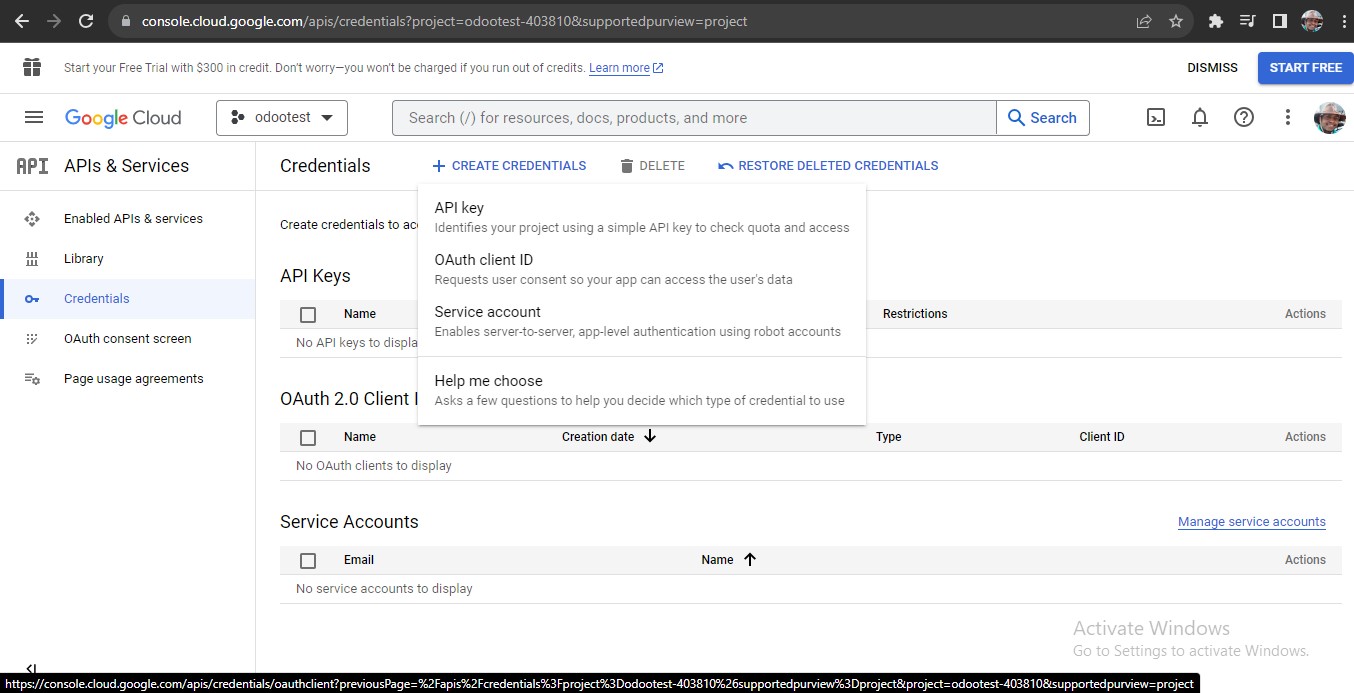
Step 7: Create a new OAuth Client ID. To do this, click on the "Credentials" tab. Then click on "Create Credential". You will see the screen below. Click on the "OAuth Client ID" option. In the resulting screen, set the "Application type" option to "Web Application".
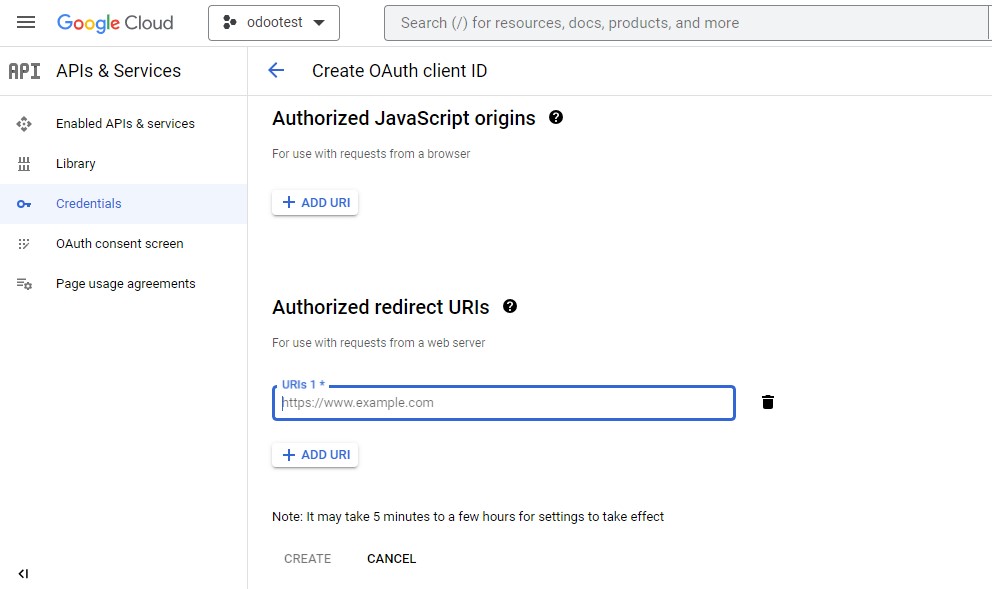
Step 8: Set a redirect URL under the "Authorized redirect URLs" section as shown below. Note that only valid web addresses are accepted here. IP addresses will be rejected. Then click on "Create".
Step 9: A window will appear, presenting both the client ID and client secret. Subsequently, proceed to Odoo and input the client ID within the "Settings" menu, specifically under "General Settings" and "Google Authentication" in the designated "Client ID" field, followed by saving the changes. Next, navigate to the "Users" section in the "Settings" menu, where you will find a new "OAuth" tab containing the list of OAuth providers.

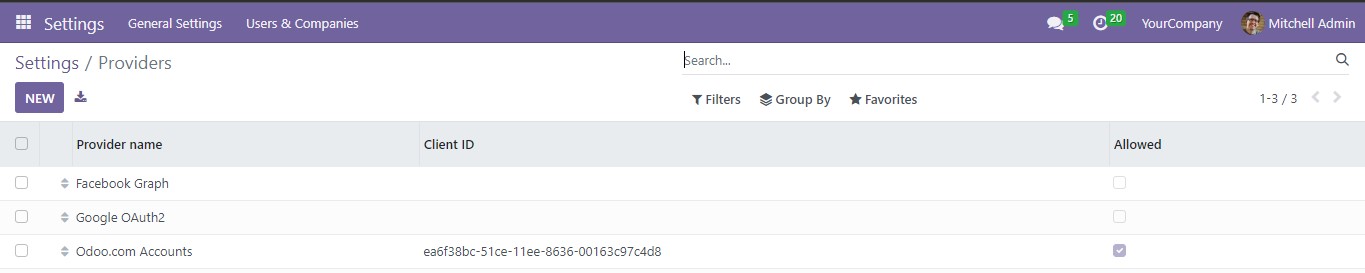
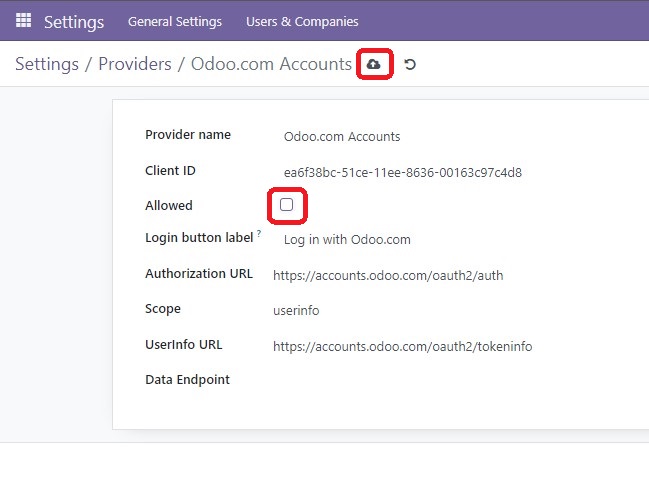
Step 10: In the "OAuth Providers" page detailed in step 2 above, select "Odoo.com Accounts" then untick the "Allowed" checked box as highlighted below. Click on the "Save Manually" icon also highlighted in the image below.
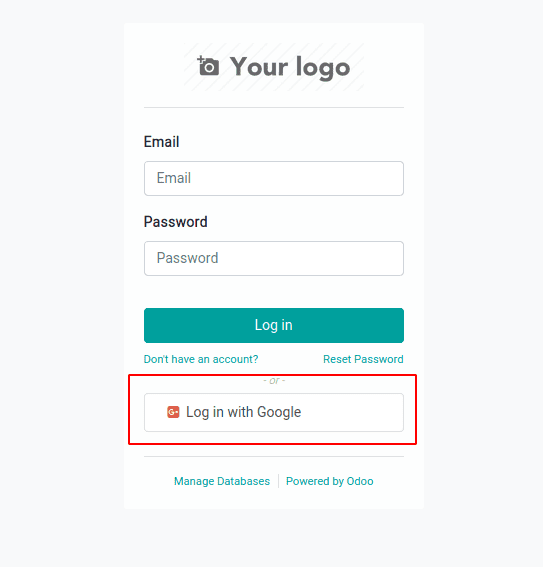
On the login page, you can see the option to login with Google account as shown below. Upon opting to log in using the Google option, you will be directed to the Google login page. Following a successful login, you will be redirected back to Odoo.
Facebook Authentication
To enable Facebook authentication, follow steps 1 and 2 above first.
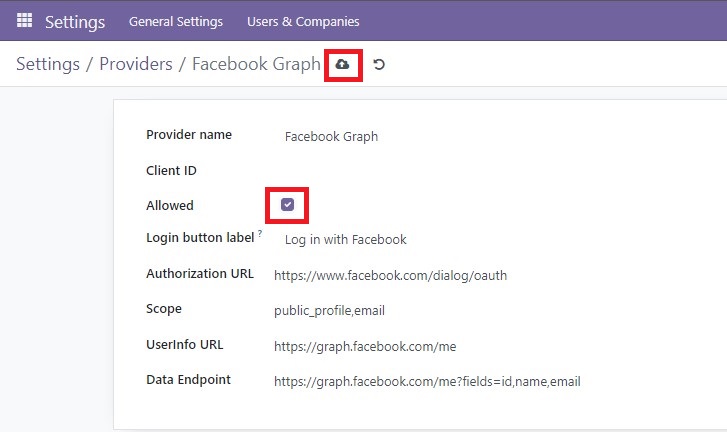
Step 3: Enable Facebook Authentication to allow users to sign in with their Facebook account. To do this, click on "FaceBook Graph" to pull up the interface below. Click on the "Allowed" check box as highlighted below. Then click on the "Save Manually icon" also highlighted.
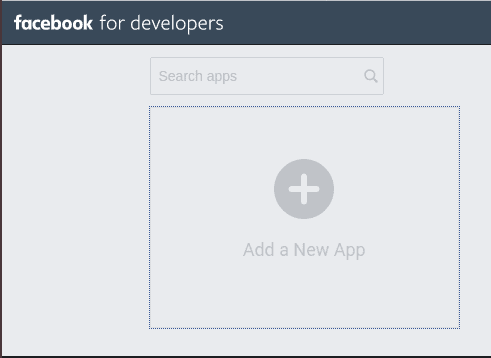
Step 4: Go to https://developers.facebook.com/apps and log in using your Facebook account. Then click on the option to add a new app shown below.
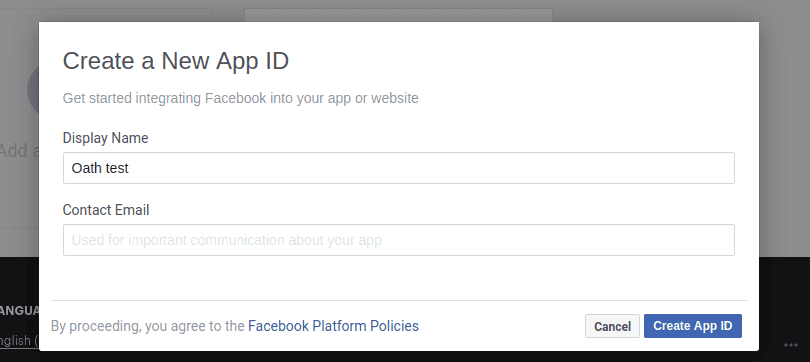
Step 5: The interface to add a new app appears as below. Enter the name and email for the app and click on the Create App ID button.
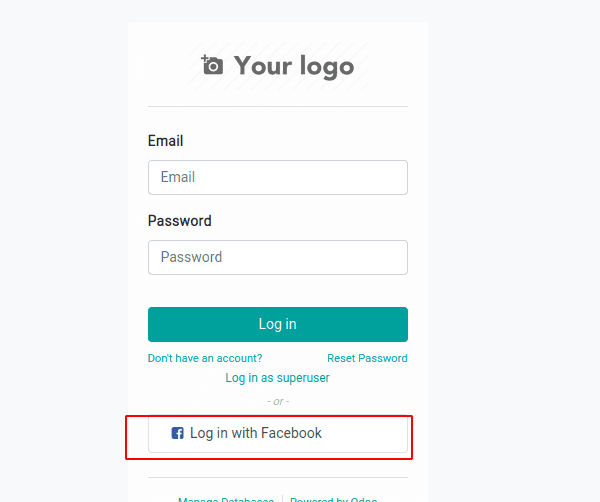
Step 6: After the App has been created, you can see the created app and the app ID. Enter the Odoo domain, which should match the one used in Odoo, as the complete URL in the settings of the newly created app. Save the new App. Now go back to Odoo in the Facebook Graph in step 3 above to enter the App ID and save. Proceed to the login page where you will find the newly added choice to sign in using Facebook.
 In conclusion, enabling social media authentication in Odoo enhances user experience and engagement. By following this tutorial, you've streamlined access and improved data collection. Embrace this feature to stay competitive and elevate your business management system.

