

This article will outline how emails work in Odoo and also how to set up email accounts for different teams using email aliases.
We're assuming you have already set up your incoming and outgoing email servers. If not, please take a look at this article. With this in place, you should have a setup that allows emails from outside to be received into the Odoo environment via IMAP or POP and emails to be sent directly from Odoo via SMTP.
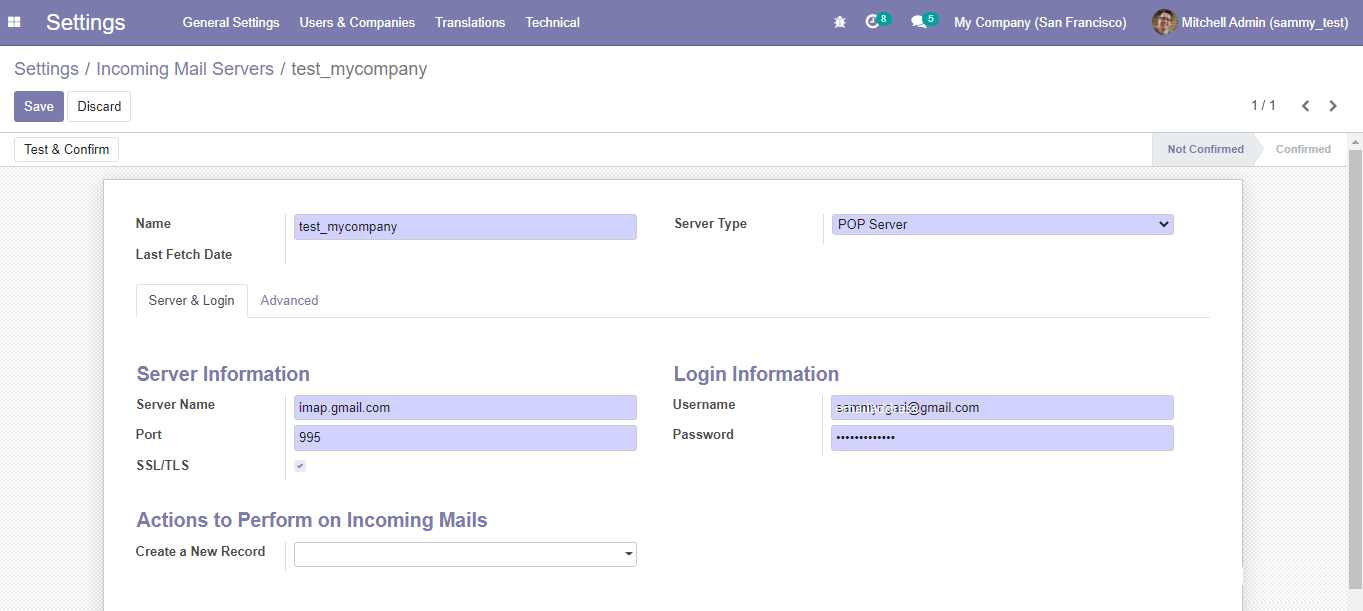
Setting Up Incoming Server
Go to Settings >> Technical >> Incoming email servers and create a new server. You will see the form below. Fill it as per the instructions in this guide. You can create as many servers as you want.
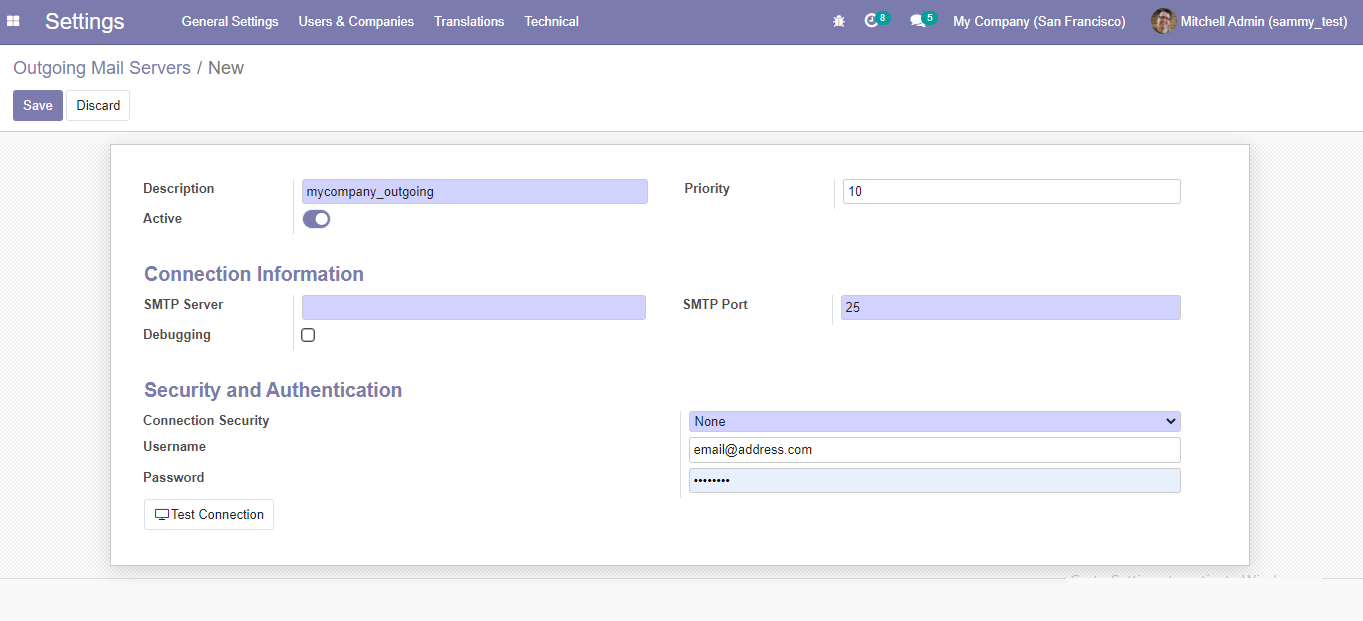
Setting Up Outgoing Server
Go to Settings >> Technical >> Outgoing email servers and create a new server. You will see the form below. Fill it as per the instructions. One outgoing server is usually good enough.
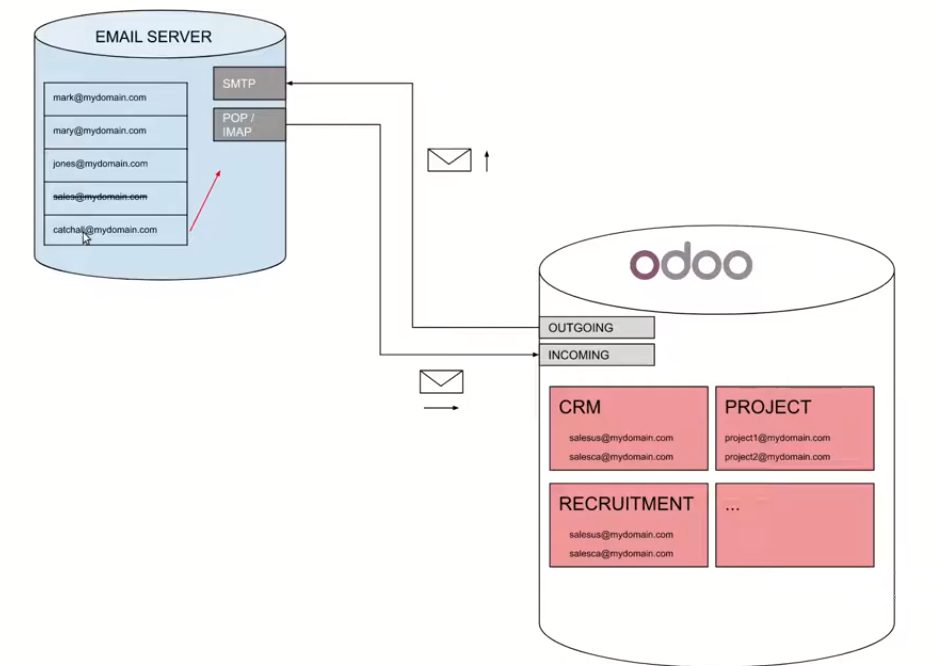
Odoo integrates with the email server with just one mailbox. By default, inbound messages are fetched every five minutes(you can change this setting to one that is more suitable for your case). Any mail sent to your domain, that doesn't have a defined mailbox, will be sent to your catchall email. Applications fetch the mails and divert them to the corresponding virtual mail address (alias). So we have to be careful to set the created mailbox as the catchall address. Odoo will handle the rest.
Odoo relies on generic email aliases to fetch incoming messages as follows.
- Reply messages of messages sent from Odoo are routed to their original discussion thread (and to the inbox of all its followers) by the catchall alias (catchall@).
- Bounced messages are routed to bounce@ in order to track them in Odoo. This is especially used in Odoo Email Marketing to opt-out invalid recipients.
-
Original messages: Several business objects have their own alias to create new records in Odoo from incoming emails:
- Sales Channel (to create Leads or Opportunities in Odoo CRM),
- Projects (to create new Tasks in Odoo Project),
- Job Positions (to create Applicants in Odoo Recruitment),
- etc.
Depending on your mail server, there might be several methods to fetch emails. The easiest and most recommended method is to manage one email address per Odoo alias in your mail server.
- Create the corresponding email addresses in your mail server (catchall@, bounce@, sales@, etc.).
-
Set your domain name in the General Settings.
The diagram below illustrates how the mail server is abstracted from the users within Odoo. This allows communication within Odoo to be smooth and feels like native mail. However, Odoo is not intended to be used as a mail client, and that they are not supporting the ability for users to have an alias as this causes many problems.
After configuring both the mail servers (Incoming/Outgoing), we can start creating Odoo aliases. In this article, we shall look at creating email aliases for the following use cases.
- Adding the email to a Discuss group when sending to a specific alias assigned to a discuss channel.
- Creating leads when someone sends to a specific alias assigned to a sales channel.
- Creating project tasks when someone sends to a specific alias assigned to a project.
- Creating job applications when someone sends to a specific alias assigned to a job application.
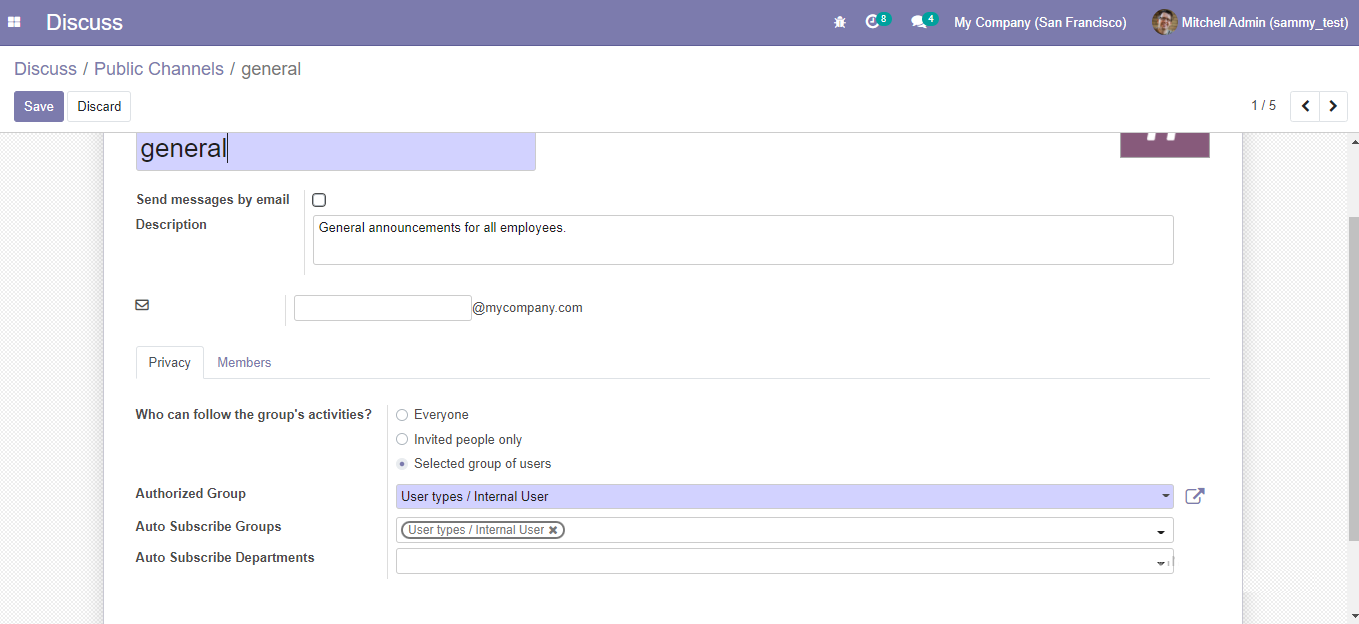
Adding email alias to a Discuss group
On the Discuss page, select a channel and go to settings. You will see the following window. Adding an alias to the channel is pretty straightforward. This allows participants to contribute to the discussion from outside Odoo by just sending an email to the alias address..
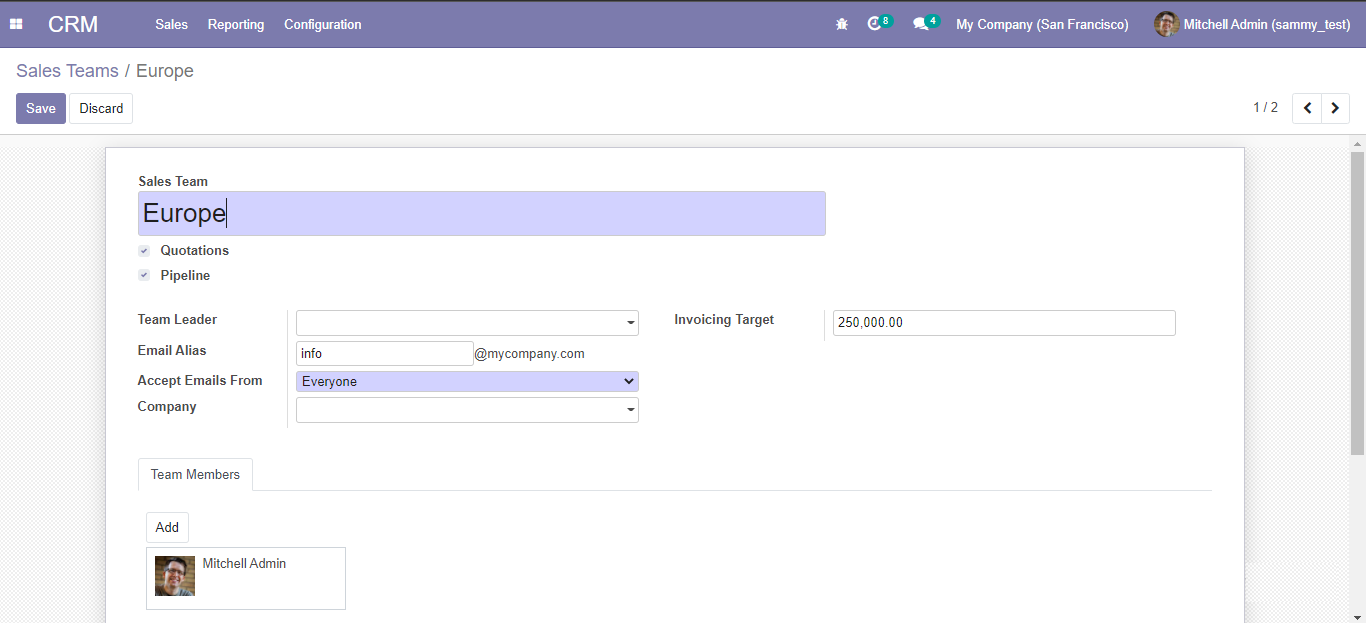
Creating a Sales Lead in the CRM when an email is received
Go to the CRM page => Configuration => Sales Teams. Select a sales team and click on Edit on the top left corner. You will see the following page. Set the email alias for that particular team. When an email is received with that alias, Odoo will automatically create a sales lead in that team's pipeline. The team leader can then assign the lead to a salesperson. This is the basis of email marketing and running email campaigns in Odoo.
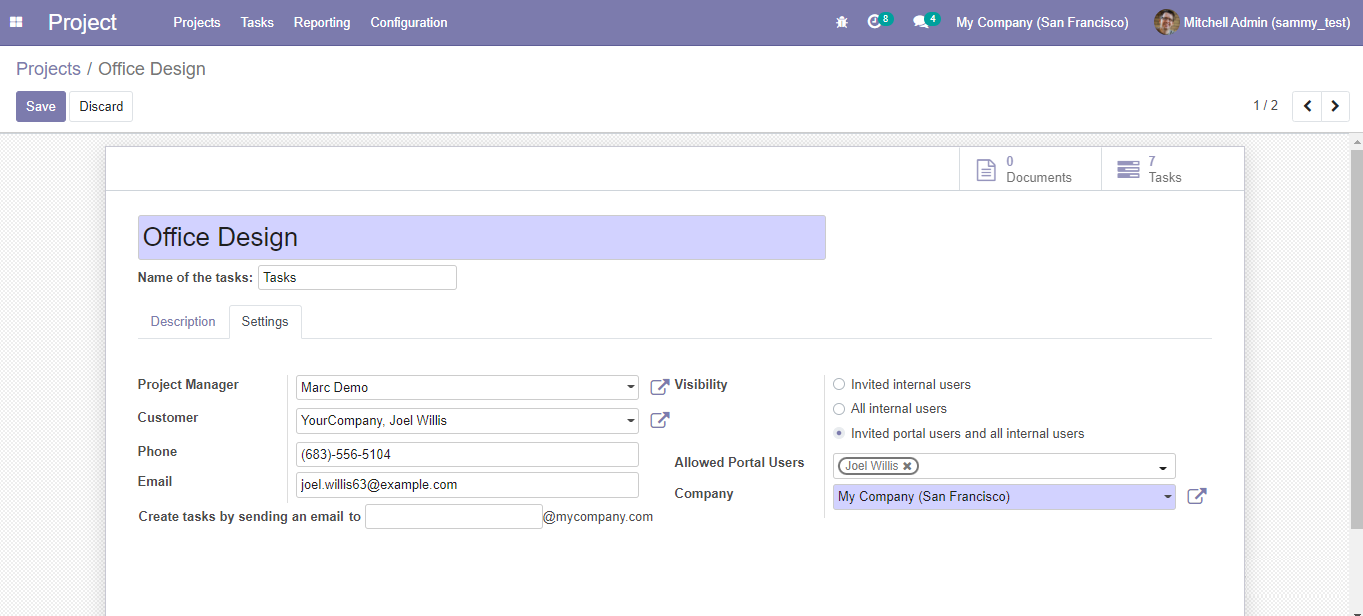
Create a Project Task when an email is received
Go to the Projects page => Configuration => Projects. Select a project, click on Edit and go to the settings tab. You can set an email alias so that Odoo will automatically create a task in that project when an email is received in that alias.
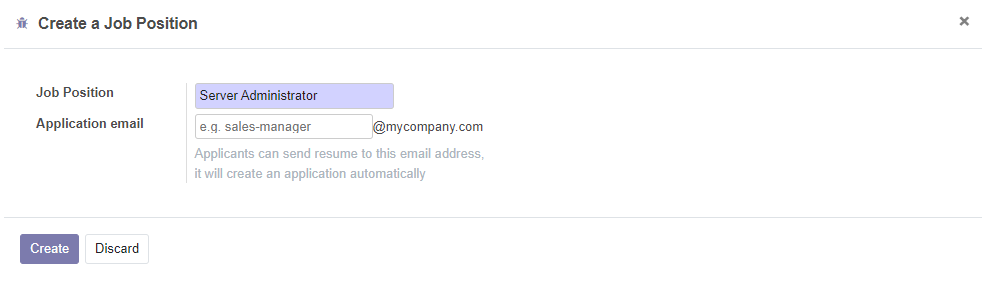
Creating a Job Application when an email is received
Go to the Recruitment page then create a new job opportunity. You will see the modal form below. Here you just set the job title and the email alias where applicants should send their applications. When an applicant sends an email, Odoo will automatically create an open job application in the kanban where the Human Resource Staff can seamlessly manage the interviewing and hiring process.
There is a lot more that can be done using email servers and emails aliases in Odoo to improve the business process. But all have these same fundamentals.

