

Migrating an Odoo installation from Windows PC to a Windows server may be necessary for a scenario where the organization has changed its hardware but would still want to run the same Odoo instance without loss of data. This article outlines how to migrate Odoo from Windows PC to a Windows server.
Step 1: Navigate to the Database Manager in your Odoo installation. To do this, navigate to the following URL:
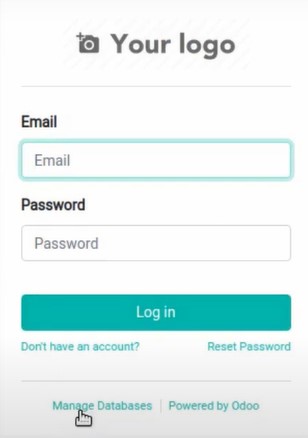
[your_odoo_url_and_port]/web/database/managerYou can also log out of the current user to get to the login page as shown below, then click on "Manage Databases".
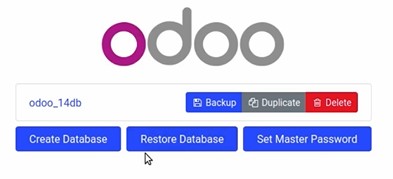
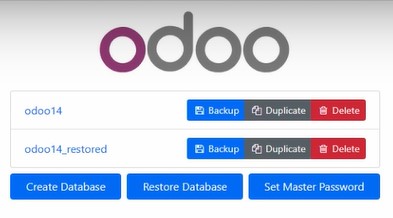
Step 2: On the Database Manager shown below, you can select other databases, backup/restore/duplicate/delete options for each database, or you can set a new master password. Select the database you want to back up.
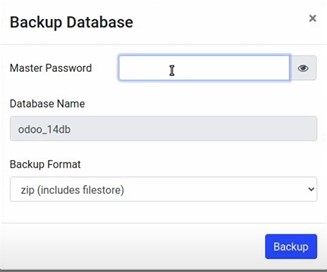
Step 3: Click on the "Backup" button to bring up the following dialogue for backing up the selected database. In this case, the database is called "odoo_14db". Enter the master password and select "zip(includes filestore)" as the desired backup format. Then click on the "Backup" button to download a copy of the selected database into your system.
Step 4: If you have any custom or third-party modules installed, you need to copy their files from the add-ons folder. The addons folder is configured in the "odoo.conf" file which is located in the following path:
C:\Program Files (x86)\Odoo 14.0\server\odoo.confThe addons folder is the path or paths defined in the following line within the "odoo.conf" file. This line can define one or multiple paths for custom addons.
addons_path = C:\Program Files (x86)\Odoo 14.0\server\odoo\addonsAny custom modules will be contained in these folders. You should copy all of them as you will need to re-install them on the other machine. There is no need to copy the modules that come with Odoo.
Step 5: Install the same version of Odoo to your Windows server. For Odoo 14 installation, follow this guide. For Odoo 15, follow this one. The purpose of ensuring the versions match between the PC and the server is to ensure full compatibility during the migration.
Step 6: Restore the backed-up database on the newly installed Odoo instance on the Windows server. Navigate to the database manager page and click on the "Restore Database" button. You will see the following dialogue.
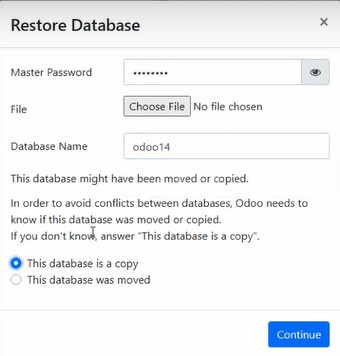
Step 7: Enter the master password then select the database file that was created during the backup process. Name the database appropriately, then set the database as a copy. Click continue to finish restoring the database. You will now see two databases as shown below. You can choose to keep both or delete the one you will not be using.
Step 8: Add any custom addon paths to the "odoo.conf" file the same way it was set up in the previous installation. Then create the actual folders and copy the backed-up custom module files into the folder. The "odoo.conf" file is found in the following path:
C:\Program Files (x86)\Odoo 14.0\server\odoo.confCustom addon paths are added by appending them to the following line in the file one by one separated by commas as shown below:
addons_path = C:\Program Files (x86)\Odoo 14.0\server\odoo\addons,C:\Program Files (x86)\Odoo 14.0\server\custom_addonsStep 9: Restart the server,
Step 10: To be able to serve HTML pages on Windows, we should enable IIS which is a stable web server that runs on Windows systems. If IIS is already running on your system, you can skip this step. To enable IIS, follow the following steps.
- Open Server Manager and click Manage > Add Roles and Features. Click Next.
- Select Role-based or feature-based installation and click Next.
- Select the appropriate server. The local server is selected by default. Click Next.
- Enable Web Server (IIS) and click Next.
- No additional features are necessary to run Odoo, so click Next.
- On the Web Server Role (IIS) dialog box, click Next
- On the Select role services dialog box, verify that the web server components listed below are enabled. Click Next.
- Verify that your settings are correct and click Install.
- When the installation completes, click Close to exit the wizard.
Step 11: You need to get all the components necessary for setting up a reverse proxy. Your Windows server needs these two components.
Follow the links, and download and install the modules that correspond to your version of Windows Server.
If the components already exist on your server, you can skip this step. Installation of the modules will create a new icon "URL Rewrite" icon in the IIS Administration Console. This icon will be present on each site and web application that exist on the server. It allows you to configure rewrite rules which will apply from that level downwards.
Step 12: To set up a reverse proxy rule, go to the IIS Manager Console and click on Default Web Site from the tree view on the left of the screen. Double-click on the URL Rewrite icon on the middle pane to open the URL Rewrite interface. Choose the "Add Rule" action from the right pane of the management console then select the "Reverse Proxy Rule" from the "Inbound and Outbound Rules" category.
Fill in the routing information as shown in the below screenshot.
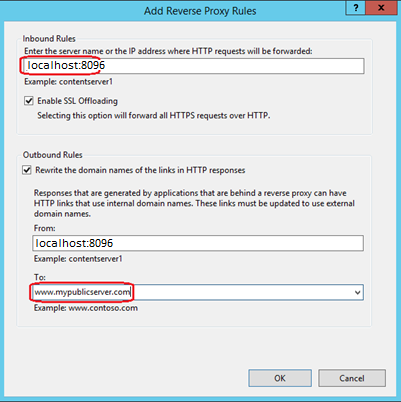
We've rerouted the service running on 'localhost:8069' to the public-facing address 'www.mypublicserver.com' running on the default HTTP ports 80 and 443. If every step has worked, the 'web.config' file at the root of your site should look like this:
<?xml version="1.0" encoding="UTF-8"?>
<configuration>
<system.webServer>
<rewrite>
<rules>
<clear />
<rule name="ERP_http_https” patternSyntax="Wildcard” stopProcessing="true">
<match url="*" />
<conditions logicalGrouping="MatchAny” trackAllCaptures="false">
<add input="{HTTPS}" pattern="o0ff" />
</conditions>
<action type="Redirect” url="https:// {HTTP HOST} {REQUEST URI}" redirectType="Temporary” />
</rule>
<rule name="ReverseProxyInboundRulel” stopProcessing="true">
<match url="(.*)" />
<conditions logicalGrouping="MatchAll” trackAllCaptures="false" />
<action type="Rewrite” url="http://127.0.0.1:8069/{R:1}”" />
</rule>
</rules>
<outboundRules>
<rule name="ReverseProxyOutboundRulel” preCondition="ResponseIsHtml11">
<match filterByTags="A, Form, Img” pattern="“http(s) ?://127.0.0.1:8069/(.*)" />
<action type="Rewrite” value="http{R:1}://myodooserver.com/{R:2}" />
</rule>
<preConditions>
<preCondition name="ResponselIsHtml1">
<add input="{RESPONSE_CONTENT_TYPE}”" pattern="“*text/html” />
</preCondition>
</preConditions>
</outboundRules>
</rewrite>
<httpRedirect enabled="false”" destination="https://mypublicserver.com” exactDestination="false" childOnly="true” />
</system.webServer>
</configuration>
Congratulations! You have successfully migrated your Odoo instance from Windows to Windows server.

